Fog lights have long been used to improve visibility on the road. They justify themselves not only in fog, but also in winter during a snowstorm or at night on a bad road. Everyone had to see the yellow light of fog lights, but recently, thanks to the power of the lamps, the luminous flux has changed. It remains to consider the question of how to install such light sources on a Gazelle commercial vehicle.
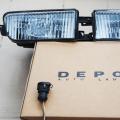
The usefulness of foglights
At the same time, it is important to provide an autonomous connection of fog lights to the Gazelle. This is due not only to the increased power of the lamp, but also to the generated current. Experts do not advise using a parallel connection of dimensions and foglights - the wires are simply not designed for this.
Fog lights are usually not installed on most Gazelles. Because of this, you have to do such work with your own hands. The simplest connection combination involves the use of the main light switch, so as not to look for additional keys. Such a scheme for connecting fog lights on a Gazelle is often used on other brands of domestic cars.
Where to post
You need to start by choosing a place where our new foglights will stand. Traditionally, for these purposes, either a car bumper or a cab roof is used. However, with the second option, there may be difficulties in agreeing with the rules of the road.
Note! According to these regulations, it is allowed to use the roof for vehicles with four-wheel drive or in difficult operating conditions - dirt roads, bumps, etc.
Additionally, you need to know other requirements of the traffic police rules.
So, the installation of Gazelle fog lights must meet the following standards:
- the flux of light should not be greater than that from the main light source of the car;
- must be made so that they are parallel to the axis of symmetry of the machine;
- the height must be at least 25 cm, and the fog lights cannot protrude from the side of the vehicle by more than 40 cm.
Of the other nuances that the installation of fog lights on a Gazelle can cause, you should pay attention to the shape of the products, since they can be rectangular, square, oval, etc. Place them in the places recommended by the manufacturer.
If this does not work, then you can cut holes in the existing bumper or buy a new one specially prepared for this. The purchase price of a new bumper may not be acceptable for every Gazelle owner, so further we will dwell on how to do this at no extra cost.
The main stages of the connection work
Here is a sample connection guide:
- First of all, in the symmetrical places of the bumper, we cut out two holes in which the light sources will be attached and thoroughly lubricate them with an anti-corrosion agent.
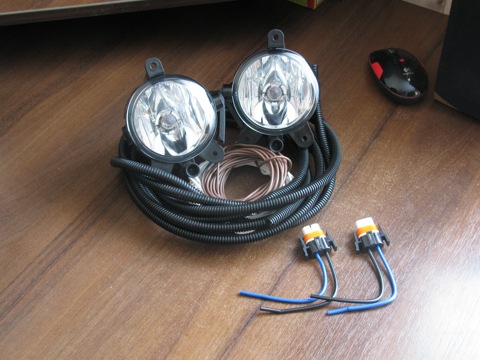
- We connect the purchased pair of foglights with wires. Check the cross-section of the main car wiring and the one that comes with the headlights. It is generally accepted that the minimum cross-sectional diameter should be at least 0.75 mm.
- De-energize the car battery.
- We carry out the wiring in accordance with the diagram that comes with the package.

- It is necessary to open the housing of each headlight and pull out its optical element from there. This will be required so that you can carefully insert the halogen bulb and not damage the case with glass during the installation process.
- Having tightened the headlight housings, we put the contact relay with the wiring down. So we will protect it from moisture.
- When inserting a halogen lamp into its optics, keep your fingers away from the bulb surface. Work with gloves or even wrap a rag around the flask. Grease on the surface of the bulb will significantly shorten the life of the bulb.
- We connect the wiring kit to the lamp and install the optical element.
- Gazelle fog lights will be considered installed when you have completed all the stages of work and provided power to the battery again. Now you can check the functionality of the device. Switch on the headlamp only after completing the complete assembly. The video in this article will give you the opportunity to visually see some of the work.
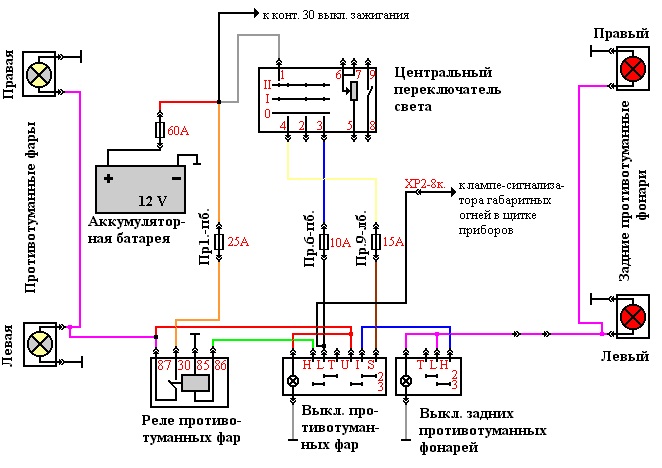
The role of the relay and button
If the fog lamp kit you purchased does not have a relay, purchase it as for model 3302. There it ensures the operation of the rear fog lamps. Normally, each kit should be equipped with electrical wiring with connectors, a breaker-relay, a power button, and detailed assembly instructions.
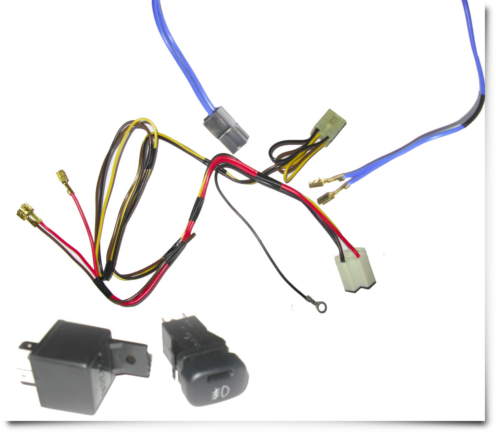
Note! The wiring harness is not only possible, but also needs to be brought out into the space under the hood.
After that, decide on the place where the breaker relay will be mounted:
- The wiring from the relay will enter the passenger compartment through a specially provided technological hole.
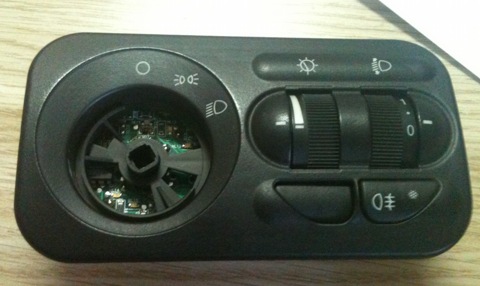
- It is now necessary to find out where the button that turns on the fog light will be located in order to find out how to connect it to the standard electrical wiring of the Gazelle.
- We need the relay for the reason that to save the button - it may not withstand the current that is consumed by the foglights. Some are used to connect a 3-position key: 1 wire is pulled to the size circuit, the second to the ignition, and the third to the relay itself. This achieves 3 modes of operation.
If PTFs are inoperative
We will briefly consider the main reasons for the failure of the fog lights or problems in the operation of the control mechanisms (see photo). Unfortunately, long-term operation and not always favorable climate cause corrosion and oxidation of wires and contacts.
- Each of the foglights has its own fuse located in the block under the hood. Check first if it is out of order. If both headlights do not work at once, then the point is different, since the fuses do not fail in pairs.
- In the event of a lamp burnout, nothing else can be invented except to replace them, and the reason may be in the relay-breaker. There should be a click when the headlights are turned on. If not, then either it is inoperative, or there is no power on it, or, as an option, there is no normal mass on the body, or from a relay.
In conclusion
We hope that the proposed material will be useful to you. Do not forget to also protect the glass of the headlights from foreign objects - for this purpose, the production of stickers on the headlights is provided. Good luck on the road!
Fog lights on the Gazelle - practical nuances of installation
3.9 - Ratings: 76