In most cases, the design and construction of the taillights is completely satisfactory for motorists. At the same time, it is not uncommon for the optics to undergo a certain refinement. Most often, this is done by lovers of auto-tuning, as well as the owners of domestic models, whose lights are not unique and bright enough.
Tuning of taillights
Today there are many options for improving rear optics. The simplest and most affordable of them: shiny stickers, powerful bulbs with tinted film, LEDs and overlays. Let us consider in more detail these methods of tuning a car.
- Stickers it is rather difficult to call a stylish or unique way of giving originality to taillights. Most likely - this is child's play, which no one takes seriously.
- Powerful light bulbs They are usually installed with a tinted film that darkens the diffuser. This optics upgrade is completely ineffective and fraught with bad consequences. More powerful lamps put additional load on the generator and cause overheating of the wiring. The consequence of such modernization may be the option when the taillights are completely off.
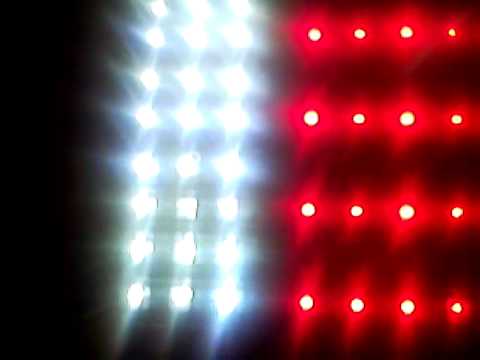
- LEDs - the most original way to give your car a stylish and presentable look. It allows you to implement various unique design solutions with minimal cost and maximum efficiency.
- Overlays - the most common and affordable tuning option for any car model. Today you can buy various types of ready-made kits, but standard standard kits are not particularly original and do not always look spectacular on a car. Do-it-yourself tail lights based on fiberglass and epoxy glue can be more unique.
DIY LED installation
The advantages of tuning rear optics with LEDs are:
- Reduced energy consumption.
- Original and stylish look.
- The brightness of LED optics is several times higher than that of conventional bulbs, which eliminates the need for reflectors.
- The ability to group LEDs in any order and quantity, which is limited only by your imagination and the size of the free space available in the rear of the car.
Preparing for tuning
 To make LED taillights with your own hands, you need to purchase a certain number of diodes. For standard diffusers, the best option may be white elements with a power of 12-16 volts. If you plan to install clear lenses, then you should buy red LEDs for the parking and brake lights. For turn signals, you will need orange-colored elements, and for reversing optics, white diodes.
It is recommended to buy LEDs with a margin in case that if a certain number of elements fail during operation, you can immediately replace them, and not run around in search of the desired model in the shops.
The number of LEDs must be selected based on the specific features of the lanterns in such a way that there is enough space in each section of the optics. You should also take into account such a moment as the turn signal flashing relay. In the design of the car, each relay is selected taking into account a certain load. Therefore, it is necessary to provide such a number of LEDs that will correspond to this parameter. Otherwise, the blinking frequency of the optics will differ from the standard scheme.
In addition to LEDs, you need to stock up on thin plastic made of foil-clad getinax or dielectric. It will be needed for arranging the mounting of diodes.
If you use a getinax, you will have to etch the current-carrying tracks according to the number of installed elements. Although this method is time consuming, however, such a structure will be more compact and durable. In the case of a dielectric, power is more easily realized using a thin wire. In this case, care should be taken to securely fasten the wiring and other elements to prevent them from being damaged by strong vibration.
All LEDs are sensitive to vibration and shock, so care should be taken to ensure that they are securely attached. The elements must be inserted with an interference fit. In this case, the connection of wires with diodes should be done only by soldering.
The power supply is connected in parallel through resistors, which are designed to limit the currents passing through the diodes. In order not to select resistors yourself, it is better to buy them right away complete with LEDs.
Video - How to make a tail light tuning yourself
When arranging the power supply, special attention should be paid to fixing the resistors. They must be securely fastened in such a position that they do not touch the wires.
All connections must be carefully insulated with thin heat shrink tubing or plastic shrink sleeves. In places where the wire comes into contact with the sharp edges of the optics housing, also additionally install a protection made of dense cambric.
Mounting LEDs on taillights
The LEDs are installed on the rear lights in the following sequence:
- We dismantle the lantern and carefully cut it. The best way to do this is to use a burnout device. In this case, you will get a thin and even seam.
- We remove the reflectors of the turning lights and take out the reflectors.
- We disassemble the taillights.
- On the outer surfaces we mark the optimal position of the reflectors.
- Cut out 15 mm circles from the self-adhesive film and glue them inside.
- The inner surface of the stop lamps and dimensions is painted with silver paint. After the paint has dried, the circles can be removed.
- We mount reflectors with epoxy glue. Additionally, we coat all joints with silicone sealant.
- The LEDs pre-soldered to the boards are installed in the case and connected with wiring.
- In order for the LEDs to burn at full power in the "STOP" mode, and less brightly in the "DIMENSIONS" mode, it is necessary to first assemble and solder the stabilization circuit. The voltage stabilizers "7812" can be taken as a basis.
- We assemble the swivel blocks and install them together with the rest of the parts into the headlights. We fix the modules with epoxy glue.
- We check the work of optics. If everything works, you can start filling the lantern blocks.
Rear light covers
Stylish and custom tail lights can be made from fiberglass. To do this, you need fiberglass, epoxy glue, putty, primer, paint, varnish and masking tape.
We cover the lanterns with masking tape. Then we apply fiberglass and saturate it with epoxy glue. We smooth out irregularities well and wait for the layer to dry. Experts recommend applying fiberglass with epoxy in thin layers in several steps.
After complete drying (10-12 hours), remove the workpiece and draw the contours of the future part with a marker. After that, it cuts out the desired profile.
We putty the cut out forms, and after drying we grind with sandpaper. Then we prime and paint the overlays. At the final stage, we cover the parts with varnish. The rear lights are attached with double-sided tape.