The use of a headlight hydrocorrector in modern VAZ models made it possible to provide light supply at the desired angle, regardless of the operating conditions of the car. With a loaded rear part of the model without a hydrocorrector, the headlights blind the drivers of oncoming cars. At the same time, the road surface is less illuminated, which directly affects safety while driving. Consider how to repair or replace a device with your own hands.
What does a hydrocorrector look like and what does it consist of?
The device adjusts the angle of the light flux depending on the position of the car body. The shape of the regulator resembles a long tube, one end of which is located in the cabin, and the other is attached to the headlights. The construction of the hydrocorrector consists of:
There are no complicated parts here, small repairs can be done with your own hands. This does not require a complex tool and special skills.
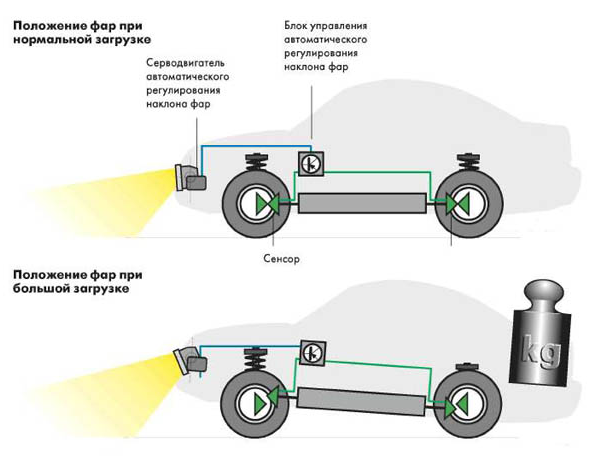
Principle of operation
The general principle of operation of the device is as follows: a serviceable corrector sets the required pressure, thereby holding the lighting fixtures at the desired angle. If the luminous flux is to be directed lower, the pressure in the system drops. The piston lowers the rod, the position of the headlights changes. The system must be sealed, if a fluid leaks, the hydraulic corrector will not be able to perform its function and repairs with the replacement of some parts will be required.
When a replacement is needed
- If you notice that the adjustment does not work, you need to accurately determine the cause of the breakdown. Most often, depressurization and leakage of working fluid occurs in the system. This can be revealed by visual inspection. But if there is no leakage, the cause of the malfunction may be in other details. Perhaps the point is in the stock itself, the movement of which is difficult due to contamination or deformation. To measure the stroke of the rods, you must first remove the cylinders, the stroke length should be 6-7 mm.
- If the stroke is normal, then there is a breakdown in other parts of the hydrocorrector. In the VAZ 2110 model, this device is non-separable; if one of the units fails, a complete replacement will be required. There are kits on sale at different prices. It is better not to save money and buy a regulator with quality cylinders and tubes.
- Some motorists recommend trying to repair the hydraulic corrector with your own hands. You will need to use materials at hand: threaded bolts, washers and clamps. This will save money on the purchase of a new kit, but the service life and reliability of such a design leaves much to be desired.
Tip: More often than not, if the device breaks down, one or both of the headlights will be pulled up and the light is directed higher than usual. This can be seen if you park your car in front of a garage door or in front of a flat wall.
How to get your device repaired
In the process of repairing with your own hands, you will need to make some parts and consumables yourself.
Tools
From the tool you need to prepare:
- Screwdrivers.
- Metalworking machine.
- Plastic dowels that will serve as a cap.
- Washers.
- Anaerobic sealant.
Description of the repair process with a photo
The repair differs depending on the type of malfunction. In most cases, factory headlight mounts are replaced with homemade ones, and the cylinder rod is also lengthened..
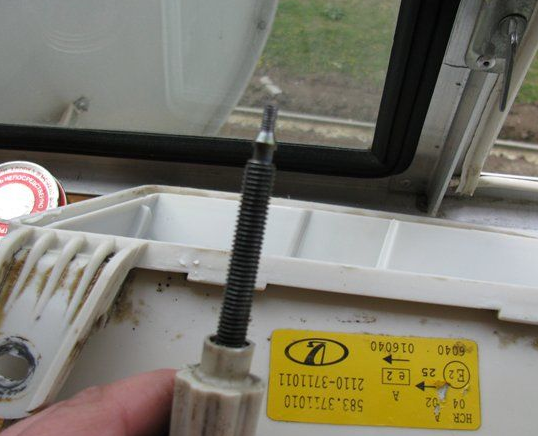
How to lengthen the stem
If you want to extend the road lighting next to the vehicle, it makes sense to lengthen the stock. This will change the position of the headlight. You will need to use a 7-8 mm plastic tip. We recommend using a regular dowel of a suitable diameter. It is attached to the top of the stem with glue or sealant.
Replacement instructions
Since the cost of a new hydrocorrector is 200-300 rubles, most motorists do not get tired of manual repairs. To replace the device, we need:
- Flat screwdriver;
- Long head wrench.
The first step is to remove the old hydraulic corrector:
- We open the hood and remove the slave cylinders from the inside of the headlights. To do this, simply turn the cylinder counterclockwise until it clicks.
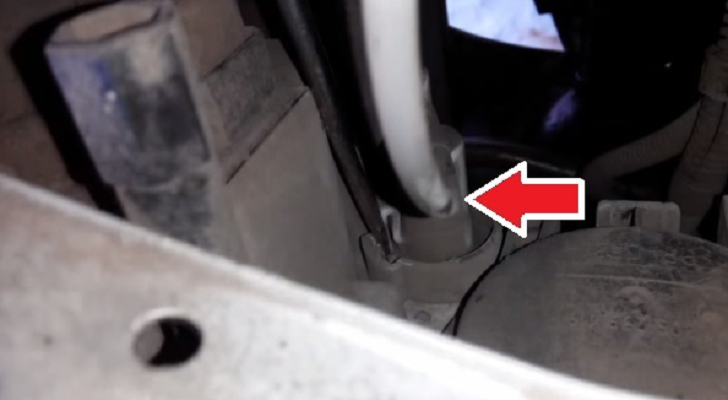
To get to the slave cylinders, you need to open the hood and lower to the headlight attachment point
- We remove the cylinders from the holes.
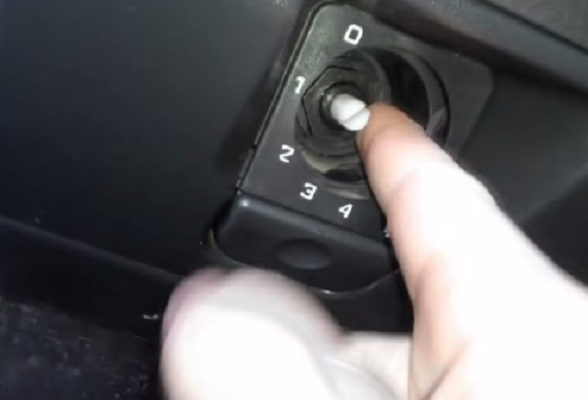
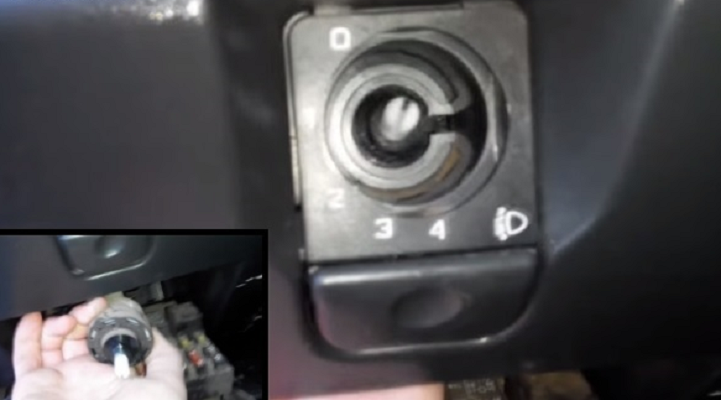
- We go to the salon and remove the control knob. It is located to the left of the steering wheel. To remove it, pull it towards you until it disengages.
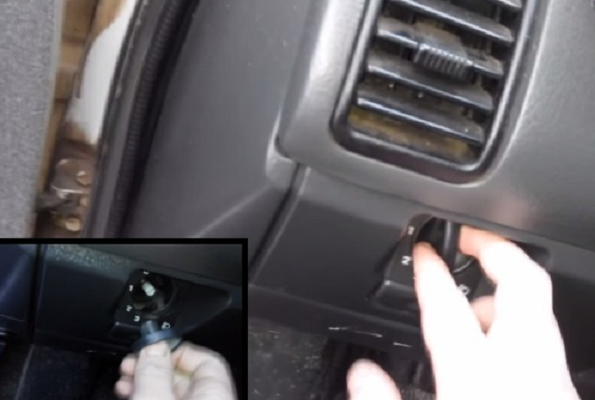
Remove the adjusting handle by pulling it towards you
- Now you have access to the nut that secures the regulator to the instrument panel. Remove the nut with a cap wrench.
The fastening nut is removed with a cap wrench
- Press the lock button under the hydraulic corrector to open the cover and gain access to the master cylinder.
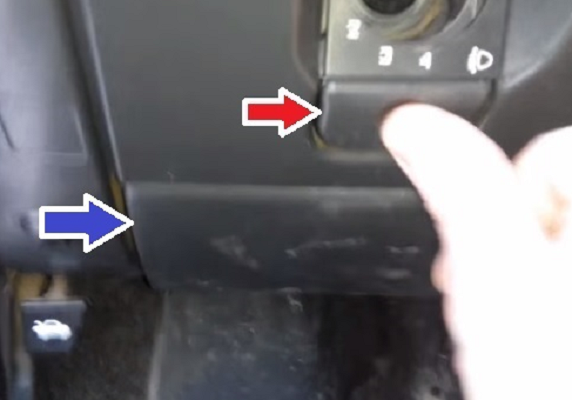
Press the button to open the cover and gain access to the main cylinder of the hydrocorrector
- We take out the rod through the hole, and then the cylinder itself.
Pulling out the main cylinder through the hole
- We take out the tubes.
Tip: If snagging occurs when removing the pipes, you will need to squeeze out the fastening clamps under the hood or remove the water tank.
The installation of a new kit is carried out in the same way, only in reverse order. You need to feed the tubes from the side of the passenger compartment through a special hole, as shown in the photo.
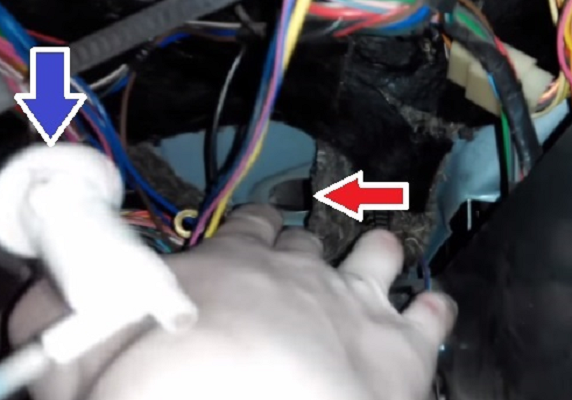
We stretch the tubes through a special hole in the cabin
Video: how to replace the headlight hydrocorrector on a VAZ 2110 with your own hands
The headlight hydrocorrector allows you to smoothly adjust the direction of light, provides good visibility of the road surface. If this device breaks down, it can be easily replaced with a new one, the cost of the kit is quite small. Before repairing, it is better to conduct a visual inspection and measure the stroke of the rod - this will help to understand the cause of the malfunction and eliminate it.