Do-it-yourself initialization of the Toyota Corolla robot box is an accessible procedure for motorists. It is not necessary to go to a specialized car service to solve this problem. It is enough to study the instructions in detail, watch a video on this topic, get acquainted with the Techstream program, and the setting will become available to any owner of a Toyota Corolla 2008, 2006, 2007 model year.
How is initialization done?
After replacing any parts, the operation of the robotic transmission may be impaired. In order for MMT to work flawlessly again, initialization is required. The instructions must be followed clearly, otherwise the procedure will have to be repeated.
First of all, you need to figure out what a robot box is, then the initialization of the MMT will become an easier process to understand and execute. The robot is structurally different from a conventional automatic transmission. It works more clearly, does not allow jerking, shifts without delay, the driver does not need to apply any mechanical force to change gear.
MMT is equipped with an ECU control unit, there is a position sensor, as well as sensors to control the movement of the machine. A conventional manual transmission has a robotic drive that independently selects a gear. The car has a clutch: you can set automatic, manual or semi-automatic operation of the robot.
It is convenient to use this system on Corolla:
- fuel consumption will be like a manual transmission;
- has high reliability;
- switches independently, like an automatic.\u003e
What are the problems?
The first Toyota Corolla with a robotic gearbox appeared in 2006. The transmission was imperfect and had a number of problems. The control unit often malfunctioned, initialization had to be done every 10 thousand km. If this was not done, the clutch disc began to overheat, which is why it had to be changed every 50 thousand km. In traffic jams, the car moved in jerks, the ECU also malfunctioned.
Initialization is a reset of all ECU settings. Corolla 2007 or a car of another year of manufacture may require initialization if any part of the mechanism has been replaced (for example, after replacing the clutch, sensors, electric drive), if the ECU stops working normally. Calibration is needed if the system produces unknown errors or malfunctions.
Is initialization always useful?
There are times when the ECU does not need to be initialized.
Do not carry out the procedure too often: regular initialization of the robot will lead to increased wear on the system.
When the drive is installed incorrectly, a reset is not required if gear changes are lagging or uneven at low speed. The clutch actuator settings will not help if you need to pull off more smoothly or quickly.
All actions associated with the initialization of the checkpoint or unit should be carried out after inspection by professionals and their direct recommendations or obvious reasons for that. Before initializing the Toyota Corolla 150 robotic gearbox with your own hands, you need to consult with a specialist who is well familiar with the operation and problems of the manual transmission on this car model.
How is the procedure going?
It is advisable to entrust specialists to train the robot, but you can do it yourself. To do this, you need to set the car on the handbrake, close the contacts in the DLC3 block using a needle, paper clip or other thin and long object. You need to connect CG and TC numbers 13 and 4, then you need to turn on the ignition without starting the engine and press the brake 7-10 times. You will hear a duplicate sound notification: this means that the diagnostics have started. The brake pedal must then remain depressed. You will need to configure the ECU as follows: N - E - V - select "minus" - M - again "minus" - M - E - N.

After the electronic unit is configured, you can begin to adapt the clutch operation. The following combination is required: N - E - M - "+" - M - "-" - M - "+" - M - "-" - E - N. When setting up MMT, you must follow the sequence: N - E - M - " - "- M -" - "- M -" + "- M -" + "- E - N.
Release and apply the brake again, this will adjust the selected item. If the adaptation of the robot is correct, the system will notify you with sound signals: first you will hear them 2, then 3, and then 4. After that, it is permissible to turn off the ignition and disconnect the vehicle and the CG.
If, during the debugging procedure, the system notifies you with long signals or this happens after it ends, then you have done something wrong.
The solution to the problem is as follows: you need to remove the key from the ignition and pause for at least 20 seconds. After that, the system will reboot and you can try to configure the trainable robot again.
How to work with ECU?
If the control unit does not function properly, it is advisable not to try to correct the errors yourself. The intervention of a specialist is required, if incorrectly configured, the system is capable of starting to shut down or give other failures.
The tuning of the ECU should occur only after the debugging of the operation of the manual transmission and all its control units has been completed.

Box initialization
Before starting the system, you need to prepare it. Set the gearbox lever to neutral. Wait until the necessary settings are made, and turn on the ignition, after 20-25 seconds turn it off. After that, you can start the car engine. The brake pedal must be depressed. If all settings are correct, the “N” light will start blinking. After 15 seconds of blinking, it will be on constantly: this means the end of debugging.
Conclusion
We briefly talked about why initialize a robotic box. Not every motorist is an expert in technical matters, not everyone can understand why this unit is working intermittently. Therefore, we recommend that you entrust the production of this procedure to employees of special services who have all the necessary equipment and experience. Professional assistance will not allow important elements of the mechanism to "burn out".
Toyota Corolla car supports the installation of the following types of transmissions: automatic transmission, manual transmission, variator and robot. The Corolla robot can be found on a foreign car, where the volume of the power unit is 1.4, 1.6 liters. The robotic transmission has absorbed the advantages of automatic and manual transmissions. Fuel consumption on this vehicle is approximately the same as fuel consumption if a mechanic is present on the car.
Diagnostics of Toyota Corolla with a robot
The main advantage of having a robot on the Corolla is smooth movement along the track. This version of the box includes an ECU control unit with sensors. This improves driving efficiency.
The robotic boxes on the Corolla are designated MMT.

Appearance of a robotic gearbox
It is necessary to diagnose a robot box on a Toyota Corolla in the following cases:
- extraneous sounds when gear shifting occurs;
- difficulty changing speeds;
- spontaneous activation of speed modes.
In some cases, this is due to the fact that non-original oils are used. The worse the quality of the liquid is poured into the automotive system, the faster the gearbox will lose its working properties.
The clutch disc can function over 60,000 km. This indicator is influenced by the driving style of the vehicle owner. It helps to prevent the occurrence of premature failure by timely replacement of the transmission oil.
Repair and restoration work
The cost of repairing the robot remains acceptable. It is possible to eliminate extraneous noise from the gearbox side by replacing the release bearings. This procedure can be carried out in a garage environment.
As a rule, during the maintenance of a Toyota Corolla car with manual transmission, initialization is required. This will help identify existing problems. Initialization of the box is the process of resetting the previous settings of the gearbox ECU. It should be noted that frequent initialization has a negative impact on the coupling. This will lead to accelerated wear and tear of its constituent auto parts. In winter, the owner of a foreign car may face such a problem as the loss of functionality of the sensor, which is responsible for changing the speed modes.
For each individual version of the car, a certain amount of transmission fluid is required (approximately 2-2.5 liters). For a Toyota Corolla with a robot, add oil that matches the SAE 75W viscosity (GL-4 grade). Replacement on the Corolla 2007 robot box is possible both partial and complete.
Toyota clutch replacement
corolla
with a robot
gear shifting. Everyone has heard a lot about the fact that the robot on Toyota is very moody and should be avoided.
If you got to this site, then apparently you are the owner of this car and you need qualified help. I will try to describe everything clearly for you.
First of all, in MMT, the clutch fails. The average clutch mileage according to our practice is 70 - 90 thousand mileage. It all depends on the intensity of driving and the conditions in which the car is used. In city driving, the mileage is less, since the clutch works constantly. But when used in intercity mode, it is larger.
There are some tips for extending clutch life. The first is switch MMT to neutral when stopping at long traffic lights and in traffic jams. This will relieve stress on the clutch actuator and the clutch itself. Second, don't drive aggressively. The clutch is responsible for all the gear shifting load. And the third - from time to time it is worth driving in the manual transmission mode. The control unit remembers your driving style over time and will try to repeat it in automatic mode.
Change the oil at MMT every 60 thousand runs. The manufacturer does not provide for oil change in MMT. He calculates it for the entire service life - 100 thousand kilometers. In practice, problems arise with MMT.
Mechanical faults of the MultiMode gearbox.
Mechanical failure is mechanical wear of the clutch parts. Mainly clutch wear and overheating, in which the grip loses its functional ability. The main symptom of a clutch failure is slipping. This results in a loss of torque at high speeds or when starting abruptly. In case of mechanical faults the system enters emergency mode and resets the transmission to neutral. Displays the error code P0810. To eliminate the malfunction, you need to replace the clutch kit, which includes the basket, clutch disc and release bearing.
Crunch in MMT when switching from second to third gear... This is due to the wear of the third gear synchronizer. The reasons are partly not in the timely oil change, in the failure to adapt the clutch or in its violation. In the launched version, it leads to the failure of the gear package for engaging the third gear and the gear selection mechanism.
The hum from the MMT when the car is moving. Due to an untimely oil change or its leakage, the bearings of the primary and secondary shaft fail. Eliminated by replacing the rear bearings of the input and output shafts.


Electrical malfunctions of the MultiMode gearbox.
Malfunctions in the electrical system of this gearbox are expressed in several versions. The first is a malfunction in the setting or initialization of the clutch. Typical signs are jerking at the start. The second is a reset to neutral when the clutch overheats. A red gear-shaped icon lights up on the display, indicating a malfunction in the transmission. After a while, the system starts working again. When carrying out diagnostics, you can find out the nature of the malfunction by the error code. Let's consider a couple of the most common ones. The first is P0810 - clutch position control error.This error occurs both with a mechanical failure of the clutch and with an electronic failure. Error P0900 - open circuit in the actuator pin drive motor circuit. This error directly indicates an open circuit in the wiring or failure of the clutch actuator motor.
The drive motor is changed separately. The cost of the motor is 6000 rubles.
Consider in practice how to replace a clutch on a robot.
To replace the clutch, we need a clutch kit - this is a disc with a clutch basket and a clutch release bearing. Everything in the original is desirable.


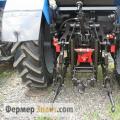
Disconnect the MAF sensor connector, air duct clamps and air filter housing cover latches. Then we unscrew the lower part of the air filter housing.


We unscrew the bolt securing the gearbox cushion, but do not remove it. Disconnect all connectors from the checkpoint. Then we unscrew the upper mounting bolts.

We unscrew the hub nuts and fastening the ball joint to the lever for removing the drive shafts. Pre-drain the oil from the gearbox.

We unscrew the front gearbox mounting pillow and take out the drive shafts from the box for the convenience of dismantling the gearbox.


We install thrust struts on the gearbox and the engine so that it does not sag and slightly raise the gearbox to remove the upper gearbox mounting bolt, which we unscrewed from above in advance. As you can see in the photo, oil "snotty" from the left drive oil seal, which is why the cavity turned black. During installation, we will replace it with a new one to eliminate oil leakage. Next, we unscrew the gearbox mounting bolts in a circle and pull the box from the motor with a mount, it sits tightly on the guide bushings. And now the checkpoint is already on the floor.


Remove the old clutch from the flywheel and check the flywheel itself for wear. Wear should not exceed 03 - 05 mm and its surface should be flat and smooth. As a rule, the flywheel rarely fails.

Place the new clutch on the flywheel and center the clutch disc. We change the release bearing for a new one. And we install the checkpoint. The assembly procedure is exactly the reverse order.
After assembly, the clutch is initialized (adapted).
Clutch initialization Toyota Corolla and Toyota Auris.
Before you start self-initializing the clutch, remember - if you fail to initialize correctly, P the broadcasts will stop turning on and to transport the car to the service, you will have to call a tow truck.
In place of SST, you can use a simple wire, connect the indicated contacts with it.
1. Prepare the vehicle (a "):
1. Stop the car.
2. Move the shift lever to N.
3. Switch off the ignition.
2. Using SST, connect pins TC and CG of the DLC3 connector.
3. Wait at least 10 seconds.
4. Switch on the ignition (IG).
5. Press the brake pedal at least 7 times within 3 seconds.
The buzzer emits 2 beeps at 0.25 s intervals.
6. Press the brake pedal.
7. While holding down the brake pedal, move the gear shift lever in the following sequence.
1. When initializing the ECU: N\u003e E\u003e M\u003e -\u003e M\u003e -\u003e M\u003e -\u003e M\u003e -\u003e E\u003e N.
2. When initializing the clutch: N\u003e E\u003e M\u003e +\u003e M\u003e -\u003e M\u003e +\u003e M\u003e -\u003e E\u003e N.
3. When initializing the transmission: N\u003e E\u003e M\u003e -\u003e M\u003e -\u003e M\u003e +\u003e M\u003e +\u003e E\u003e N.
8. Release the brake pedal.
9. Press the brake pedal again.
The buzzer will beep at 0.5 second intervals for the number of times specified below (interval between cycles is 2.5 seconds).
1. Twice when initializing the ECU (1 cycle)
2. Three times when initializing the clutch (1 cycle)
3. Four times at transmission initialization (1 cycle)
NOTE:
1. If the buzzer does not beep as described above, turn off the ignition and wait at least 15 seconds. Then repeat from step (a ").
2. If the buzzer sounds at intervals of 1 s (instead of 0.5 s), turn off the ignition and wait at least 15 s. Then repeat from step (a ").
10. Press the brake pedal at least 3 times within 2 seconds.
The buzzer will beep 2 times at 0.25 s intervals.
11. Switch off the ignition and wait at least 10 seconds.
12. Initialization is complete.
13. Disconnect SST from pins TC and CG of the DLC3 connector.
Owners of Toyota Corolla cars produced in the period from 2006-2008 often face the problem of robotic gearbox operation.
The manufacturer acknowledged a flaw in the creation of the MMT, which entails the initialization of all parameters and subsequent premature repair.
For the successful initialization of the robot box on a Toyota Corolla, it is necessary to perform certain sequential actions, this is the only way to properly configure the operation of the entire transmission.
Before doing any work with a robotic gearbox, you need to figure out what it is. This transmission, which greatly simplifies driving, due to the automatic operation of the clutch and gear shifting. The box reads the information that is transmitted by the driver, while taking into account how the car is moving, then the information is processed in the ECU, after which the box operates in a specific algorithm.
It is important to know that the work of modern robotic gearboxes is more comfortable, and the reliability of operation and fuel consumption remains the same as for manual transmissions.
Basic box problems
Due to the problems that arose with the MMT box, the manufacturer took it out of production, and additional extended insurance was introduced for already purchased cars. The main problems faced by car owners were as follows:
The control unit had frequent failures, as a result of which the initialization procedure had to be done almost every 10,000 kilometers;
- Overheating of the clutch disc, and as a result, premature wear. It happened that it had to be changed at 50,000 kilometers;
- Transmissions began to switch intermittently;
- Due to the problems above, it was necessary to do a complete ECU update.
It is important to know that the "insurance" from the manufacturer for such boxes is still valid, and as a result of any problems, when contacting a specialized service, they make a free warranty replacement of all elements of the MMT system that have failed.
What is this procedure
This procedure is the adjustment or reset of all parameters of the electronic control unit. As a rule, it is done during the replacement of any repair work when the elements of this transmission were replaced, for example:
- The MMT kit is completely changed, or the parts of the box or clutch are partially updated (in this case, the transmission itself is initialized);
- Sensors, electrical unit or electric drive are changed (in this case, the unit is initialized)
Calibration or adjustment is done on failures or in the event of unknown errors.
It is important to know that it is not recommended to perform the ECU initialization procedure without good reason. If you do it often, this will lead to the fact that the clutch and its parts will wear out quickly. And the effect from it will be short-lived.
There are a number of common opinions regarding this procedure that are erroneous, for example:
- After it, the car starts to move easier;
- It is carried out in order to eliminate jerks that occur at low speeds;
- If the clutch drive rail is not positioned correctly, you need to reset the system.
Therefore, all work related to the conduct of this procedure should be performed only if there are good reasons for that, by agreement (consultation) of a specialist.
Reset
The reset procedure is as follows:
Transmission setup
After the initialization on the Toyota Corolla is completed, it is necessary to configure the system that controls the robot, for this:
- The car stops;
- The gearshift knob is moved to the neutral position "N";
- The ignition is turned off, after which it turns on for forty seconds;
- The ignition is switched off again for fifteen seconds;
- The ignition is turned on, the engine starts, and the foot brake is applied.
If everything is done correctly, the indicator showing the neutral position "N" will blink, and after ten seconds it will stop blinking and will just light up, this is a signal that the setting is complete.
Useful video
The above methods are produced without specialized diagnostic equipment. The setup process with the device differs from the above in its process and approach.
Robotic transmissions are conventional manual transmissions with several additional features that make driving a vehicle much easier. The gear and clutch of the robot's box is shifted automatically: the gearbox reads the information that the driver transmits, takes into account the driving conditions of the vehicle, after which the electronic control unit (ECU) processes this information and itself controls the operation of the box with a certain algorithm. To control the gearbox, the clutch release and selection / shift drives are installed on the gearbox housing. The electric drives, according to the signals of the sensors, are controlled by the control unit. The control system can operate in two modes: automatic gear shifting (E) and manual gear shifting (M). The gear lever has no mechanical connection with the gearbox; the position of the lever is determined using sensors, the signal from which is sent to the control unit.
To ensure safety, there is a gear lever locking system. The lever is blocked in the following cases: - if the ignition is off; - if the lever is in the "N" position, the engine is running, the brake pedal is released. The engine can only be started with the brake pedal depressed and the gear lever in the "N" position. When the ignition is turned off, the transmission control system locks the gear lever in the set position and engages the clutch. However, if the ignition is turned off at the time of gear shifting, the buzzer will sound and the gear engaged indicator will flash, warning that the vehicle cannot be parked with the gear engaged.
Initialization of the transmission control system (C50A (Multimode))
After replacing any element indicated in the table "Initialization of the transmission control system", you must first delete the data about the old element from the memory of the control unit and then adjust the system for the new element.
Note: Carry out initialization only for those elements that were replaced.
Initialization of the transmission control system
1. New elements: - Gearbox assembly. - Transmission elements, replacement of which required disassembly of the transmission. - Electronic transmission control unit
Necessary operations: 3. Calibration
2. New elements - Electric drive for selection and gear shifting. - Gear shift sensor. - Gear selector sensor.
Necessary operations:
1. Initialization of the transmission control system.
2. Setting up the control system.
3. Calibration
3. New items
Electric clutch release.
Clutch travel sensor.
Clutch disc and clutch cover.
Release bearing.
Clutch release fork.
Flywheel.
Crankshaft
Necessary operations:
1. Initialization of the transmission control system.
2. Setting up the control system.
Initialization.
1. Stop the car.
2. Move the shift lever to the "N" position.
3. Switch off the ignition. 4.Connect leads "4" (CG) and "13" (TC). 
5.After connecting the leads, wait 10 seconds.
6. Turn on the ignition.
7. Within 3 seconds, press the brake pedal at least 7 times. Note: the buzzer will sound twice at 0.25 second intervals. 8.depress the brake pedal. 9. Keeping the brake pedal depressed, move the gear lever in the sequence indicated in the table "Initialization of the control system".
Table. Control system initialization

10.release the brake pedal.
11.depress the brake pedal.
12. the buzzer will sound several times (depending on the element being initialized) with an interval of 0.5 s (the interval between cycles is 0.25 s).
Number of beeps:
initialization of the control unit -2;
initialization of clutch elements - 3;
initialization of gearbox elements - 4;
Note: if the buzzer does not emit beeps or the interval between beeps is 1 s, then turn off the ignition, wait 15 s and repeat the initialization steps from the beginning.
13.depress the brake pedal at least three times within 2 seconds. Note: the buzzer will sound twice at 0.25 second intervals.
14. Switch off the ignition and wait 10 seconds.
15. Remove the jumper between terminals "4" and "13".
16.After initialization, it is necessary to configure the system.
Note: if the system setup has not been completed, then it is necessary to carry out the initialization procedure from the beginning.
a) stop the car, set the gear lever to the "N" position and turn off the ignition.
b) turn on the ignition.
c) wait at least 40 seconds.
d) turn off the ignition.
e) wait at least 15s.
f) turn on the ignition.
g) press the brake pedal and start the engine.
Note: When starting the engine, the "N" indicator will flash.
h) wait at least 10 s.
i) make sure that the "N" indicator is on continuously.
Calibration
Moving in "M" mode, change gears up and down, at the speeds shown in the table.

Make sure the gear shifts smoothly. If after calibration the gear changes are jerky, then repeat the calibration.
Note: hold for at least 2 seconds in each gear.
Read 13711 time