Burning out the gasket under the cylinder head on VAZ 2109-2108 cars is the most common reason why you have to remove the head from the engine, and, accordingly, with further repair, or rather, replacing the gasket. If you do not notice this problem in time, then this can lead to rather sad consequences, since the engine can overheat and even jam.
The procedure itself for removing the cylinder head and replacing its gasket is not difficult, but at the same time it requires certain technical skills and a small number of tools, the list of which is given below:
- Allen key or similar bit with adapter for use with a crank
- Torque wrench - in this case I used the Ombra model with a range of 10 to 110 Nm, which is sufficient
- Flat screwdriver
- Extension
- Gasket Remover
The procedure for removing the cylinder head on the VAZ 2108-2109
Of course, it will first be necessary to carry out some preparatory procedures, without which it will be impossible to remove the head.
- First, you need to remove the air filter housing
- Then disconnect all fuel hoses and power wires from the carburetor or injector (depending on the type of engine)
- , although this is not a prerequisite - it will be enough to disconnect high-voltage wires
In general, it is necessary to free the head from all that is superfluous so that unnecessary problems do not arise during dismantling. Of course, if you decide to completely replace it or repair it, then you will have to perform more operations, and remove the carburetor and collectors. Well, if it's only a gasket, then you can get by with a minimum of actions.
To unscrew the cylinder head on a VAZ 2109-2108, it is necessary to use a powerful knob and a hexagon, since the bolts attaching it to the cylinder block are wrapped with a large torque. In total, you will have to unscrew 10 bolts, which are shown in the photo below:

As a lever, you can use a nozzle in the form of an ordinary metal pipe:

Then you can take out the bolts together with the washers, as shown in the picture:

And now you can gently lift the cylinder head of the VAZ 2109-2108 up, removing it from the engine block:

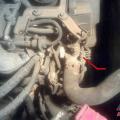
Then the following picture opens to us:

The procedure for replacing the cylinder head gasket on the VAZ 2109-2108
The gasket can remain on the surface of the head or stick to the block itself. You can try to remove it by hand without using any tools, and if it fails, you can gently pry it off with a flat screwdriver without damaging the surface of the part.

Examine carefully the surface of the cylinder head and if there are pronounced traces of corrosion on it, especially in the immediate vicinity of the coolant channels, in this case it is necessary to repair it: milling, grinding, etc. If everything is normal, then we remove traces of the old gasket using special means:

We are waiting for a few minutes until the whole thing turns off and we remove the residues that did not succumb to chemistry, if any, with a razor blade. Then we wipe everything dry and you can even degrease it so that no foreign traces remain on the surface:

The engine block also needs to be cleaned and then replaced with a new gasket. It is important that the holes in the gasket match the guides that are located at the corners of the block:

Replacing the head
Now you can carefully install the cylinder head in its place, making sure that at this moment the gasket does not move out and does not move to the side. Of course, the guides fix it, but you still need to be extremely careful.
Next, we need a torque wrench, since the bolts will have to be tightened with a certain torque. It should also be borne in mind that the tightening order must be followed. The diagram below shows in what sequence to tighten:

Now with regard to the force with which it is necessary to tighten the bolts. This should be done in 4 steps:
- First with a torque of 20 Nm
- Second reception with a torque of 75-85 Nm
- Tighten each bolt 90 degrees more
- Finally we wrap it 90 degrees

After that, it remains to install all the equipment removed from the car, fill in coolant, connect all sensors, wires and hoses and check the work done. Usually, everything becomes visible immediately after the antifreeze bay. If wet marks appear at the junction of the head and the block, then you can remove everything back and do all the work again! But I hope that this will not happen in your practice! Happy renovation!
VAZ cars of the 2112 family were produced from. These engines have different intake ports on the cylinder head. In theory, there are no other differences. And therefore it will be the same if we talk about any 16-valve internal combustion engine. The tightening is performed in three steps, although another option is given in the repair books (it is for 8-valve valves).
The part with the name of the cylinder head is attached to the cylinder block with 10 screws. They are turned off with a "10" socket wrench. presented in the first photo.
Loosening sequence (1-10)
Standard screw length - 93 mm. If the screw has been pulled out to at least 95 mm, it is replaced with a new one (AvtoVAZ requirement).
During installation, a different scheme is used (photo 2). Each screw is lubricated with machine oil, otherwise the efforts will come to naught.

The order of tightening the head is indicated in this photo.
Tightening torque for cylinder head cover bolts
For VAZ-2112, the cylinder head tightening torque is normalized:
- First pass - force is 20 N * m;
- Each screw is turned 90 degrees to the right;
- Wait 20 minutes, then turn the screws another 90 degrees.
At first, the effort is very small. But in “step 3” it will be difficult to get the job done. Use a lever.
Why do you need guide bushings
Before installing the cylinder head, perform the following actions: clean the threaded holes, as well as all the holes for the bushings (photo 1). , and only then.

Everything is ready to install the cylinder head
Metal parts adjacent to the gasket must be degreased. We examined the cylinder head tightening scheme, but the cylinder head itself must be installed correctly:
- We place the cylinder head on the cylinder block;
- Moving the part in different directions, we ensure that the bushings enter the grooves.
After "step 2" the screws can be tightened.
Sealant
No sealing compounds are used when installing gaskets! Solid oil, CIATIM and other lubricants are not needed all the more. The main thing is that the metal must be degreased. AND .
Cylinder head cover and the order of tightening its bolts
The metal cover installed on the cylinder head must be air tight. At points of contact with other parts, the tightness must also be maintained. Therefore, a sealant is applied to the edge of the lid. An example is shown in the photo.

Cylinder head cover before installation
Here you need to apply materials: Loctite-574, ANACROL, etc. The screws on the cover are tightened with a key "8".
You can unscrew the screws in any order. Their number is 15 or 14. When installing, it is better to follow the sequence shown below.

The order of tightening the cap is marked with numbers and arrows
It is usually not necessary to replace the screws - the load is too low. We wish you success.
Typical misconceptions
If the bolts are pulled too far, they are tightened in four steps. At "step 2" the tightening torque will be 70-85 N * m. These are all common misconceptions that do not apply to 16-valve internal combustion engines.
All steps in one video: replacing the cylinder head gasket
The tightening torque of the VAZ 2112 cylinder head (16 valves) is very important, since deformation occurs with an uneven installation of the head. This leads to the fact that after disassembly, it will be necessary to grind at least 2 mm from the surface of the block head. If you observe all the tightening torques, then you will not have to sharpen the head, and if you need to do this, then no more than a quarter of a millimeter.
Head design

In order for the hydraulic pushers to work in normal mode, oil is supplied to them from the lubrication system. It is supplied through special channels in the engine block and cylinder head. Oil flows through these passages and to lubricate the camshaft journals. There is a valve in the channel that prevents oil from being drained from the top after the engine is shut off. This allows the system to operate normally until it stops completely.
Camshafts
When repairing the head, it is imperative to check the condition of the camshafts. When assembling, follow the instructions and maintain the tightening torque of the VAZ-2112 cylinder head (16 valves). Such a motor is installed on the Priora - it is quite powerful, has excellent characteristics and does not require frequent maintenance. Two camshafts drive intake and exhaust valves.
The camshafts rotate in special sockets that are located in the head itself. The difference between the camshafts is that there is a small belt on the intake. It is located near the very first support. To prevent axial movement, there are thrust collars - they are located on both sides of the support in front. There are self-tightening seals on both camshafts in front.
How to repair

- A device for compressing valve springs. You can use both "store" and homemade. The main thing is to make it convenient to work.
- Device for pressing out valve stem seals.
- Tube-shaped mandrel for cap installation.
- Keys for "10", hexagons, tweezers and screwdrivers.
Perform the following manipulations:
- Carry out all the steps to remove the head and camshafts.
- Remove all valves using a special device.
- Remove the valve stem seals.
- Replace and lapping valves. It is necessary to change the valves if there is damage - burnouts, violation of geometry. Be sure to sign on which sockets you rub the valve - otherwise the tightness will be broken.
- Collect all valve drive mechanisms - hydraulic pushers, springs, fix them with crackers.
All assembly steps are carried out in the reverse order, only one feature must be taken into account: adhere to the recommended tightening torque for the VAZ-2112 cylinder head (16 valves). The photo shows the tightening sequence.
How to tighten the cylinder head bolts

Be sure to tighten the tightening according to the scheme given in the article. In order to tighten the bolts, you need to follow a few simple steps:
- Install a new head gasket, place it on the centering sleeves.
- Install the head and screw on the bolts of its fastening.
- Start tightening with a torque of 20 N * m. If the scale is in "kgf / m", then divide by 10.
- In the second run, you need to turn all the bolts 90 degrees according to the scheme.
- For the third run, they turn another 90 degrees.
Do not use bolts with a length of 95 mm or more. In general, the procedure is quite simple, but a torque wrench is required - without it, it will not be possible to withstand the correct tightening torque of the VAZ-2112 cylinder head (16 valves).
Tighten the bolt? What is the problem: a wrench and ... go ahead, tighten it all the way.
This is what a person who has a poor idea of \u200b\u200bhow important the correct order of tightening the cylinder head bolts will be will think. And what kind of engine malfunctions can a violation of the order and technology of tightening the cylinder head bolts lead to. In fact, this is a very sensitive question, so let's figure it out.
Why should a motorist know the procedure for tightening the cylinder head?
Naturally, if you have a bunch of banknotes and even shake out the ashtray in the cabin, you go to a car service, then there is no need. But for those motorists who want and can repair a car in general, and in particular, this information will not be superfluous.
It is important! Before we share with you the peculiarities of the cylinder head tightening procedure, you should draw your attention to the fact that each engine model has its own bolt tightening parameters.
In no case should you, especially when working with the cylinder head of modern cars, rely on your knowledge and experience gained when repairing the cylinder head on other engines. The procedure for tightening and pulling the cylinder head bolts is carried out in strict accordance with the manufacturer's requirements for this engine. You can easily find these parameters in the engine repair and maintenance manual.
Knowing the order of tightening and retightening the cylinder head is not so often needed. In the case when you need to replace the cylinder head gasket or when repairing the engine.


What are the general features of the cylinder head tightening technology
To begin with, according to the old memory of the operation of domestic car models, many motorists are worried about the need to carry out preventive broaching of cylinder head bolts. Especially after an engine overhaul or cylinder head repair.
Cylinder head broaching is not required in modern engines. This is due to the fact that for attaching the head to apply
self-tightening bolts or so-called "spring bolts".
Their characteristic is such that after the first tightening they no longer need to be broached during operation. Moreover, pulling the cylinder head in this case can only damage the quality of the bolts.
If earlier, the broaching of the cylinder head was one of the mandatory points of vehicle maintenance, today this point can only be applied to outdated models of engines of Muscovites, GAZ and VAZ.
Rules for tightening the cylinder head
With different parameters and characteristics, the general rules for tightening bolts, in principle, apply when working with all types of motors.
- Mandatory use of the manufacturer's parameters according to: the order (diagram) of tightening the cylinder head bolts and the tightening torque.
- When tightening the cylinder head, use only a serviceable and proven torque wrench, not a simple wrench. In this matter, the eye and the hope for muscle memory are not helpers.
- A prerequisite is the perfect condition of the cylinder head mounting bolts: in no case use old bolts, do not put cut bolts, check the condition and cleanliness of the thread before tightening. Reapplying the "spring" bolts will no longer provide the required tightening force, which will eventually lead to oil leakage from under the cylinder head gasket.
- It is strictly forbidden to tighten or tighten the cylinder head with TTY bolts (this type of bolt is mainly used on aluminum cylinder heads). TTY bolts are not tightened to the tightening torque, but to the specified degree. This information should be in the manufacturer's instructions.
- When buying a cylinder head gasket, it must have a manufacturer's specification, which indicates which tightening torque is applicable to this particular type of gasket. This must be taken into account so that the figures for the engine tightening torque and the gasket tightening torque do not differ dramatically.
- If the hole for the cylinder head mounting bolt is "blind", then pouring oil into it before tightening the head, try not to overflow. Otherwise, the bolt will not reach the end. If the hole is through and goes into the cooling system, then before screwing in the bolt, lubricate the thread with a plastic sealant.
If you nevertheless decided to tighten (broach) the cylinder head bolts, then take into account that it is done: for an engine with a cast-iron cylinder head - to "hot", i.e. minimum 80 0 engine temperature, for an engine with an aluminum cylinder head on "cold".
As we have already found out, the cylinder head is one of the most important engine components. If you feel confident and have the skills to use a locksmith tool, then broaching the cylinder head will not be difficult. It remains to decide for what and how to draw the cylinder head.
When you need a cylinder head broach
Maybe not all motorists know, but modern cars do not need preventive broaching of the cylinder head.
Previously, broaching the cylinder head was a mandatory item of the first maintenance, then the situation changed. Even relatively modern VAZ engines. Broaching the cylinder head is mainly required today for old models of engines VAZ, UAZ, Moskvich, etc.
The main reason that prompts the owner of the car to think about the need to broach the cylinder head is "sputum" at the junction of the head and the block. This indicates an existing oil leak.
There may be several reasons. The most traditional: failure, warpage of the cylinder head as a result of engine overheating unnoticed by you, or initially incorrectly tightened cylinder head bolts. If you got a "kapitalka" at a car service.
How to pull the cylinder head bolts
From the study. It is from the study of the Manual for the repair of your car, preferably the original one. It is there that the manufacturer indicates everything that is needed to tighten the cylinder head. But you need to know:
- the order (diagram) of tightening the cylinder head bolts;
- what torque is required;
- what bolts are used to tighten the cylinder head.
Bolts for tightening the cylinder head are a special conversation. The fact is that in modern engines, bolts with special characteristics are used for the cylinder head. The so-called "spring" bolts, which, due to their properties after the initial pull at the factory, do not need additional.
Moreover, when trying to pull the cylinder head bolts, due to the "fluidity" of the metal, they will stretch. As a result, you can get a break in the bolt.
During cylinder head repairs, gaskets must be installed that do not shrink. This eliminates the need to pull the cylinder head bolts.
But, if you already decided that broaching the cylinder head bolts is extremely necessary for you, then you should do it with the manufacturer's manual and using a torque wrench. Motion in motion, digit for digit. Amateur performance on the basis of "reserve" is not needed here.
Cylinder head tightening control
To keep your soul calm, and as soon as you decide to broach the head bolts, there is a method for controlling the tightening torque of the cylinder head bolts. Naturally with a torque wrench.
A moment is applied to the bolt, equal to the moment of the bolt breaking away. After the start of the turn, you need to control the moment of starting. If it has not increased, then everything is in order, the bolt began to stretch.
If the moment starts to rise, it means that the bolt has not reached the yield point. Here you need to tighten the cylinder head bolt until the tightening torque stabilizes.
When checking the tightness of the cylinder head bolts, pay attention to two things. If a torque of 20 kgGcm is applied to the bolt, but the yield point has not been reached, then the bolt must be replaced, since it has increased strength.
If, at the moment of tightening the bolt, you see that the moment decreases, then this means the destruction of the bolt, and it definitely requires replacement.
Such requirements for the cylinder head bolts are explained simply: they work in a constant heating - cooling mode.
Good luck, and may the DIY tightening of the cylinder head bolts be successful.