In the dark, you cannot do without additional lighting. In any car, for this purpose, a close one is provided from the factory, it undergoes an adjustment procedure, but over time the settings may get lost. A lot of cars on the road blind oncoming drivers. And so that you do not blink distant in response, you need to correctly adjust the headlights. An electric corrector does not always cope with this. In addition, not all cars have it. How to do it correctly You can do it yourself, and in today's article we will describe this procedure in detail.
When is adjustment needed?
Some motorists will say they have never adjusted their headlights and there is no need to. This is the case if the car has not undergone major changes. In particular, this concerns the refinement of the suspension and wheel replacement. Because of this, the headlights can blind the “oncoming lane” even without the main beam. A striking example of this is the reinforcement of the GAZelle suspension. From the factory, two leaf springs are mounted in front. But with the installation of the third headlight, they begin to shine higher than expected. And the proofreader does not cope with its task, even if it is lowered to the maximum. There is only one way out - to independently adjust the near one. How to do this, we will describe below.
By the way, re-adjustment is necessary when installing a different type of lamp. For example, if LED or xenon lamps were installed on the car. In this case, adjustment is mandatory.How to do? Preparation
We will look at the most versatile method that will work for most car brands. What do we need for this? You will need a vertical wall about two meters high. It is desirable that it be flat, without any curvatures (this is necessary to fine-tune the low beam). This wall should be between seven and ten meters from the vehicle. It is important that the site is level and the vehicle is not parked on a slope. Additionally, we need crayon and masking tape. We need these materials for marking.
Auto check
So, how to adjust the dipped headlights on "Qashqai" and other cars? Initially, you need to check the car itself for the following points:
- Tire pressure. If the norm does not correspond, a significant error is possible.
- Workload. It is worth removing all unnecessary from the trunk, as this creates a bias, the presence of which is not welcomed when setting up.
- Suspension. It must be free of defects - it is unacceptable for the machine to be tilted more to one side or the other.

Some masters advise making adjustments on a half-empty tank. Also note that the setup process may differ depending on the type of lamps installed in the unit. There are headlights where low and high beams are combined. But on some cars (for example, "Gazelle") it is separate. In this case, the high beam will have to be adjusted separately. On lamps with an H4 base (these are installed on the Nexia), it is enough to correctly set the dipped beam. Here the far one is combined, so the procedure is made a little easier.
Getting started
Before adjusting the dipped headlights, drive the car to a specified distance and cover one headlight with masking tape or a piece of cardboard. Next, we apply the markings on the wall. You need to make two points - they will be the centers of the headlights. We connect them with a line, with chalk. Then we draw a second line parallel to the first. But it should be five to ten centimeters lower than the previous one. Now draw straight vertical lines. They should go through the center points of the headlights.

After that, turn on the ignition and low beam lighting. As a result, the spot of light should be at the level of the second line. In the event that foglights are installed on the car, then the upper limit should not exceed the third line.
What if the light beam is out of range? In such a situation, open the hood and manually adjust the headlight. For this, special adjusting screws are provided on the block. There are only two of them. One is responsible for the horizontal position (directs the lamp to the left and right), and the other - for the vertical position (moves up and down). By tightening or unscrewing these screws, we will make the correct setting of the light. It is necessary to adjust until the beam of light goes beyond the boundaries of the drawn line (its height should be at the level of the location of the headlights themselves in the car).

What's next?
After successfully adjusting the left headlight, you can go to the right. The procedure is carried out in a similar way. The adjacent headlight is covered with cardboard, and the light beam is adjusted using the same screws. How to adjust the dipped headlights on the GAZelle? These screws are located on the back of the unit. One (large) is at the bottom, and the second (small, under the hex) is at the top. The first is responsible for the horizontal position, the second for the vertical. Note that the light from the right headlight should not be deliberately underestimated, since it will not blind oncoming drivers. The beam should be located on the line where the marking was made. Sometimes drivers even overestimate it so that the light from the headlights of the car captures not only the road, but also the curb.
We also note that such an operation can be done at a service station. Only in the service, work is carried out using a special device. It looks like this:

The cost of work is no more than a thousand rubles.
How to adjust the dipped headlights on the Matiz?
The adjustment procedure differs only in the location of the adjusting screws. In a similar pattern, the adjacent headlight is closed and marks are made on the wall. Next, using a Phillips screwdriver, you need to find the screw responsible for the vertical position of the lamp. It is closer to the battery. Twisting it, we raise the beam of light up. Then we proceed to adjust the horizontal position.

This propeller is closer to the side wing. You need to rotate it until the beam of light enters the specified boundaries of the lines. On this question, "How to adjust the dipped headlights on a car with your own hands?" can be considered closed. But remember that any car must be prepared according to the above points before setting up.
Penalties
Note that for the operation of a vehicle with impaired headlight adjustment, a fine is imposed. The minimum penalty is 500 rubles. However, if driving with unregulated headlights caused the oncoming driver to be blinded and led to an accident, then the amount increases to five thousand rubles. In addition, the offender is deprived of the right to drive a car for up to one and a half years. If this violation was committed again, the fine will already be 25 thousand rubles. And you can lose your driver's license for up to two years.
Conclusion
So, we figured out how to adjust the low beam headlights. Remember that the right lighting is your safety. Not everyone wants to be guilty of an accident that occurred as a result of blinding from the headlights of an oncoming car.
Think about the last time you adjusted the headlights on your car? I'm sure most of you will say never. Meanwhile, headlight adjustment has as much impact on road safety as good brakes or steering. We will tell you when headlight adjustment is required and how to do it yourself, without using complex equipment
Those who travel a lot at night, and in winter there are most of them, probably noticed that when driving with one oncoming car, you do not experience any discomfort, and when meeting with another you have to almost close your eyes from the blinding light. This usually occurs on the highway when drivers forget to switch from high beam to low beam. (Recall that traffic rules insist that this should be done at least 150 m before the oncoming vehicle or earlier if the driver of the oncoming vehicle asks you to do this by periodically switching the headlights.)
However, in most cases, especially in the city, the main beam has nothing to do with it. The fault of the white circles in front of the eyes is the incorrectly adjusted low beam. The headlight, instead of illuminating the road, begins to shine upward, thereby blinding oncoming drivers . But how can this happen, you ask, because all cars leave the factory with headlights adjusted? And here we come to the first point of our article.
Reasons for violation of headlight adjustment
In fact, there can be a lot of reasons. The first is a simple light bulb replacement. Lamps are known to burn out from time to time, and they have to be replaced. They usually change to a suitable type, but at the same time from a different manufacturer. We do not think that it would go to someone to look for exactly the same in the store. The exception is exclusive bulbs, which are sold in pairs. When one headlight shines with white light, and the second with yellow, not very nice, we agree. However, and because of this, you are unlikely to drive in the dark with one headlamp, especially if the lamp burns out somewhere on the highway, and you still have to cut and cut for more than one day in another city. Buy the first one you see, of course. This is where the need to adjust the headlight may arise.

The fact is that no matter how standardized the lamps are, depending on the manufacturer, the location of the spiral in them can be displaced, especially when it comes to inexpensive lamps or even counterfeit ones. In this regard, the entire light beam is displaced, and the headlight either begins to shine upward and blind, or beat in front of the bumper. So, if you have changed the light bulb in the headlight, be sure to check the light adjustment. It also happens that, due to the inconvenience of replacing, many insert the bulbs incorrectly, that is, with a bias, and this also leads to the fact that the headlight begins to shine completely in the wrong place.

It's no secret that cars get into accidents. If the front of the car is damaged, repair with the dismantling of optics is usually required. But no matter how well the repair is done, the headlight will no longer fit in the place where it was installed at the factory and adjusted there. It will definitely rise, albeit with small, but displacements. And the headlight itself is likely to be new. So she will definitely need adjustment.

Headlights are also changed due to their breakdown. They, after long-term operation, can also fail. The glass becomes cloudy, the reflector grows dim, and the temperature may simply dry out the plastic holding the reflector or lens in the body, or even part of its attachment to the body may fall off. In this case, the headlight is changed to a new one, and it also requires adjustment.
And headlights can also steal. There are a lot of whole cars without head optics on our roads. Just replacing the old ones with new ones is not enough, adjustment is necessary.

So there can be many reasons for the adjustment. But often the owners stop at the fact that the headlight starts to shine. As they say, it burns and okay. But in fact, adjusting the headlights is not so difficult.
How to properly adjust the headlights yourself
So, for example, you changed a light bulb in one of the headlights. You can check whether it shines there directly at the store. It is enough to drive up to the wall at a distance of about five meters, turn on the low beam (it is good if it is twilight or night, but in principle it is possible to see the light beam at such a distance during the day) and see if your headlights are shining synchronously.

It is not difficult to do this by the reflection on the wall. The main thing is that the platform on which the car stands should be more or less even. If the difference in beam height from the headlamp where the bulb was replaced with the one in which the bulb did not change is not visible, then you are lucky, you do not need to adjust. If the headlight shines a little lower or higher, then first check whether the lamp is in place. If the lamp is clearly in the seat, but shines in the wrong place, then proceed with the adjustment. To do this, there is a special screw on the headlight, using which, you can easily either lower or raise the light beam. By the way, in order to understand whether the headlights of your car are shining correctly, in principle, it is enough to ask a person to stand in front of the car at a distance of five meters. With correctly adjusted headlights, the cut-off line will be approximately at knee level.

A more precise headlight adjustment can be carried out using a laser building level. To do this, you will need to park the car, but this time on a perfectly flat area, again five meters from the screen, which can be a flat wall of a house or a repair box. Next, we set the building level perpendicular to the course of the car in such a way that the laser beam passes exactly in the middle of the dipped beam lamps or lens, and its projection is displayed on the "screen" where the headlights will shine. Then we open the hood and look at the headlight markings. The headlamp will definitely indicate a percentage figure that characterizes the deviation of the beam to the roadway from the horizon, called the initial directivity. As a rule, this is 1%, although it can be more.

And then it's a matter of technology. Turn on the dipped beam and see where the cut-off line of the beam is. If it goes beyond the laser line from above, it indicates that your headlights are not shining correctly. Moreover, they not only blind oncoming drivers, but also significantly reduce your visibility, because they shine not on the roadway, but upward. If the beam boundary is significantly lower, then the road is generally illuminated only in front of the car, but not at the distance when the braking distance is less than the visibility boundary or at least equal to it. And again, this is bad. Ideally, if the border of the light beam is 5 centimeters below the laser level, which at a distance of five meters to the screen is the same "1%" slope. In this case, the headlights will be correctly adjusted. If this is not the case, then turning the adjusting screws will allow you to easily bring them back to normal.

For a more accurate and professional headlight adjustment, you can contact the service. However, as practice shows, after the adjustment method described above, adjustments on professional equipment will require little, if any, need. In addition, not every specialist knows how to work correctly with such equipment. If, for example, you did not check the pressure in before adjusting the headlights, this can already tell about the "qualifications" of the master.

According to the rules, before adjusting the headlights on special equipment, the pressure in the tires must be checked and leveled, the fuel tank and other filling tanks must be completely filled, a driver or a person similar to him in build must be behind the wheel, the suspension must be pressed, and the manual salon headlight range control is set to position "0". Only in this case it is possible to guarantee one hundred percent result. By the way, the last point is one of the prerequisites for any adjustment.

So don't be lazy to check where your car's headlights are shining. And then, being on the border of light and darkness, you yourself will never get lost, and you will not knock what you meet on the true path.
Most of the road accidents occur at a time when the sun has already set and it is dark. Some do not turn on the side lights, and some simply cannot use the headlights normally, as they are incorrectly adjusted.
In order not to create problems for other road users and to protect yourself on the road in the dark, it is recommended to adjust the headlights... Also, this should be done when replacing the headlight with a new one or during long-term operation of transport on bad roads, since the setting is disturbed during shaking.
The headlights on the VAZ-2110 are adjusted with two screws: 1 - horizontally, 2 - vertically.
Owners of foreign-made cars can be considered happy people, since their vehicles are stuffed with electronics and automation, which makes it easier to use the car. Almost all settings there are carried out automatically using the on-board computer.
This also applies to the headlights. Their angle is adjusted depending on the load of the car, the pressure in the wheels or the quality of the road surface. Therefore, such cars can rarely blind the oncoming traffic, and the driver can see all the obstacles on the road at night.
On the VAZ-2110 there are no such adjustments, and therefore it is necessary to adjust the angle of inclination of the headlights in manual mode... Experts advise to carry out such settings on special stands that are available at the service station. But when this is not possible, then you can carry out the correction yourself. To do this, you need to call a friend for help.
Preparation for adjusting headlights on the VAZ-2110
Before adjusting, you need to make sure that there are no faults in the headlights themselves.
Initially, it is worth watching a video on how to adjust the headlights. The lessons will help to understand in more detail the nuances of the operation.
You will also need to carry out the following actions before adjusting:
- Clean the headlights from dirt.
- If necessary, polish optics.
- If the reflector has defects that affect the quality of the light flow, then it is better to replace it.
- Change the lamps to new, more modern ones.
- Fill the car tank, inflate the wheels to the required parameters and perform other regulatory procedures that are indicated in the User's Manual.
Well, the headlight should be wiped!
After completing these procedures, you can proceed directly to the adjustment itself.
Adjusting headlights on your own
Headlight adjustment diagram.
Important points of the procedure:

As you can see, the procedure is not complicated and you can easily do it yourself. Here you only need to correctly measure and make marks on the wall.
The most difficult thing in the work is finding a flat base and walls, which should be connected to each other strictly at an angle of 90 degrees. But not every garage has one.
You can make an impromptu stand for adjusting the headlights.
Conclusion
Video about the repair of the headlight range control VAZ-2110
Asks: Alexander.
Essence of the question: how to raise the headlight with a broken corrector, does not react to adjustment with a wing, shines on the floor?
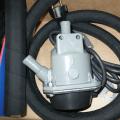
I thought that the hydraulic correctors break both at once. It turns out that they can do it one at a time. And now, if one proofreader is broken, and you are reluctant to change it, then what to do next? The left headlight is now shining down. I know how to remove correctors (through the salon). But if we don’t change them yet, is it possible to correct the situation and adjust the headlamp light, that is, raise it?
Expert response
The following two tabs change content below.
An expert on Lada cars with many years of experience. I own a Lada Grant car, collect cramps at the Priora base. Sometimes I spend the night in the garage. My wife is more jealous of cars than women.
If you know how to remove correctors, then do it at your leisure. We will not repair them here, nor will we change them. Let's use one trick instead. Carefully study all the photos, and then get to work.
- Carefully remove, and if necessary, first bite off both hoses on each module. There will be liquid inside, it is poisonous;
Bit off hydraulic corrector hoses on the left headlight
- We will refine each of the two modules: we screw in a self-tapping screw so that the “foot” comes out to the desired length (see photo);
Modified module
- Let the whole structure be covered with a layer of electrical tape.
Final option
The self-tapping screw presses on the piston, and it must be screwed in at an angle. This is the trick.
Height adjustment
If necessary, carry out additional adjustment. To do this, you need a hex key "6". The adjusting screw in the "Grant" is fixed above the corrector module, which must be reinstalled.
Vertical direction slider
The adjustment itself is carried out according to the standard technique. But let's assume the "side adjusters" are in the correct position. Then the procedure will be simplified:
- We drive away from the wall for 5 meters;
- We achieve that the upper horizontal border was at a distance of 52-53 cm from the ground. Above is not necessary - you will "blind" oncoming traffic.
By the way, (the second is closed). Good luck!
It should be recognized that on budget cars of both foreign and domestic manufacturers, the light of the dipped and distant headlights is often very far from perfect. The reason for this state of affairs, as a rule, lies in the presence of significant losses in the lighting circuits (associated with design features and natural weakening of electrical contacts during operation), as a result of which 11V, or even less, reach the light sources instead of the expected 12V.
Meanwhile, at present, there are many ways to significantly improve the lighting parameters and headlight performance on almost any car brand, and these methods are available to every interested car enthusiast.
Connecting light through additional relays
The main idea of \u200b\u200bthis method is to connect the low and high beam headlights through the contacts of additional relays directly to the battery.

In general, the steering column switch wires are connected to the control windings of the additional relays (contacts 85), the relay contacts 86 are bridged and connected to the nearest ground. In turn, contacts 30 of the relay are connected to the positive terminal of the storage battery (preferably through a 15-20A fuse), and contacts 87 are connected to the wires going to the standard fuses.
As a result of this refinement, the voltage across the lamps will rise to the level of 13.5-14V, which will increase the luminous flux by about 20%. In addition, by changing the control logic, a significant part of the load is removed from the steering column switch. It is not worth fearing that such an increase in voltage will negatively affect the light sources - the growth is insignificant and the lamps cope with it perfectly.
Installation of high power lamps
It is quite clear that the installation of more powerful lamps will undoubtedly improve the quality of lighting noticeably.
However, when choosing such a path, it is necessary to take into account the limited capabilities of the optics of your car (it is possible that the reflector quickly burns out, the installation elements melt, the steering column switch fails, and other troubles), as well as the negative impact of such forcibly amplified headlights on the eyes of drivers traveling towards you. However, a fairly good result can be achieved if instead of increasing the power, you choose the option with the installation of lamps with increased luminous efficiency. Such lamps are not cheap, but the effect may be even better than installing additional relays.

Installation of bi-xen lamps in standard reflex optics
Despite the certain illegality of this method, many motorists choose it. In general, there is nothing difficult in installing bi-xenon lamps, you just need to buy a set consisting of lamps, as such, and ignition blocks, but a person who does not have special technical skills can handle the installation. Unfortunately, as in the case with the use of overly powerful light sources, it must be remembered that reflex optics are not adapted to work with arc lamps and, when installed, will not be able to correctly focus and distribute the light flux. Attempts to adjust such headlights even with the maximum lowering of the corrector, as a rule, give no result.
Installing bi-xen lamps complete with lenses
In case the choice nevertheless fell on bi-xen lamps, it makes sense to spend a little and, in addition to them, purchase special lenses. It is characteristic that even the cheapest sets of Chinese production generate light of quite decent quality, which illuminates the road perfectly and does not blind the drivers of oncoming traffic. As for labor costs, the process of installing lenses is not much more difficult than installing lamps - in both cases you have to disassemble the headlights (perhaps the most time-consuming stage of work), and the lens itself, as a rule, perfectly becomes instead of the previous light source and is securely fixed on the back side with a screw. Wiring is also not a big problem.