VAZ 2107 in the original looks rather modest. The dynamic characteristics of the car are just as modest. Therefore, many car owners modify and improve almost all components and systems of the car: the appearance changes, the interior becomes more comfortable, the engine power increases, etc.
Radical tuning of the VAZ 2107
You can use tuning to transform a serial sedan that rolled off the assembly line at the beginning of the 21st century into a car that vaguely resembles the original. Examples of professional tuning can be seen in various international competitions, for participation in which cars are specially altered and modified.
Tuning concept
The term tuning literally translates from English as tuning or adjustment. Any car can be tuned to such an extent that it becomes unrecognizable. Each owner modifies his VAZ 2107 in his own way, determining individually which components and parts need modification.
Before starting tuning both the car as a whole and any component part, it is important to understand a number of simple requirements. The modernization of the car should not contradict the Russian legislation and traffic rules (SDA). First of all, this concerns external tuning of the body, replacement of wheels and disks, external and internal lighting. Anything that is attached to the sides and front of the machine must not: have parts protruding beyond the dimensions, be poorly welded or screwed on, contradict the requirements of UN Regulation No. 26.
There are three types of tuning.
- Technical tuning: improvement of engine performance, revision of gearbox, transmission, chassis. Sometimes this problem is solved radically - standard units and mechanisms are changed to units and mechanisms from other car brands.
- Internal tuning: changes to the interior. The design of the front panel, seats, ceiling is changing, which are sheathed with fashionable materials, inserts are made of metal, expensive wood, etc.
- External tuning: body refinement. Airbrushing is applied to the body, body kits are installed, the configuration of sills, wheel arches, etc. changes.
An example of tuning a VAZ 2107
The appearance of the VAZ 2107, shown in the figure, has changed a lot due to the unusual home-made front bumper, crate, front fenders and sills, painted green.
The ground clearance decreased from the factory 17 cm to 8–10 cm, which made the car look like a racing sports car and had a positive effect on stability and handling. The paint made the car noticeable in traffic. Thus, the external tuning made the ride safer and gave the VAZ 2107 a memorable appearance.
Body tuning VAZ 2107
VAZ 2107 is ideal for external tuning for the following reasons.
- The car initially has a discreet appearance.
- On sale there is a wide selection of parts, accessories, tuning accessories at affordable prices.
- The car does not have complex electronics, automation, self-diagnosis systems that could be damaged during work.
Most often, external tuning is limited to window tinting and the installation of stylish rims. To give the body of the VAZ 2107 a streamlined shape is an almost impossible task. However, this is not necessary for the speed characteristics of the car. It is possible to reduce the force of air currents under the bottom by installing low-lowered spoilers, which harmoniously integrate with the body frame in the places where the sills and bumpers are installed.
You can give the car body a sporty look by:
Body kits and bumpers are made independently. It is very important to cut and bend them correctly. For this, you can use special computer programs.
Windshield tinting
In accordance with the traffic rules, it is recommended to tint the windshield only at the top with a lane width of no more than 14 cm. This will protect the driver's eyes from the sun's rays. For tinting you will need:
- tint film 3 m long and 0.5 m wide;
- glass detergent or shampoo;
- rubber scraper to remove water;
- nonwoven napkins;
- marker;
- sharp thin knife (clerical can be used);
- roulette;
- spray bottle.
The tinting process itself is carried out as follows.
- The windshield is removed from the body and removed from the sealing rubber.
- The glass is transferred to a bright, clean corner of the room where there is no dust.
- The glass on both sides is thoroughly washed with soapy water. Stubborn dirt can be removed with a solvent.
- The tint film is applied to the outside of the glass and outlined with a marker with a tolerance of 5–7 mm.
- The film is cut along the line with a sharp knife.
- The protective layer is removed from the film.
- The surfaces of the glass and the adhesive side of the film are moistened with soapy water.
- The film is applied to a clean, damp surface. In this case, the formation of horizontal folds should not be allowed.
- The film is gently pressed with a plastic or rubber scraper from the center of the strip to the edges. Creases are smoothed out at the same time. At the same time, it is advisable to warm up the film with a construction hairdryer. There should be no bubbles between the film and the glass. If they appear, they should be driven out with a scraper to the side that has not yet been glued, or pierced with a thin needle.
- The glass is dried for several hours and installed on the car.
Headlight tuning
The easiest and most affordable way to tune the headlights and rear lights of the VAZ 2107 is to replace standard bulbs with LED ones.
To do this, they usually use a special tape with spotlights glued to it. Thus, you can make original running lights, angel eyes, etc. You can also purchase already tuned front and fog lights and taillights in car dealerships.
Rear window tinting and decorative grille installation
If the car owner does not have experience in tinting, it is advisable to purchase the cheapest film for darkening. There are no light transmission restrictions for the rear window. Tinting is performed without dismantling the glass, as it is glued to the sealing rubber. The work will require the same materials and tools as for the windshield. The film is glued from the inside in the following order.
- The glass is washed with soapy water, and stubborn dirt is removed with a solvent.
- The tint film is applied to the outer damp side of the glass.
- The tinting is given the shape of the glass. To do this, the film is pressed against the glass and smoothed out under a stream of warm air from a hair dryer. In order not to overheat the tint, the air temperature should not be too high. The hair dryer moves along the entire surface of the film, stopping in each place for 2-3 seconds.
- The protective layer is removed from the tint film, and it is glued from the passenger compartment to the damp inner side of the glass. Since the film has taken on the shape of glass, it should fit snugly enough. Water from the tinting is expelled using a scraper.
Sometimes, instead of tinting, a decorative grille made of two-millimeter plastic is installed on the rear window, which can be purchased at a car dealer. For ease of installation, it consists of two halves and is easily attached to the rear window rubber seal from the outside. The grille can be painted to match the color of the vehicle or left as is.
Installation of roll cage
The installation of a safety cage will help to protect the driver and passengers of the VAZ 2107 in extreme situations. The installation of the frame is quite complicated. In order not to violate the geometry of the body, careful observance of the dimensions, welding and fitting of pipes in the cabin using a hand-held power tool will be required.
Tuning salon VAZ 2107
In the original it looks very modest. The lack of frills provides the car owner with ample opportunities for tuning. Before radical interior tuning, the seats are removed from the cabin, the doors are dismantled and disassembled, the steering wheel, dashboard and rear panels, as well as the floor and ceiling trim are removed.
Soundproofing of the salon VAZ 2107
Internal tuning should begin with the installation of new noise insulation, without which it makes no sense to install a high-quality audio system. During the installation process, preliminary preparation is made for tuning all elements of the cabin. Depending on the readiness of the body surfaces, the insulation can be installed in parts or completely. First, the outer wheel arches and the bottom of the car are processed, then the trunk, the hood, the floor and ceiling of the cabin, the doors and the dashboard. After dismantling the engine, the bulkhead in the engine compartment is insulated.
Required tools and materials
For noise insulation you will need:
- set of open-end wrenches;
- set of spanner keys;
- set of sockets with extension and ratchet;
- construction hair dryer;
- a set of screwdrivers with different blade shapes;
- vibration-insulating material on a mastic basis ("Vibroplast Gold" or "Silver") 4 or 8 mm thick;
- shumka (products of the enterprises "Shumoff" and "StandartPlast").
Soundproofing the floor
The soundproofing of the floor is carried out as follows:
- The fasteners are unscrewed and the front and rear seats are removed.
- The factory covering is removed from the floor.
- The floor is degreased and treated with special mastic.
- The floor is covered with soundproofing material.
Experts advise to lay thin Shumka in several layers without gaps and gaps. Sound insulation is more effective than laying thick material in one layer.
Front panel tuning
There are a lot of opportunities for tuning the front panel of the VAZ 2107. You can cover it with expensive material, make inserts of aluminum, chrome or precious woods. For devices, you can make LED backlighting or install the GF 608 Gamma panel with an on-board computer. The steering wheel can be replaced with an analogue from a foreign car, covered with leather or other material.
Obviously, the dashboard needs to be dismantled before tuning.
Video: dismantling the dashboard VAZ 2107
Replacing the interior trim and seats
You can effectively change the look of the cabin by replacing the upholstery of the seats, headlining, front and rear panels, doors with more modern and practical materials. At the same time, it is not recommended to use fleecy materials (phlox, carpet, etc.). When cleaning such surfaces with a vacuum cleaner, their surface will quickly lose its original appearance. To replace the seat upholstery yourself, you will need a sewing machine and the ability to handle it.
On sale there are special inexpensive kits for tuning the VAZ 2107 interior, consisting of plastic decorative overlays for the dashboard, sun visors, armrests, door cards, acoustic grilles, etc. Such a set can be matched to the color of the car and choose different options
Padding of seats
The ideal option is to install more modern seats in the VAZ 2107 salon. The 1993–1998 Toyota Corolla armchairs, the fastenings of which match the standard seat bolts of the VAZ 2107, are ideal. However, it is quite expensive.
To tighten the seats you will need:
- material (fabric or leather) for upholstery;
- foam rubber;
- glue "Moment" or similar;
- electrical tape or tape;
- sewing machine;
- thick needle;
- threads of a suitable color;
- sharp knife;
- awl;
- set of wrenches;
- a hammer;
- set of screwdrivers.
The work is carried out in the following order:
- The front seat is removed from the rails and placed on a flat surface.
- The old paneling is unstitched at the seams. In this case, it is necessary to prevent damage to the edging.
- The places where the casing is glued to the cardboard inserts are moistened with gasoline.
- The old upholstery is neatly pulled off the backrest and seat cushion.
- A pattern is made from a new material along the contour of the old sheathing with scissors.
- On a sewing machine, upholstery and edging are sewn with a double stitch. Depending on the material, the joints can be hand stitched, glued or heat welded.
- The foam rubber and sagging seat springs are changing.
- New upholstery is gently pulled over the back and cushion of the front seat.
The rear seat is pulled in the same way.
Video: seat upholstery VAZ 2107
Replacing door cards
Installing new door cards will also noticeably refresh the interior of the VAZ 2107. This is quite simple to do. As new cards, you can use plastic wood pads. Alternatively, you can buy a set of various inserts for the VAZ 2107 interior in the store.
Headliner trim
Some car owners attach hardboard to the ceiling of the VAZ 2107 cabin and already glue the carpet on it. It is quite time consuming and laborious, but the result is very effective. Before starting work, the windshield and rear windows are dismantled.
Sometimes the standard trim is changed to leather or some other material. However, before that, you should strengthen the sound insulation of the ceiling. For this:
- the factory Shumka is carefully removed;
- the metal surface of the ceiling is degreased;
- a vibration damper is glued to the degreased surface (experts recommend using a construction hair dryer);
- a splan layer is glued to the vibration damper;
- the surface is covered with factory shumka.
Video: vibration and noise insulation of the ceiling of the VAZ 2107
Other possibilities of internal tuning VAZ 2107
The tuning of the VAZ 2107 salon can be supplemented:
- replacement or modification of sun visors and rear-view mirrors;
- changing the interior lighting with the installation of footlights;
- installation of a new radio and speaker system;
- installation of electric windows;
- replacement of regular rugs with decorative;
- modernization of other parts, devices and devices.
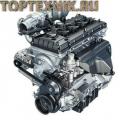
VAZ 2107 engine tuning
The manufacturer installed on the VAZ 2107:
- carburetor engines with a volume of 1.2 and 1.3 liters;
- injection engines with a volume of 1.5 and 1.6 liters.
The most common types of powertrain tuning are:
- an increase in the working volume of the combustion chambers;
- replacement of the camshaft;
- installation of a zero resistance air filter;
- alteration of the exhaust system to a straight-through muffler.
The greatest effect is obtained by installing a turbo kit on the engine.
Ways to increase engine power VAZ 2107
You can increase the power of the VAZ 2107 engine in the following ways.
- Cylinder head tuning. Due to this, the power can be increased by 15–20 liters. from. Since the head is made of cast iron, all the operations for its completion are quite elephantine and time consuming.
- Carburetor tuning. The diameters of air and fuel jets are changed, enlarged diffusers are installed.
- Installation of two or four carburetors.
- Installation of a turbocharger consisting of a compressor and a turbine.
- Boring cylinders to increase their diameter.
- Installing forged lightweight pistons instead of cast ones.
- Replacing the standard air filter with a zero resistance filter.
On VAZ 2107 injection models, it is recommended to carry out software chip tuning. This will not only optimize the performance of the engine, but also normalize the operation of the electronic control unit. The effect will be maximum if the chip tuning is performed on a serviceable engine that has passed a full technical inspection.
Video: budget tuning of the VAZ 2107 engine
Tuning of the exhaust system VAZ 2107
Some car owners make the engine sound louder to sound like the growl of a sports car. For this, the catalyst is replaced with a special flame arrester. Other owners of the VAZ 2107 believe that tuning the exhaust system is justified if the result is an increase in engine power. When assessing the feasibility of such measures, it should be borne in mind that improper installation will lead to an increase in fuel consumption and a deterioration in vehicle performance. Therefore, the work on tuning the exhaust system should be entrusted to professionals.
When tuning the exhaust system, do not forget that the maximum engine sound level should not be louder than 96 dB. Alteration of exhaust gas evacuation devices cannot impair the environmental class of the engine.
Tuning of the exhaust manifold and the intake pipe
For better purging of exhaust gases, extreme sportsmen change the standard exhaust manifold for a StinGer spider complete with a double intake pipe (pants) made of stainless steel. This allows for an increase in power at high revs by about 9 hp. from. In this case, the formula for the exhaust gas output "4-2-1" does not change.

Since the inner walls of the StinGer are smoother, installing such a manifold will increase the exhaust gas efficiency and increase power at maximum rpm by 9 hp. from
The smooth surfaces of the StinGer manifold flanges ensure that they fit snugly against the cylinder head and pants. However, the new intake pipe does not have a threaded seat for the oxygen sensor. Therefore, if necessary, a nut is welded on this pipe in front of the catalyst, into which the sensor is installed.
Since the pants end with a flange, the resonator of the injection model is attached without problems. However, on carburetor VAZ 2107, this unit is made differently, so it is better to immediately install a resonator from an injection engine on such a car.
Installing a straight-through muffler
The standard VAZ 2107 muffler consists of two pipes welded at different angles and lined with a non-combustible mineral wool filler that reduces the speed of exhaust gases and softens the exhaust. To increase the volume of the exhaust and make the exhaust flow straight, the exhaust system is audiotuned. Instead of a conventional muffler, a direct-flow, made by hand, is installed.

In a straight-through muffler, the exhaust gases do not make turns, which dull speed, and are additional resistance that reduces engine power
Video: manufacturing and installation for a VAZ 2107 regulated exhaust with a damper
Thus, with the help of tuning, you can turn the VAZ 2107 into a completely new car. In accordance with the wishes of the car owner, almost any units and parts are being finalized, including the engine. Tuning parts are commercially available, and it is quite easy to do most of the work, carefully following the instructions of the professionals.
It must be said right away that the front suspension of the VAZ-2107 is of a double wishbone type, as in most rear-wheel drive cars. From time to time, it is necessary to monitor the technical condition of all suspension assemblies, as this affects the normal handling of the vehicle, as well as the comfort of the driver and passengers. Unfortunately, the quality of many components leaves much to be desired, so any element may suddenly fail. All work on checking and replacing suspension elements can be easily done independently. True, for diagnostics, for example, it is best if there is an inspection pit in the garage or an overpass.
Suspension condition diagnostics
And now about how to make a technical inspection of a car, or rather its suspension, for troubleshooting. The first step is to look closely at the tires. Their wear should be uniform. If the rubber began to wear off more on one side and less on the other, then the wheel alignment is clearly broken. In addition, uneven tire wear indicates that there is a breakage in the steering rods. Then it is not necessary to repair the front suspension of the VAZ-2107, but to replace the steering.
Then you need to check the clearance in each of the front wheels. This should be done on a car installed on a flat surface. It is necessary to grasp the wheel, or rather the upper part of it, and then pull it sharply towards you. If the play in the bearings is very large, then you will hear characteristic knocks. Please note that tapered bearings are installed in the VAZ-2107 car. They must have a very small backlash. If the bearing adjustment did not help, then you will need to replace it.
Checking shock absorbers

If the front shock absorbers are out of order, they must be replaced. If there are oil leaks or deformations on the housing, new ones must be installed. Please note that a broken shock absorber cannot absorb all vibrations of the vehicle body while driving. In this case, the front suspension of the VAZ-2107 will not work correctly. Before starting repairs, you need to carefully check the shock absorbers to fully verify their malfunction. To check how well the front shock absorbers are working, you need to carefully, trying not to damage the fender, put pressure on the front of the car.
If the shock absorbers are fully functional, the body will immediately return to its original state. If the body continues to jump on the springs, it can be concluded that there is a malfunction of the shock absorbers. It doesn't matter if one or both shock absorbers are broken, they only need to be replaced in pairs. It is worth noting that it is necessary to install new ones if there is an oil leak from the shock absorber cartridge. In this case, only the repair of the front suspension of the VAZ-2107 will help.
Removing shock absorbers

First, open the hood, unscrew the nut that secures the rod to the car body. After unscrewing the nut, remove the washer and rubber gasket. Please note that the shock absorber rod must be held with a 6 key. But you can also use a special device. After that, unscrew the two nuts that secured the levers. The shock absorber is pulled down. A complete replacement of the front suspension of the VAZ-2107 is not required.
Note that it will not be possible to remove it on a flat surface, even if the stem is completely recessed. The entire side of the vehicle that is being repaired must be slightly raised. But the most convenient, of course, is to do all the work on a lift or a viewing pit. After removing the shock absorber, it is necessary to unscrew the nut, which is attached to the bracket. This bracket is installed on a new shock absorber.
Installing a new shock absorber

Next, proceed with the installation of a new suspension element. In fact, all work is done in reverse order. First, a lower cushion made of rubber is put on the stem. Then the shock absorber body is installed in place through a special hole in the lower arm. The rod must be fully extended and inserted into the body bore. This is how the VAZ-2107 front suspension is easily repaired. The price of one shock absorber is an average of 900 rubles.
After that, you need to install the rubber pad and washer. Get a nut on. At the bottom, tighten the nuts securing the bracket to the lower arm. After that, tighten the nut on the rod until it stops. The installation of a new shock absorber is completed, similarly, repairs are performed on the other side of the car.
How to replace the upper arm?

Lever installation

With the help of a puller, the silent blocks are installed in their places. Note that when installing the upper arm in reverse order, it is best to use a new one. Also, do not tighten the nut when the wheel is hanging. First, you need to put in place the bolt that secured the bumper, and then load the suspension.
If tuning of the VAZ-2107 front suspension is required, then it is best to put reinforced levers. For example, from "Niva". Then install a spacer under the lower arm and lower the car on a jack. Next, you need to put the ball joint in place and only after that tighten the nut. In the event that you removed the ball joint completely by pressing the pin out of the hub, you also need to replace the nut on it.
Preparing to remove the lower arm
As with the upper arm, the lower arm changes when it is damaged. It does not need to be completely removed when replacing the rubber-metal hinges. Please note that the transverse link is attached to it. This is what the VAZ-2107 front suspension diagram looks like. To make repairs, you need to have heads for 22 and 19, a spring puller is also useful. First remove the wheel and remove the spring along with the shock absorber. The lower ball joint is detached from the wheel hub and completely removed. After that, using a 22 key, it is necessary to unscrew both nuts, which secured the lever to the car body.
Removing the lever

Using a 19 key, unscrew the nuts securing the transverse link to the suspension arm. Only then is it necessary to move the axle with the help of a mounting blade and completely remove the lever. Please note that there are special washers under the axle on which the suspension arm is attached. With their help, wheel camber is regulated. Installing the new lower arm is done upside-down. It is imperative to install new nuts. With the help of a puller, the silent blocks are pressed into the new lever. That's all, the front suspension of the VAZ-2107 has been restored, now it will serve for quite a long time.
The VAZ 2107 car is a classic of the Soviet and Russian car industry. Millions of such machines travel across the expanses of our country and neighboring countries. The owners are trying to improve their characteristics, for which they make tuning of various parts. But high-quality tuning without modernizing the suspension is impossible, and the suspension on the VAZ 2107 model is neither reliable nor practical.
1 Tuning the suspension on a VAZ 2107 car
The factory suspension of the VAZ 2107 is too soft and imperfect. As a rule, with a certain load of the trunk and the transportation of several passengers, the car sags noticeably, overload is felt, and in some cases the wheels begin to touch the arches. That is why, after increasing the rigidity and replacing some of the suspension units, the vehicle's handling and the overall level of comfort are significantly improved.
The amount of suspension depends on the financial capabilities and desires of a particular car owner. With a solid budget and contacting a tuning workshop, you can seriously "pump" the front and rear suspension and get a sports car with improved performance at the output. However, many are trying to modernize the suspension on the VAZ 2107 with their own hands, spending the minimum amount of finance and getting the maximum effect from the work done.

2 Features of modernization of the front and rear suspension
To increase the stiffness of the front suspension, many resort to installing springs from the domestic SUV Niva 2121. They fit perfectly into the technical scheme of the "seven" suspension and provide greater rigidity. The springs from the Niva are also suitable for the rear suspension, while they can be installed with or without trimming (some cut off one or two turns to lower the clearance) and it is imperative to replace the rubber bumpers.

Next, you need to replace the factory shock absorbers. Which one to choose also depends on financial capabilities. You can put cheaper options, such as Ikon, but you can install sports shock absorbers Bilstein, however, in the second case, the price will be significantly higher. It is best to install gas-oil shock absorbers when modifying the suspension. They have a fixed rod and will give more elasticity to the front of the car.

With new springs and shock absorbers, the car will roll more when cornering. To keep roll to a minimum, new anti-roll bars with increased stiffness should be installed. In this case, you can install additional stabilizers or pair two factory ones on each side.
3 Additional changes to improve handling
After the changes in the front and rear suspension, it makes sense to think about improving the steering. The easiest option is to install a steering column from the same Niva. In this case, you can install an electric power steering, which will need to be properly "fitted" to the new column. It is better to entrust these changes to professionals, while they are not necessary, it can only serve as an additional "option" to improve the driving performance of a car with a reinforced suspension.

It will not be superfluous to take care of the strengthening of the brakes, it is recommended to replace the standard brakes with disc analogs.
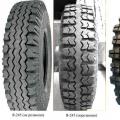
In addition, it is worth changing the factory tires, especially if your car has domestically produced tires. It is better to choose "classic" tires, although it all depends on your preferences - low-profile and wide tires can add control, but reduce comfort.

What kind of rubber to choose depends on the budget, but it is better that it be of foreign production. After all the above changes have been made, the wheel alignment must be done without fail. Subject to all the rules and the availability of the necessary equipment, tuning the suspension can be done by hand.
Every owner of a domestic car VAZ 2107 should know how the car's suspension works. The undercarriage requires periodic maintenance, which includes the replacement of worn out elements. You can do this work with your own hands if you know how to properly remove or install this or that part. In this material, we will tell you about this in detail.
VAZ 2107 is the last car of the domestic automaker, produced according to the classic layout, that is, with rear-wheel drive. Many Russian motorists prefer rear-wheel drive cars, so the so-called seven is popular to this day. The car's chassis consists of front and rear suspension. The front one has a fairly simple design, so everyone can cope with its periodic repairs.
How does the front suspension work?
Bottom view of levers
In front, the VAZ 2107 suspension has an independent design and consists of two levers: one on top, the second on the bottom. There is also a coil spring and a telescopic shock absorber-rack. The suspension has an anti-roll bar.
The lower arm is firmly bolted to the axle with an axle, and it, in turn, is held on the front side members. The upper arm is attached to the mudguard post, but the lever does not have its own axis - it is a long bolt that goes through the post.
To ensure the rotation of the levers around the axis, silent blocks are provided in the design, which are rubber-metal hinges. At the ends of the levers are ball joints, to which a steering knuckle with a trunnion for installing the hub is attached. The coil spring is located between the mudguard post and the lower arm. So that it does not budge, the ends are installed in the support cups. There are hydraulic shock absorbers inside the spring. The shock absorber housing is attached to the lower arm via a rubber-to-metal hinge.
The shock absorber rod is attached to the body through rubber pads. The anti-roll bar is attached at the ends to the lower arms of the chassis, and in the center to the side members. To avoid contact of the side members with the stabilizer, rubber cushions are located between them.
Possible damage to the chassis

VAZ 2107 suspension malfunctions include wear of rubber suspension elements, and ball bearings can also wear out. Sometimes during operation, springs and shock absorbers fail.
You can repair the front suspension of a VAZ 2107 with your own hands in a garage, but first you need to diagnose its condition. Drive the car to an inspection hole or overpass, and during inspection, determine the condition of the rubber elements, check all the gaps in the ball joints and make sure there are no oil leaks from the shock absorber, and also check the integrity of the spring.
To check the condition of the shock absorber with your own hands, you need to carefully press the wing of the car from above, achieving compression of the shock absorber. Then release and notice how the car behaves. The shock absorber should instantly take its original position without unnecessary hesitation. If the struts are heavily worn, the machine will wobble and have to be replaced.
Replacing ball joints
To replace the ball joints, it is necessary to dismantle the wheel and clean the suspension elements from dirt. After that, substitute a jack under the lower arm and raise it - this way you load the VAZ 2107 suspension.
Using a wrench, unscrew the nut of the upper ball joint pin, and then press the pin out of the steering knuckle. Once the finger comes out of the fist, unscrew the ball mount and remove it from the upper arm with a protective boot. Instead of the old ball, insert a new one and assemble everything in the reverse order. The lower ball is changed in the same way. After replacing them, contact the service center to adjust the camber and toe, as you will not be able to do this yourself.
Replacing the silent blocks of the levers

To replace the silent blocks of the VAZ 2107 with your own hands, you will need not only keys, but also a special puller. If they are in the upper arm, it will have to be completely removed, and in the case of the lower arm, this is not necessary. To remove the upper arm, press the ball joint pin out of the steering knuckle. Next, remove the bumper mounting bolt and unscrew the nuts holding the upper arm axis, and then remove it. Remove the upper arm from the machine.
After that, using a puller, you need to pull out the worn out silent blocks, and then use it to insert new ones. Installation of the lever is carried out in the reverse order, but to install the ball bearing pin, you need to load the suspension with a jack placed under the lower lever.
It is not necessary to remove it to replace the silent blocks of the lower arm. Just unscrew the nuts of the lever axle and remove the hinges with a puller. Then put the new ones in their places and tighten the nuts. It is necessary to remove the lower arm if it is damaged, but this is rare.
Replacing shock absorbers
When the struts are worn out, they have to be changed. If one of them breaks down, you still need to change them in pairs. To replace the shock absorber, first unscrew the stem securing nut, and then remove the washers and the upper rubber cushion from the stem.
Unscrew the lower strut mounting bracket from the lower arm, and through the technological hole in the arm, pull out the damaged shock absorber. Then remove it from the mounting bracket and install the new stand in the reverse order.
For this, the following parts are changed:
- springs;
- silent blocks;
- shock absorbers;
- rubber bumpers.
Rear suspension VAZ-2107
Replacing factory springs with those intended for the VAZ-2102 (04) or VAZ Niva is considered a classic. These parts fit well with the circuitry here, but are whiter and more powerful. However, if the springs of the Niva are the same size as those of the VAZ-2107, then these spare parts from the VAZ-2102 (04) raise the rear of the car, which is undesirable. In this case, in order to reduce the clearance, you have to do it yourself  remove one or two turns.
The front suspension of this model takes over the greatest part of the mechanical load while driving. Therefore, the owners of the VAZ-2107 model pay a lot of attention to it when repairing and tuning a car.
Possible damage to the VAZ-2107 suspension.
Faults can be divided into groups:
- wear and drying of rubber elements: bushings, anthers;
- wear of seals, liners, which cause breakage of stabilizer pillows, ball joints, grease blocks;
- metal wear leading to breakage of springs, shock absorbers, levers.
Checking and repairing the suspension is carried out on a lift or inspection pit.
Front suspension upgrade options
Why tuning is carried out:
A simple and effective method is to equip with high quality component parts from foreign brands. This is especially true for shock absorbers, an extensive selection of which makes it possible to solve many problems.