Was the steering wheel? Make an exclusive drawing yourself!
Make so that your car has an attractive look, you can and yourself. For this we need only fantasy and, of course, - a desire. You can change or update the cabin elements or some details under the hood. In this article I will tell you how to see old rul. Hauling the helm of the skin with their own hands is the first step to updating and improving the cabin of the car. No need to think that it is only possible to specialists. Hauling the steering wheel with your own hands is not only instructive, but also a rather interesting process.
What kind of skin take?
Considering the fact that the steering wheel is a detail of a car, the contact of a person with which to be done throughout the path of the following path, so you only need to choose the material for the hauling and it is desirable that this should be genuine leather. Since any other cloth is spoiled from constant hand friction on the steering wheel after a month of operation of the car. Estimated skin should not be very thick, but also thin it should also not be. If it is too thick, then you will not pinched it with a needle, and if its thickness is small, then the new handset can spoil very quickly. The optimal thickness of the material under the tightness of the steering wheel is 1.3 millimeters. Such ability as extensibility should be with an average. This is a very important criterion that needs to be taken into account before buying. Its elasticity should allow the material to go tightly on the steering wheel, and otherwise it is not worth thinking about quality.
One can consider the version with the presence of perforation. This is a rather unusual and attractive look, and it is also nice to work with him. But, having such positive qualities, I can allocate its negative side - wear. The only optimal solution for you is genuine smooth skin. 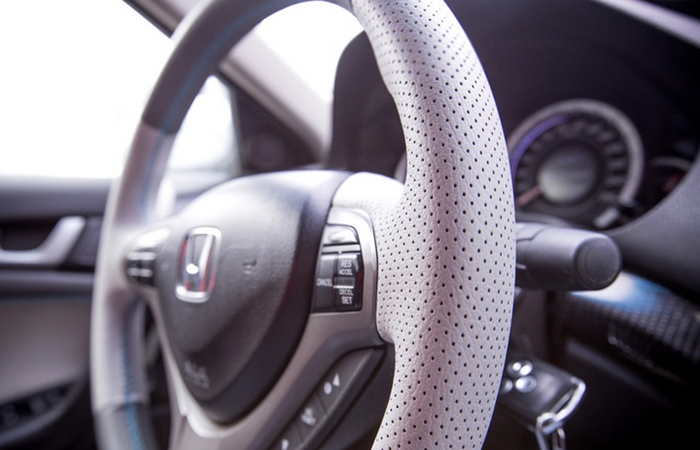
Before buying, make sure that the material offered you really has required qualitiesAnd you do not apply a substitute. It is also necessary to pay special attention to the additional materials to be used in this matter. Thread should be as hard as possible, because it will pull the edges, so it should not be easy to ride. A needle choose a durable, check that it does not bend. My advice - buy them several.
What do you need?
For fun, you will need the following materials and tools:
- Skin (it must comply with all the necessary criteria);
- A needle for stitching (the needle must be strong). If it is possible, use the needles of Soviet production, as they are really high-quality;
- Durable thread (the category is applied);
- Two thimbles (without them it is almost impossible). They will retain your fingers from punctures.
- Scotch puller, Watman Sheets (better use dense cardboard);
- Pencil or marker;
- Film;
- Knife (better use stationery).
After the preparation of the entire material, you can engage in other processes: cutting and hauling.
Making pattern
In order to correctly drag the steering wheel, and that the result of your work has a spectacular look, you need to make a pattern. To do this, make a pre-layout (template).
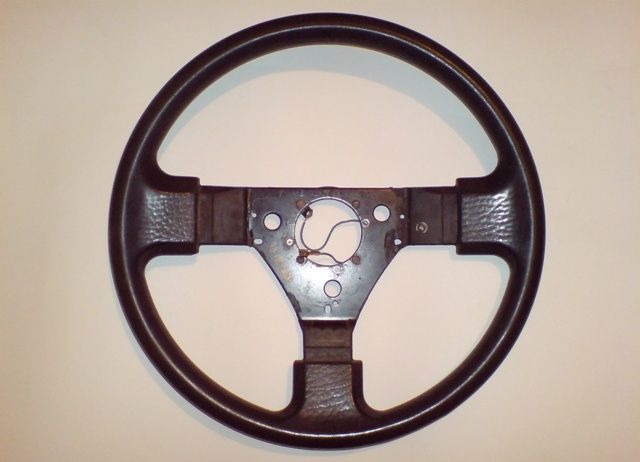
It is performed from the tape and the films that need to cover the steering wheel. But, before that, you need to remove the steering wheel, as it will facilitate the performance of work. 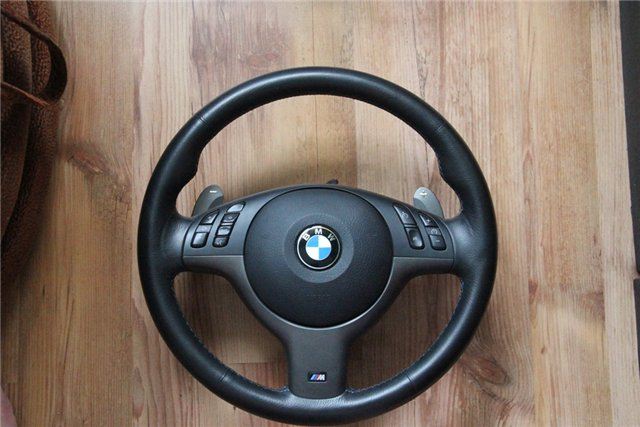 First of all, you need to remove the lid from the signal and unscrew the fastening nut that holds steering wheel On the shaft. After that, loosened movements in different directions remove the steering wheel with the slots. Now that the steering wheel is dismantled, you can play a preliminary layout. To create it, it is necessary to wind the film on the steering wheel, and on top of it lacial scotch. Do not spare the material, wake up in several layers.
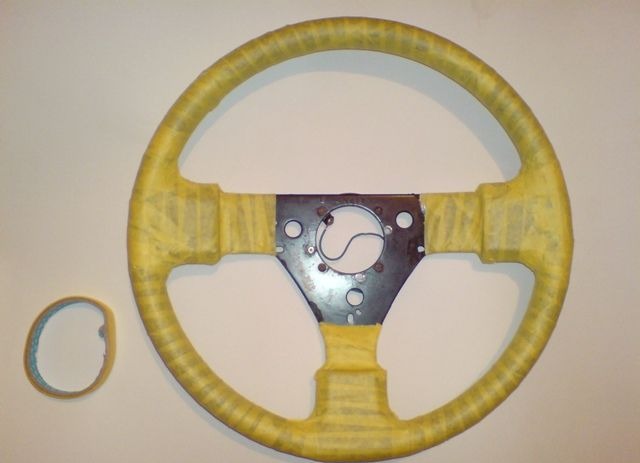
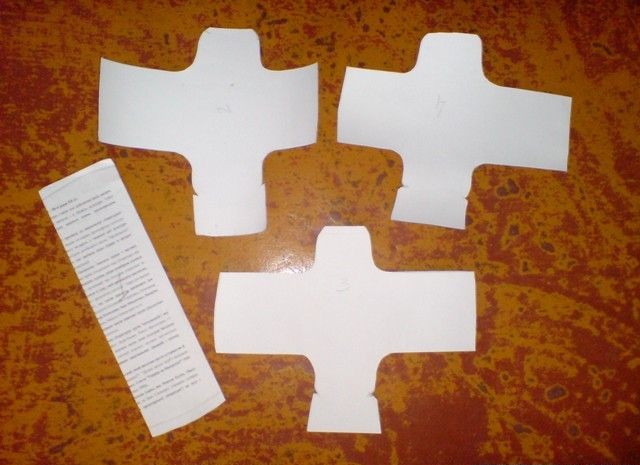
After the whole rim is covered, it is necessary to make markers using a marker in the place where the seam will be held (the location of the parts). This is done for the reason that it is very difficult to make a whole case, so it will be made of four parts. And those places where the parts will be connected to each other are marker. We also conduct a marker on the inside of the steering wheel. It is desirable to spend all the lines as soon as possible. This will make it possible to make more even original parts with strollers. After all lines are taken, the layout must be cut by the stationery knife on these lines.
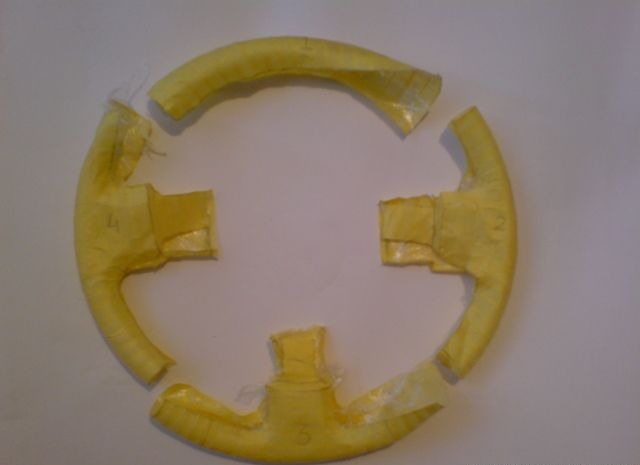
After cutting, four separate elements should be obtained. Now they need to be dissolved and attached to the cardboard to create globes under the pattern.  After the patterns are ready, they need to be attached to the main material to make the final version of the tightness. But it is important to remember that it is not necessary to cut out not exactly in size, but give some allowances to each edge of the part and after bending it. It is necessary in order to qualitatively sew them between themselves, and that the thread does not break the skin during tightening.
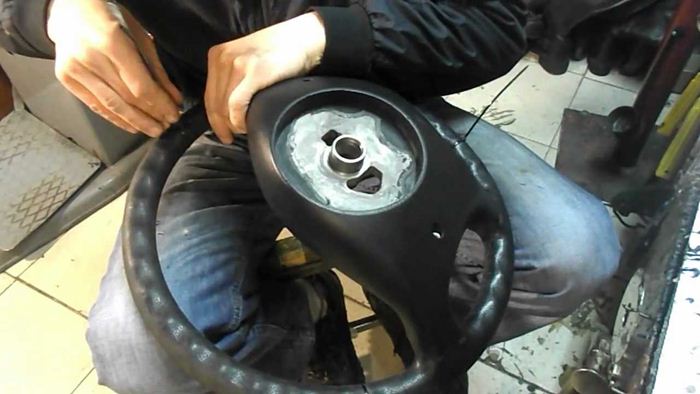
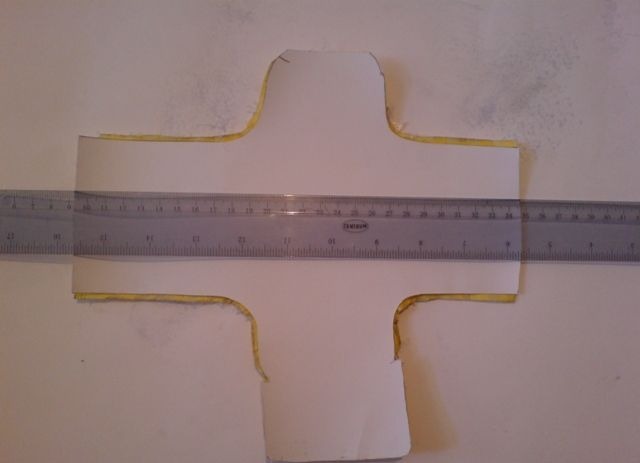
That is, seams turn out sufficiently strong and the skin will not rush when stitching. In addition, the podgiba give a new steering wheel a more aesthetic appearance. The allowances can be given immediately, while you are driving. You can also first circle, and then with the help of the line add to each edge one centimeter. So you will observe a uniform retreat on each side.
After that, you can check how correctly the cutting elements are made. It is necessary to attach each out of the patterns on the estimated place and see how they are located: their edges should be shrinking with each other. If the reserved stock is too big, then you can cut the edges. If everything is fine, you do not bother you, you can proceed to the final process - crossing parts.
Step-by-step instructions
So, everything is ready, you can proceed. At this stage, it is important to comply with the procedure for performing the work so that nothing is impact.
- First of all, you need to spend all the edges that will be shifted. The fact is that each edge will be bend (we have left indents specifically for this), and since in place of folding the thickness will double, it will not have a beautiful look and is very difficult to pierce such a needle thick. Therefore, the markup is necessary. It will allow you to observe the necessary skin thickness at the edges and thereby make edges durable.
- We post on some surface our surface (4) details of the future cover for the steering wheel. It is necessary to decompose them exactly in order as they will be located on the steering wheel.
- I prepare a needle (pull the thread into it).
- Now you need to sew sequentially all individual elements among themselves.
As a result, you should get the hoop. - Now it needs to be pulled on the steering wheel. Place it so that the seams of the seams correspond to cuts.
- Next, you can fix the cover on the steering wheel with a glue or epoxy resin. This solution each receives personally, you can not glue.
- Now try to pull the skin (align) to determine how much the edges need to be flexing before the final stage.
The last stage is the hardest thing, as it is important here on the entire steering wheel to observe the uniform skin tension. This is not only difficult, but also hard. Much better if you ask someone to help you (one tightens, and the other sews). 
So, the first thing you need to decide from what edge to start. In principle, it depends only from the convenience. You need to pull the skin so that the joint is, if the joint does not converge - it is not scary, thanks to elasticity, the joke is hung up thread. Thus, the entire case is sewn.
In those places where the case can go under the signal cover, there you need to do without a thread, and use glue. After completion, you need to straighten a new cover on the steering wheel if there are some folds - not scary. A few days later they will smooth and the surface will be absolutely smooth. Now you can engage in installing the steering wheel to the previous place, fixing it with a fastening nut and cover the lid on the signal.
Skin steering wheel change significantly appearance Not only of this element, but also emphasize the general view of the car's salon. In addition, after performing it yourself, you not only saved your funds, but also got a good experience in a drawing, and also got acquainted with the steering device of your car.
"Treshing the steering wheel"
Roller about the work of the Master of the company "Rusty Brothers" on the skin of the rim of the steering wheel in the style of "BMW M". After watching the record, you will learn which tools you need to prepare and how to handle the helical steering wheel.
http://mineavto.ru.
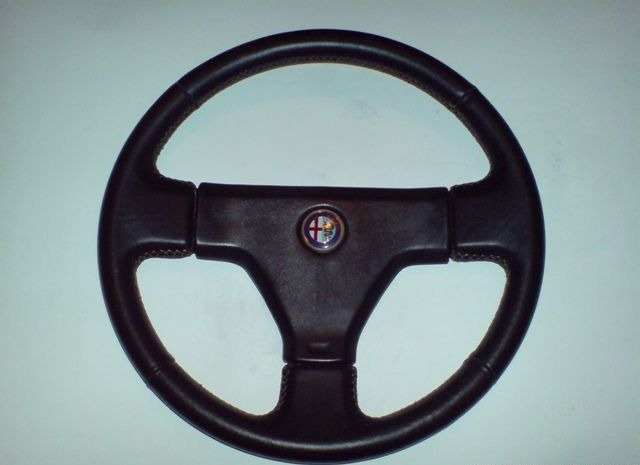
Anyone who at least once kept the steering wheel of a good anatomical shape, knows that the most practical and aesthetic option - skin tightness. Hauling steering - the process is quite laborious and can only experimental masters. An unusual appearance will have a pleasant skin with perforation. However, the most wear-resistant and equally attractive option will be natural smooth skin. As optimal option You can choose a combined tightness with various types Leather surface on the same steering wheel, as well as coloring under the style of the cabin of your car.
What details are necessary for having a steering wheel?
The following items will be needed for tightness:
- loskutka genuine leather;
- strong needle of Soviet production;
- capron thread;
- thimbles;
- malyary Scotch;
- watman sheets or tight cardboard;
- simple pencil or marker;
- film;
- stationery knife;
- epoxy resin.
After all the materials and tools are assembled, the master is starting to the processing process.
Preparatory process of tugs: steering wheel, cutting technique
To ultimately the steering wheel had a neat and spectacular look, you need to make a pattern. Simplify the task will help dismantling the steering wheel, after which the template is manufactured. To remove the steering wheel, you should remove the lid from the signal and unscrew the main nut that crept the steering wheel to the shaft. Next, the tenting movements are removed from the slots.
The preliminary layout is usually performed from the painting tape and the films that cover the steering wheel. The film in several layers is wound on the surface of the steering wheel, then the rim is wrapped with a scotch. With the help of a felt-meter, markers are made at the place of the future seam, as well as in diameter inner wheels. On the connecting lines, the layout is cut by a stationery knife. Thus, the cutout will turn out to be smooth, during the tightness process, the leather parts will be perfectly connected with each other.
As a result, the wizard turns out four separate pieces that need to be dissolved and attached to the cardboard. The finished patterns under the pattern are applied to the leather material, and the final version of the tightness is cut.
Note! Slices made of genuine leather are not cut on the exact size of cardboard patterns. For each edge of the details, it is necessary to add 10 millimeters of the leather material so that the wizard has a margin for bending when tightening the seams and did not break the skin when the rim is trimmed.
Once all parts of the skin are ready, it is worth applied to bete and double-check the size of the indents, then you can begin to the final process - stitching the material.
Proper technology of rut
At this stage it is very important to comply with the procedure for performing work. So that the trim material fits tightly to the steering wheel, the wizard strictly follows the instructions:
- The required skin thickness at the edges is achieved by means of the lines of future seams. For this, the master marks all the edges of the material, paying particular attention to the sections of the bend, where the thickness when the seams are superimposed twice. Competent markup will avoid marriage in the form of skin seals on the covered steering wheel.
- Next, 4 leather parts of the future cover with the numbering on the steering wheel are laid out onto the smooth surface.
- The needle is inhabited by the Kapron thread, and the elements are consistently stitching among themselves, so that the result is a hoop.
- The solid blank is gently stretched on the wheel so that the seats of the seams correspond to the cuts.
- The case is fixed on the steering wheel with a special adhesive composition or epoxy resin.
- Next, the skin is tensioning and smoothed, so that it can be determined to determine how many millimeters you need to bend the edges before overlaying the seams.
- In the final and most complex stage, skin crosslinking occurs, at which it is very important to observe the uniform tension of the material on the wheel diameter. Usually such work is carried out with the participation of the assistant, when the master stitches the edges, and the second person helps to pull the leather case.
Note! In places of the signal cover, you can do without threads and attach the skin with glue. It is not necessary to worry if small folds remained on the rim - in a few days they will be smoothed independently.
|
|
|
|
|
|
|
|
|
|
|
|
|
|
|
|
|


Only a professional can choose the skin with good elasticity properties, a strong high-quality thread for the trim, a special solid needle and the correct type of seam. In compliance with the power of the steering wheel, the material perfectly feels on the steering wheel and will serve not one year. As soon as the covered steering wheel is ready, it is necessary to straighten the skin on the surface and you can fix the updated wheel into the car's salon.
Video example of car lounge.
To make it comfortably driving a car, many drivers buy special covers on the steering wheel. Such refinement creates convenience, the hands are less tired. Plus to this in best side The interior of the cabin is changing. Today there are a lot of various offers on the market. However, you can drag the steering wheel yourself. The most practical and convenient material for the tuning steering wheel is genuine leather. Use artificial substitutes are not recommended. Since they do not have due elasticity and quickly wear out.
Tools and Tools for Tools
Skin steering tightness involves the use of the following materials and tools:
For the manufacture of a template (patterns), it is best to use food film and wide greater tape.
Dense paper or cardboard.
Stationery or other sharp knife, marker or pencil.
Durable and high-quality thread, preferably a kapron.
For a safe and convenient sewing, you will need two frosted for the middle finger.
Durable sewing needles from watersted steel.
High-quality soft genuine leather.
Screwdriver and key to remove, and then install the steering wheel.

To cover the wheel of the skin with your own hands, it is desirable to use the material of two species, perforated and smooth skin. The combination of two different textures will allow not only to create an original and pleasant aesthetic look, but also ensure comfort to work with the wheel.
Perforated skin is characterized by increased elasticity. She is soft and comfortably work with it. Smooth skin, in turn, is more resistant to wear. Therefore, if they are combined together, it turns out a durable, soft and sufficiently resistant to the erasure material. Experts believe that the optimal for covers on the steering wheel is a leather with a thickness of 1.2-1.4 mm. Skin color can be chosen any, it all depends on your taste. As a rule, damage leather covers are most popular. Most often use black material.
Leather pattern

In order for the hauling of the steering wheel with your own hands, quality was performed, it is necessary to pre-make a pattern. To do this, first make a pattern of film and scotch. First, remove the steering wheel, after having dismantled the signal cover. Then we unscrew the screw fastening nut on the shaft and remove the steering wheel with the slots, swaying in different directions.
After that, with the help of a food film and painting tape make a mock steering wheel, pattern for pattern. Steering wheel wrapped with a film. Top plays a greasy tape on a paper basis. Places where it is planned to make seams, mark a marker or pencil. Then carefully cut the tape for these lines. As a result, four elements should be obtained, one rectangular and three cruciforms. All parts for the template are deployed and numbered. After that, they are placed on cardboard or tight paper and made patterns of a similar shape for the pattern.
Skin pattern
To make the original case, you must first view the various sketches and choose the most suitable. Of course, from four parts you can realize not so much solutions. However, you can make each sector from two or more elements by setting up various textures or shades of the skin. Naturally, for this you have to spend more time and effort, but the final result is worth it. You can search for various options on the Internet and choose the most convenient and practical. After you have decided on the design of the case, we put the skin pieces on the table and make patterns using a stationery knife.

Making patterns is very important not to miss the next significant moment. Each sector of the template is transferred to the skin is not strictly in its form, but with a small margin. That is, after you laid the template on the skin, cutting, retreating from the edge of the sector by 1.0-1.5 cm. Such a margin will need to provide the necessary strength of the seams. Otherwise, after a short operation of the seams, there will be a cover simply throw it away. As a result, the next hauling of the helm with their own hands is required.
After sliced \u200b\u200bslices are sliced, attach them to the steering wheel and check that all sectors are cut out correctly and coincide with the size of the reserve on the seam. If necessary, all excess can be cut, because all patterns are made with a sufficient stock. After you were convinced that all the elements were prepared and comply with the design plan, you can start sewing.
Cooking leather case

First, lay out all the details on the table according to how they will be located in the case and begin to sew in the specified order. The edges of the sectors must be waged to avoid skin tightening during operation. Seam details needed with durable drop-end threads, retreating from the edge of at least 3 mm. All the details are allotted in the form of a ring, with the exception of those seams that you previously marked the marker.
After the workpiece is completely sewn and all edges are made, carefully stretch the cover on the steering wheel so that the joints of the seams are in the sections. The material is smoothed and eliminated sagging. Some experts advise "plant" the skin on glue or epoxy resin. However, in any case, it is necessary to sew edges.
Video - rubber handling

So, now it remains to do the most important thing - to pull the edges of the cover so that it is reliably fixed on the steering wheel. This procedure is very troublesome, time-consuming and demand a lot of time. First of all, it should be found at the place where the seam will be. Here you first need to fix the thread, and then you can gently sew. When tie the edges of the cover in the area of \u200b\u200bthe signal cover, it is recommended to embroider the edges of the skin with glue for rubber.
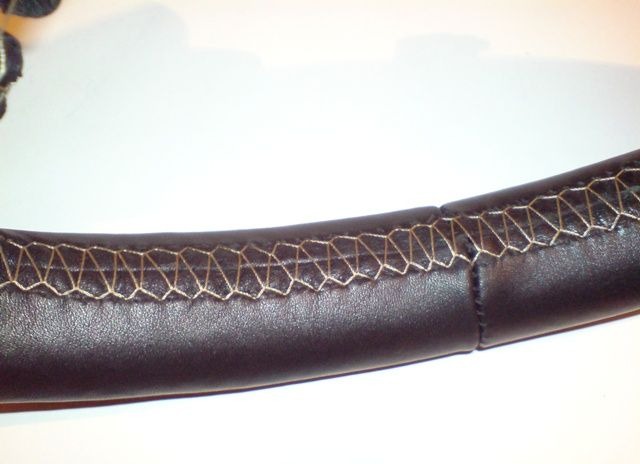
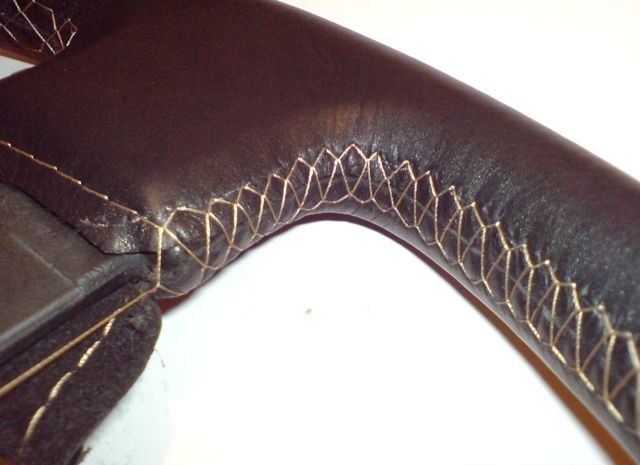
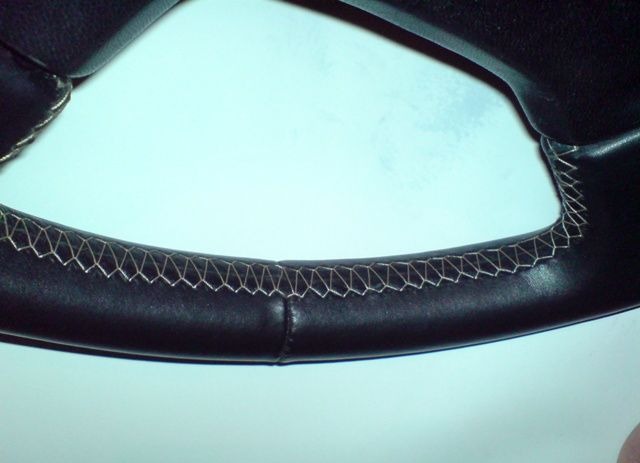
Seam species exist a lot. However, the most popular is pig, sports and macrame. They look beautiful and form the most durable connection.
After the case is fully cleaned, you can put the steering wheel on the car. There may be minor folds on the case. You should not worry about this. If you used natural skin, then due to the increased elasticity of the material, all these flaws will completely disappear over time.
Hauling the helm of the skin, a long time is a popular type of tuning of most serial cars, which have a steering wheel made of soft plastic of an unsightly look. After all, after refining the helm of the helm, Alcantara and even vinyl, the car interior is transformed and becomes more prestigious and cozy, and the steering wheel becomes much more pleasant to the touch.
But the cost of such work, in some Tuning Atelier, it is not cheap, and it makes sense to think, and do not drag your steering wheel yourself? How to do at home, and that it will be needed for this, we will consider in this article, and consider a couple of ways. And after reading the article, each car owner will decide for himself, in which way to give preference.
First you need to disassemble plastic on your steering wheel to get to the nut, the fastening steering wheel to the steering shaft. But before unscrewing this nut, you should mark this nut with a marker relative to the steering shaft thread, so that when screwing the steering nut, attach the same effort that it was applied at the factory (more on how to remove the steering wheel from the car tree, as well as About adaptations for this case, I wrote a separate article - the article is located).
By reloading the nut on the steering shaft, you should also mark the marker or the treadmill of the steering, relative to the slots of the steering shaft, otherwise then when installing the steering, you can make a little mistaken, and straight movement The front wheels will be shifted to the side. Before removing the steering wheel, do not forget to turn off the signal wire from it.
Next, wielding a steering nut on a couple of turns back to your place, chop the steering wheel from the shaft, and the screwed nut will not allow the steering wheel with a shaft sharply (fighting face or head injury). After removing the steering wheel, we put it on the table and preparing for work.
Below will be described two ways of tugging the helm or some other material. The first of the ways will allow to cover the steering wheel with a much smaller number of seams (and then almost all seams will only be on back side Steering wheel), and cover the steering wheel from almost a solid strip of material.
The second method for some at first glance may seem easier, but with this method, the number of seams on the steering wheel will be much larger, since the material during tight will be sewn from several pieces. And everyone will choose for himself the way he likes more.
The first way of tugging the helm of the skin.
First prepare required tool and materials:
- Actually, the material itself is skin or vinyl (and other materials that are well drawn). Perfect perforated leather or vinyl (with very fine holes).
- Roulette, centimeter, or Kurvimeter (what a cevimimeter can be read ).
- Scissors and knife (better tailoring).
- Marker or pencil.
- Technical hair dryer.
- Glue for gluing the material with which you will work.
- Kapron threads of color, which is more suitable for the interior color.
- Sewing machine (or familiar seamstress).
- Needle sewing.
- Threads silk or kapron No. 20 and 30.
Prepare the necessary tool, except for the material, you need to determine how much it will be needed. To determine exactly the length of the material strip, you can measure the tape measure with the diameter of the steering wheel and its thickness and then calculate the length using a special table. But it can be done much easier. To do this, turn the centimeter to the outer diameter of the steering wheel, slightly pulling it to measure it to measure the length of its circumference around the perimeter, and measuring, write the indication of the length of the material strip.
Now you need to fold the edges of the carved strip and sew them (strain on sewing machine) So that it turned out the so-called belt, which is then tightly put on (necessarily with the stretch) on the steering wheel (see photo 4 and 5).
Then on the front side of the steering wheel, retreating on each side of the steering wheel of centimeters to 7, make cuts across, slightly reaching the steering wheel, (see photo 7).
Now you can cut off along the extra material along line (photo 8), outlined in advance, but cut off on this line only to transverse cuts made on each side of the knitting needles.
Next, in the area of \u200b\u200bone of the spokes of the steering wheel, heat the material with a hairdryer, and then stretch it with his hands so that it fits tightly with the knuckle (see photo 9). When heated, the material softens and fits better better, and the vinyl at the same time also remembers the form.
I stretch the material with your hands in the area of \u200b\u200bthe knitting needles, mark the marker in the corners of the spokes of the point on each side of the knitting needles (in the middle) - see photo 10, to which it will be necessary to cut the material.
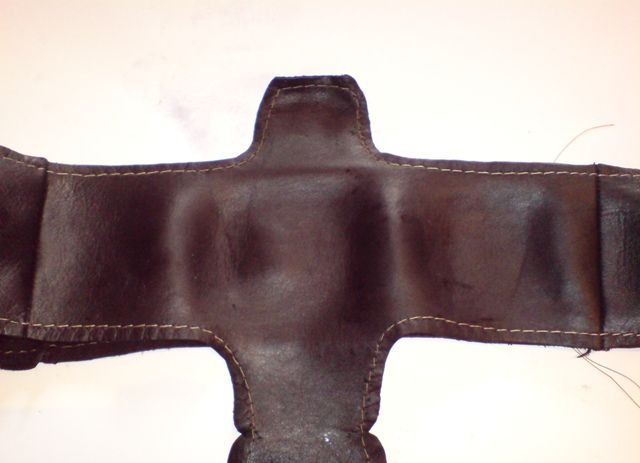
As a result, it should be possible so that when the joints on the back of the spokes are coincided, as in the photo (and the subsequent stitching of them), on the front side of the steering wheel, the material should be well covered with each knuckle without folds - see photo 13.
Sending the material for each needle, remove the pattern from the steering wheel and folding the material together (see photo 14), checking the cuts of cuts to be smooth, and if somewhere the material slightly performs, cut the excess.
Now you need to sew everything, but before you failed the material and the steering wheel with glue (see photo 16), designed for the skill of the material you use. But first failed the knucky knitting knuckles and sew them, and then other places on the steering wheel.
And I still have to tell me about the second way of tugging the helm, vinyl, or other material, which is used by many home masters, but can still be useful to someone, and about it below.
The second way of tugging the helm with skin or other material.
In this method, to make the exact patterns you will need a greasy tape and a food thin transparent film. It is necessary in order to then easily separate the fragments of the future pattern (from the tape) from the steering wheel.
Now you need to carefully cut the tape with a sharp knife from the inside (centered) and on the lines marked with the marker and remove them from the steering wheel (photo 2).
Next, we scroll all with glue and sew threads, while the pattern should make a tight steering wheel without folds, wrinkles (photo 5). What to choose seam we think yourself, the options of the sea. Well, how to sew the material right on the steering wheel, you can look at the video under the article.
That seems to be all wisdom. Having coped with such work on your own, you can save a certain amount of money, but the main thing you will enjoy work, as well as pride for yourself and your skillful hands.
Of course, newcomers can not get something from the first time, but the experience is hiring, and if you take care and perseverance, then, or other material, as a result, it will necessarily work out and your steering wheel will be transformed, engraving the salon with its steep look, success everyone.