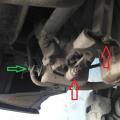
A recent inspection revealed defects in the alternator belt. The decision to replace was not long in coming. On 99, the belt was changed within 1 minute. I spent about 1 hour here.
0:764Process
0:784We unscrew the two bolts securing the right engine mount. Here was the first ambush, bolts with an asterisk, I had to buy an E10 head.
0:1018 1:1523HERE THEY ARE UNLOCKED
1:1558We jack up the wheel.
1:1606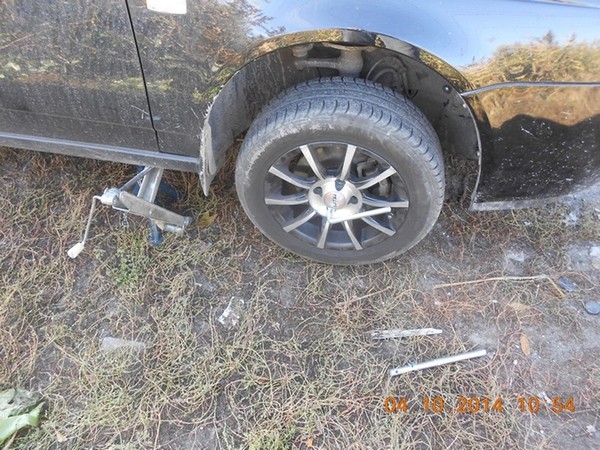
2:17
Under hole regular protectionwhere drain plug we substitute an emphasis and lower the jack, hanging the engine. We take out the old belt under the formed hole between the right engine mount and the bracket. Pre-unscrew tension roller key 17.
2:498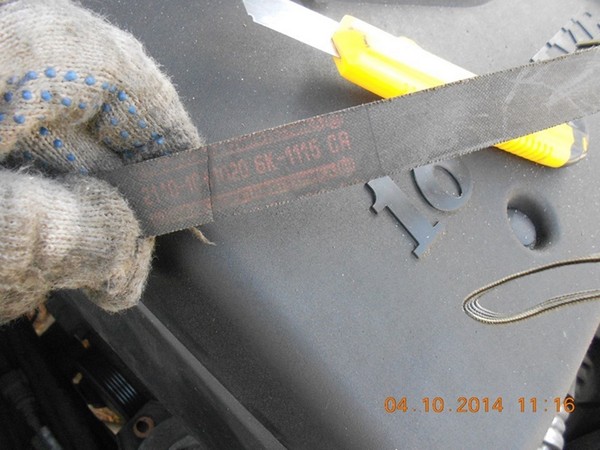
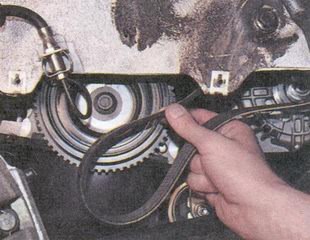
OLD BELT, DEFECTIVE TRACES AND BELT SIZE
3:1099Here I would like to dwell in more detail. About the belt size. How to choose?
In markets and shops, 90% said they would take 6rk1125, the rest 10% said 6rk1115 And one good man said the following and I advise you also
1. Look at the old belt, the size may be preserved.
2. Take 2 belts, with the condition of returning one of them.
In my case, the first option worked. I bought a belt from the German company "Continental" 6rk1115
3:1810![]()
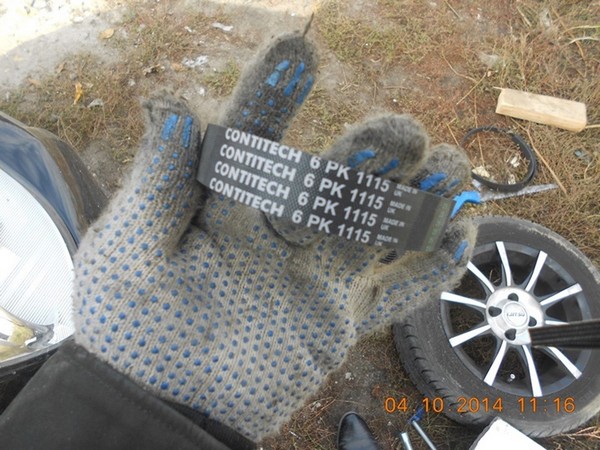
BRANDED SAME
5:547For a note: according to the manual, it was necessary to buy 6rk1125.
5:641We put a new belt in the reverse order, assemble the units, along the way we check the tension roller for defects, and, if necessary, change it.
5:943Adjust the belt tension
5:997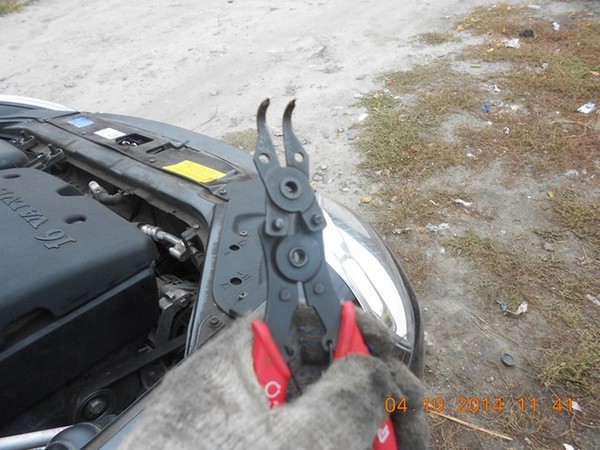
MIRACLE MECHANISM
6:1531I forgot that I gave the key for these rollers to the owner of the 99. I used a device for removing the circlips for tensioning.
6:1757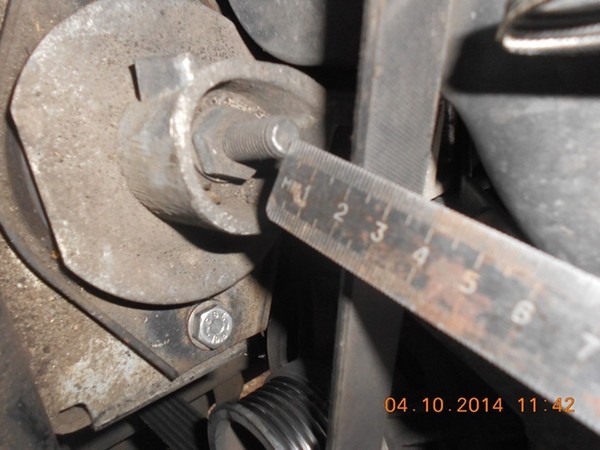
TENSION CONTROL
7:34With the correct tension, the belt should not bend more than 8 mm.
7:169In fact, I expected big problems, but everything went like clockwork.
7:289I will try to tell you in more detail about this rather simple process, as it seems at first glance, and for which some services try to rip off more money, they say, you need to take off the pillow, and all that. The replacement was carried out by me on the ground without a lift, and the car does not have a crankcase protection, which, of course, will have to be removed when replacing. We need a belt (I will also write about them in more detail.) Two jacks, one, preferably rolling or just hydraulic (since there is no special place to turn the handle normally under the machine), a ratchet, a head for 17, 15 for a ratchet extension and a cardan , as well as a wrench for tensioning the roller and a screwdriver for unscrewing the anther (there are already who have screwed on which screws). We remove the wheel.
7:1753Remove the tension roller.
7:1800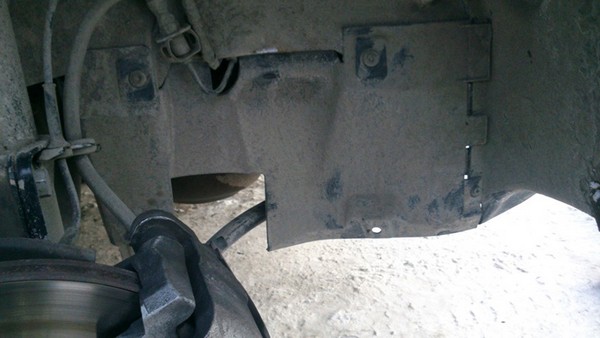
Remove the boot
8:32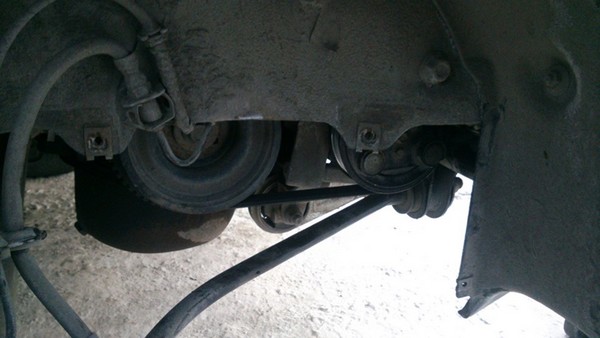
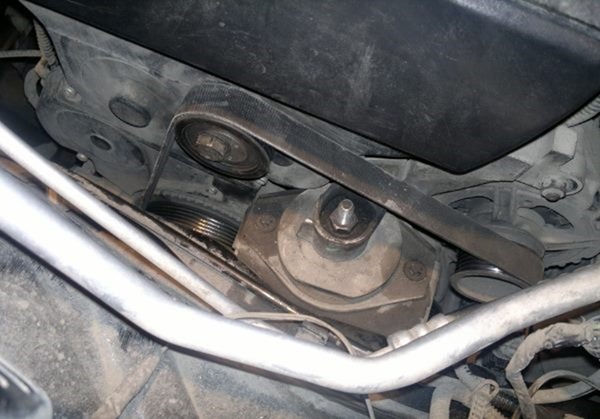
This view opens up to us
9:590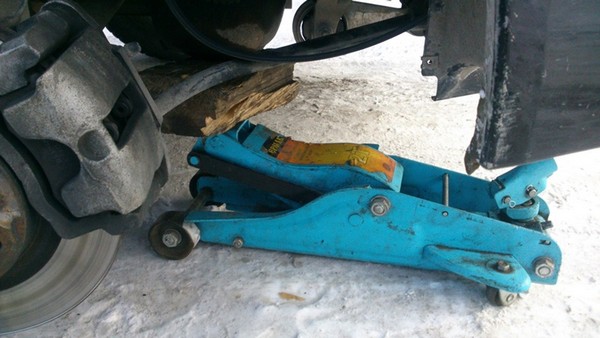
We roll the jack under the crankcase and push it a little. It is not necessary to lift strongly yet.
10:1248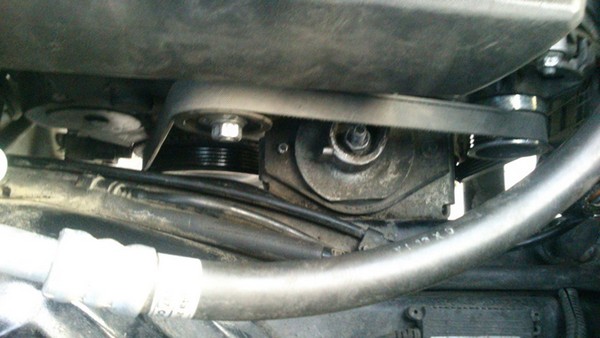
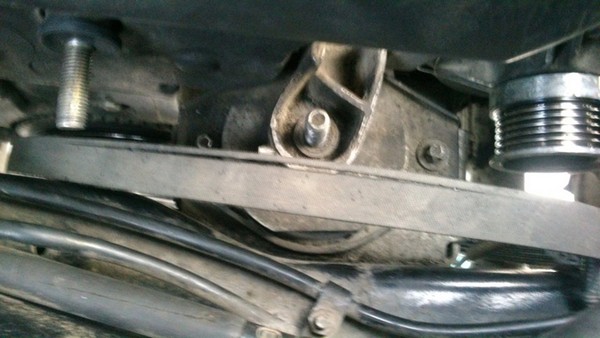
It will look like this
12:551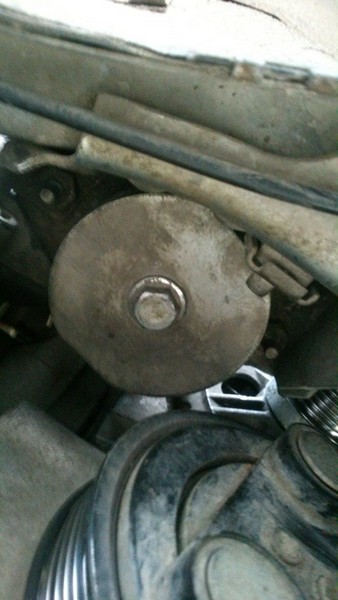
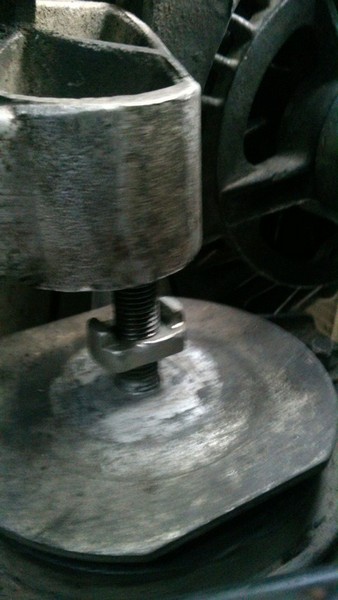
For clarity, I made this photo for those who do not know it can be very useful. Between the pillow and the bracket there is an intricate nut that fits into the groove of the bracket, thus we can unscrew the bolt from the bottom of the pillow without hindrance.
14:2247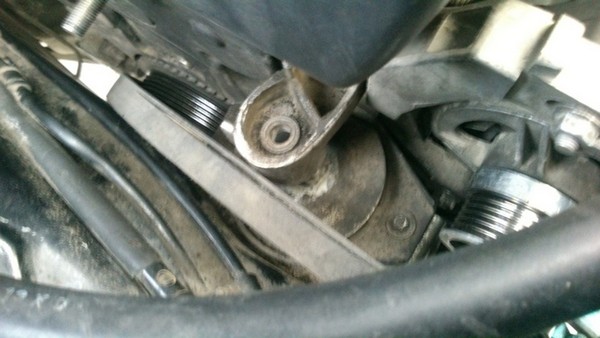
Now manipulations with jacks begin. We raise the body of the car in order to get the distance to push the belt through the pillow.
15:755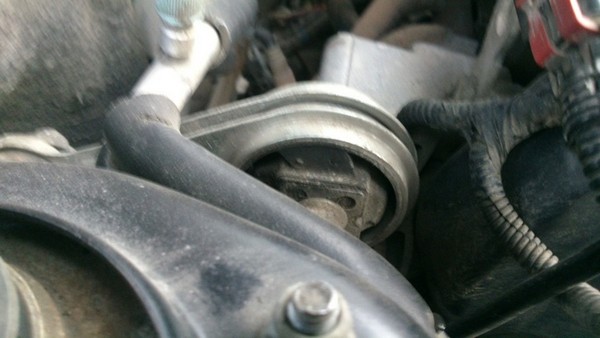
But you should not get carried away as you can break the guitar. as the body goes to the top, and the engine remains at the bottom. We pick it up and look at the guitar: as soon as it becomes a pity, then that's enough. For convenience, you can look at the bottom - they bend the same way.
16:1703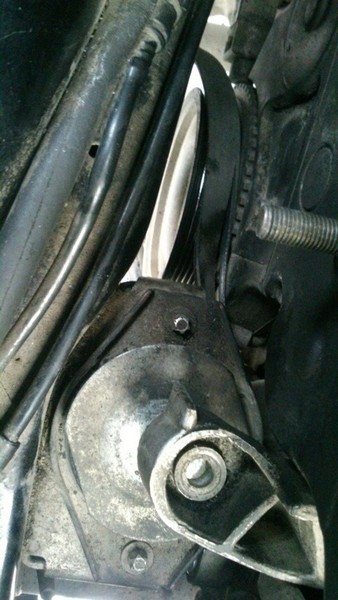
We put the belt into the gap that appears between the pillow and the bracket, slightly raise the engine and pull it out from below.
17:228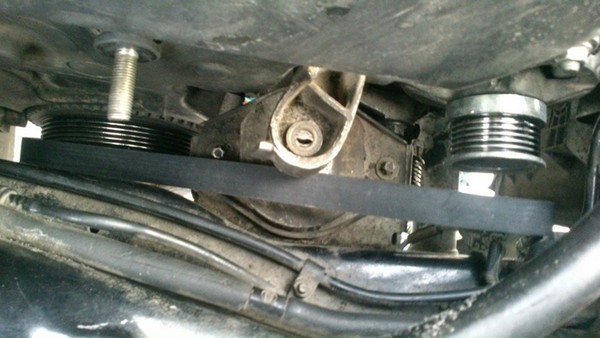
We push a new one behind the pillow, lower the engine a little and push it in its place.
18:899
We raise the car and lower the engine a little. you can do both, you can look at the guitar for one thing. We put the bracket back on this nut, we look so that it falls into the grooves of the bracket
19:1760
Next, we tighten the pillow bolt to the end. If the bracket is not placed on the pillow, most likely the bolt will rotate, and it is extremely inconvenient to hold that nut and a second person will be needed. Also, make sure that the pillow remains standing as it was, so that it does not turn. I don’t know what this will affect, but I’m for leaving it as it was.
20:609
How to tighten the lower bolt to 15, carefully lower the engine onto this bolt so that it turns out, as in the photo, and tighten the nut to 17 until it melts.
21:1364We put the belt with the roller in place. we stretch. we put the boot and the wheel. You should get the following result.
21:1567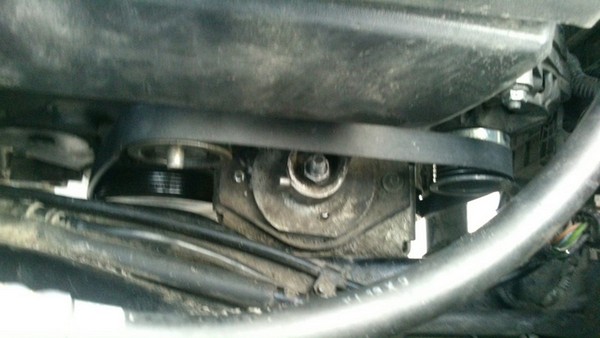
Here it is not stretched yet.
22:46It took me 30 minutes to replace the belt and the passing shooting.Another 30 minutes I pulled it on and checked the charging with and without load. In general, nothing complicated. Once you change it, it will be easier later. I seem to have described all the nuances.
22:439And now about belts from personal experience: I put myself a Contitech belt. This belt length fits perfectly on Prioru with Panasonic air conditioning. I have not encountered other air conditioning systems, I will not say anything. but you can also put 6pk1120 it is a little shorter. I also read that they are pushing 6pk1115, but there it is already necessary to move the generator towards the engine. and it will be possible to pull it but harder. this is one of the easy options. 25 and 20 put a belt for myself. fit without problems. put the belt shorter did not see much sense. Well, that seems to be all.
22:1395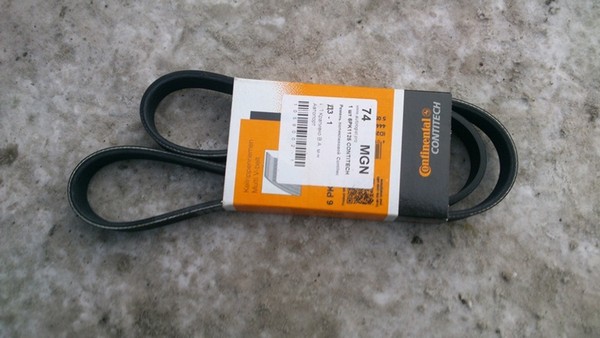
Marking 6pk1125.
23:1933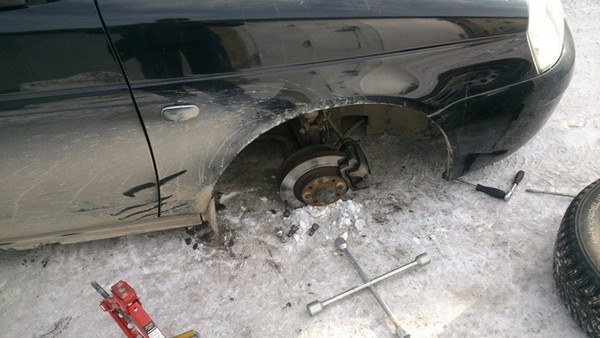
And most importantly, we observe safety precautions, we stop the car efficiently so that such an embarrassment does not happen.
24:211This post is about how to change the alternator belt on the Priore with power steering, which some clever person wrapped around the right engine mount without removing the engine protection, without a hole.
24:607The reason why I climbed to change the belt - longitudinal cracks on the belt, which departed only 20,000 km. (in my opinion, not enough, the factory departed 58 thousand and was like new) after replacement. Changed for 58,000 km. The timing belt along with the pump, at the same time the guys advised me to change the belt. I climbed under the hood the other day to see the fluid levels, and then there was such a surprise, although I bought the strap in a good store for 600 rubles. and the seller convinced that better company no (I do not remember the name, unfortunately.)
Five thousand ago I changed the roller - the previous one rustled strongly and distinctly, I bought some in an octagonal yellow box - like a Czech one - the seller also convinced that there was no better company, but further in the photo you will see what happened to the belt for 20 thousand and with the roller for 5 thousand runs.
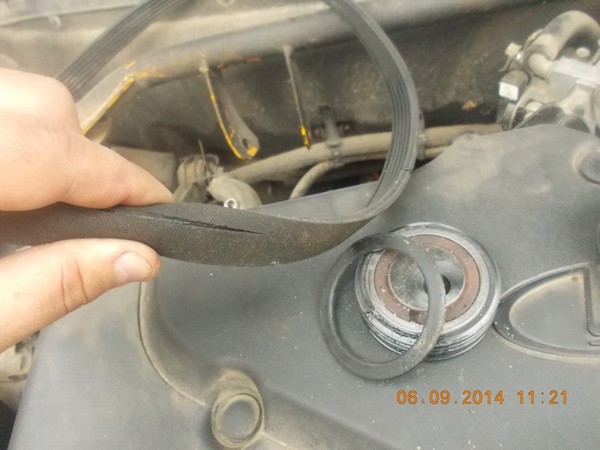
Surprise, the sidewalls from the roller flew off from both sides, and on the belt there are longitudinal through breaks in the amount of 2 pieces
25:203How to change the belt: it took me about an hour, but this is the first time, it is really possible to manage in half an hour, if you have some tool.
We need:
1. The head is elongated by 17 - without it it makes no sense even to start. You can ask someone, you need it once, then you can unscrew it with a regular head, if you make such a washer in advance
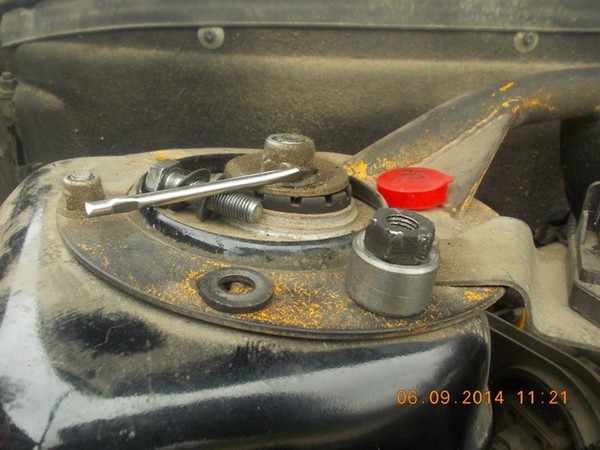
on the left was the washer, which was under the nut, on the right under the nut was the washer-barrel, its height is 16-18 mm., hole 11 mm., outer diameter 22 mm.
26:1584Even if you give it to the station, I recommend making such a barrel and asking the person who will change the belt to put it on, saving 215 rubles. - the toad strangled me at once to buy such a head - took it from the minders. Then you can even unscrew it with an open-end wrench if you wish.
2. Idler Wrench - Looks like this. They can also tighten the rail.
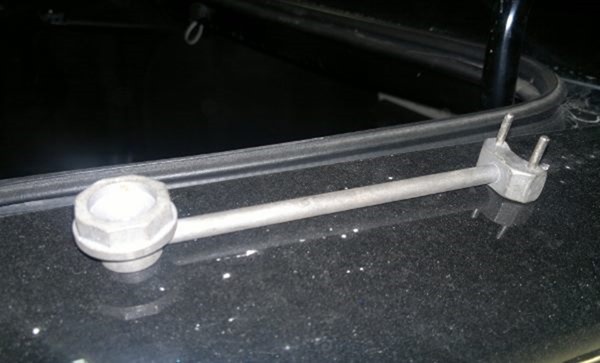
3. The head is 13 to unscrew the bracket (who has stars, as in the photo, you need to prepare in advance, and replace these two bolts with human ones during assembly and, preferably, take stronger bolts from the car shop, and not from Uncle Vasya in the garage of raw meat) ...
4. Key 17
5. WD-40
So the procedure:
First, spray WD-40 onto the cushion bolts. Let them soak.
these asterisks, I advise you to change the head to 13 when assembling
28:1744We put a jack under the front right side - remove the wheel.
Remove the tension roller, take the belt to the side. With an elongated head by 17, unscrew the nut of the pillow, and with a head by 13 (or if you have sprockets, then the necessary head) the pillow mounting bracket.
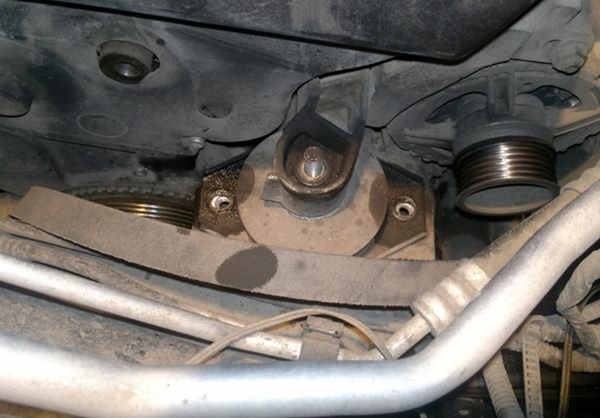
We are trying to bring the belt as high as possible and close to the engine bracket.
The engine guard has an oil drain hole. Through this hole, I pushed and rested against the edge of the flange of the pallet with the prior spark plug wrench with its narrow part upwards - it fits perfectly. The key is a little short - I put half a brick and a piece of board.
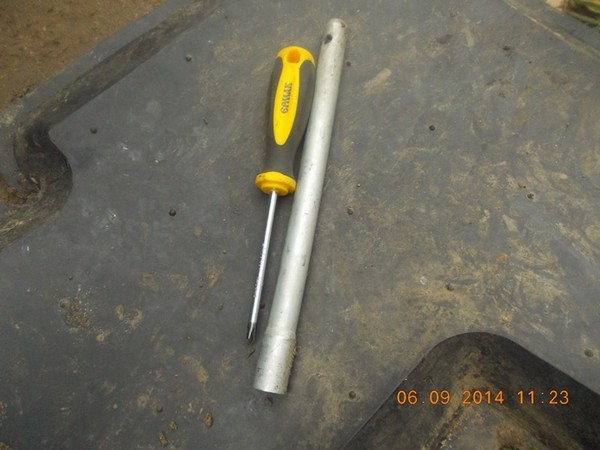
this is the key
30:1630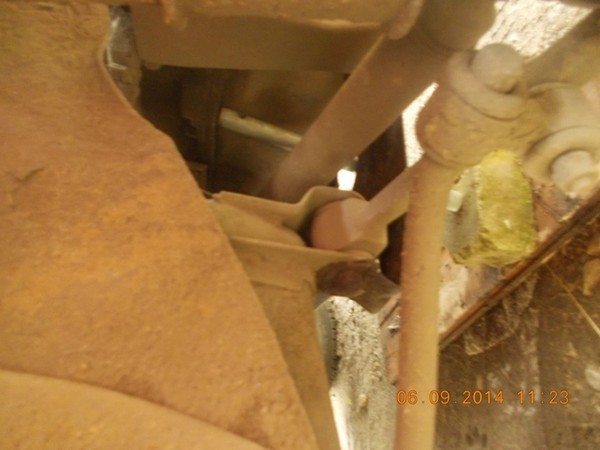
i don’t know how to turn the photo, so we turn our head to the left
31:120We begin to lower the car slowly. Accordingly, the engine will begin to rise. BUT up to a certain limit until the power steering pulley rests against the engine mount bracket. That is why we first bring the belt to the pillow, and then we begin to raise the engine. Otherwise it will not work. The pillow will dangle, but that's exactly what we went to. Move the pillow closer to the engine and remove the belt.
31:828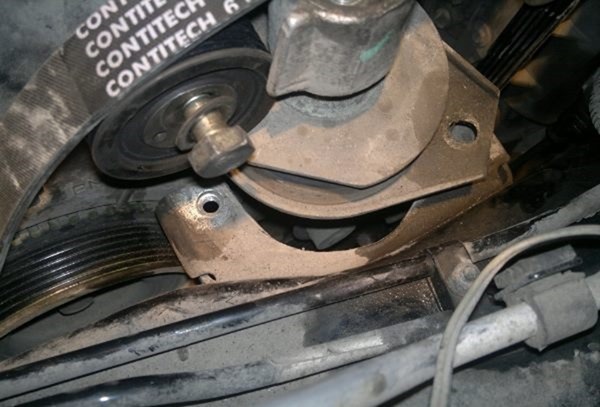
In no case, do not cut the old belt, when you get the old one it will be clear how to insert the new one, I took out the old one for about three minutes, but I inserted the new one in 30 seconds.
We put it under the pillow, we start to raise the car so that a gap forms between the power steering pulley and the bracket. at the same time, immediately while the pillow is still moving, we attach the bolts. We put the belt in place, put a washer-barrel under the nut of the pillow, tighten it, put the wheel., Put the tensioner roller.
I pull the roller clockwise, it's more convenient for me.
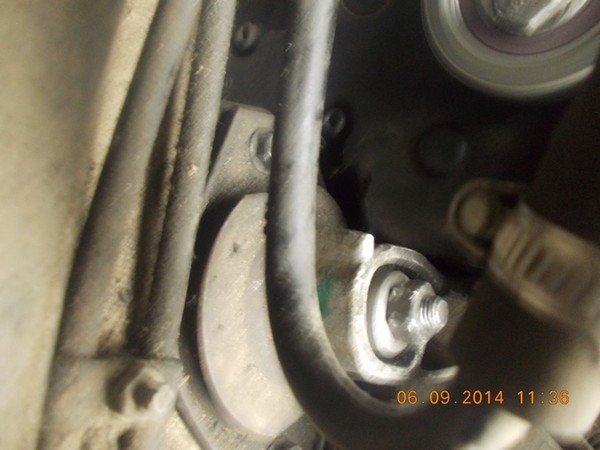
Here head to the right. Now the cushion attachment nut can be unscrewed with a regular head, and, if desired, with a short open head Rating 0.00
53628The new Priora can be easily compared with budget foreign cars. Updated russian car received the necessary set of options, which raised comfort to a new level. This was facilitated by the installation of a power steering (GUR) and an air conditioner. The only drawback of this upgrade is that it has become more difficult to get to the generator and its belt.
In this article, we will tell you how the belt is replaced and tensioned in new versions of the VAZ 2170. After reading the article, the reader will know what kind of faults the belt in the air-conditioned version has and when it needs to be changed or tightened.
Description and location
The task of the generator is to provide power to the vehicle's electrical equipment. Like the rest of the components in the car, the generator is powered by the engine to ensure constant rotation of the rotor on the generator shaft and crankshaft power plant installed pulleys. A belt is pulled between them. After starting the engine crankshaft comes into rotation, the movement is transmitted through the belt to the rotor.
On latest models Priors with the help of this element are driven by the air conditioner and the hydraulic booster. In this material, the replacement and tension of the belt in a new model car, where additional equipment is installed, is disassembled.
The belt is consumable, which requires replacement after 45-60 thousand kilometers. The size of the standard belt on the Priora with air conditioning is 1125 mm.
Symptoms and solutions
You can only determine if a replacement is needed or you can simply tighten the power steering belt with air conditioning on the Priora 16 valves only after inspecting this component. To do this, just open the hood and examine the belt - it is located next to the right front wheel. There are signs that it is time to check the alternator belt: something whistles and squeaks from under the hood.
The reasons may be as follows:
- Antifreeze, oil, or other fluids have spilled onto the alternator pulley or belt.
- The belt is worn out - you can tell by its appearance.
- The tension has dropped - in this case the component must be tightened.
- The bearing in the generator is worn out.
When the belt whistles in the Prior on 16 valve, it's time to diagnose. If there are cracks, tears or other serious damage on its surface, then replacement is required. In the case when the component of the generator with hydraulic booster and air conditioning looks normal, you should check its tension, the optimal level of deflection is 6-8 mm - you need to press the component in the middle between the generator and the pulleys.
The surface shows coolant stains or engine oil? If the contamination is not significant, they can be cleaned. In the case when the liquid has eaten into the material, cleaning will not bring any results, a replacement is needed here. If the component is well tensioned and no damage or stains are visible, then it is worth moving on to checking the bearings. They may need to be changed.
Sometimes the generator consumable whistles due to low quality products. This is especially true of Chinese counterparts, which high quality they do not differ. Such a belt whistles strongly already at the fifth thousand run, it is better to change it right away. We recommend buying consumables designed for your model, in our case, for Priora with a 16-valve engine.
Tensioning the alternator belt
If the quality of adhesion of pulleys, rollers and the surface of the alternator belt decreases, the tension should be increased. Also, this procedure should be carried out if the consumable is used for more than 15-20 thousand kilometers, but there is no damage (replacement is not required). If you opened the hood and saw a frayed tape, then go straight to the replacement instructions, then you still have to drag it. To carry out the work, you will need a special key for the roller and standard keys for 19 and 17.
Process and result verification
data-lazy-type \u003d "image" data-src \u003d "https://vazremont.com/wp-content/uploads/2016/10/pic4.jpg" alt \u003d "(! LANG: Tighten the nut to save the result" width="700" height="525" srcset="" data-srcset="https://vazremont.com/wp-content/uploads/2016/10/pic4..jpg 300w" sizes="(max-width: 700px) 100vw, 700px">!}As you can see, the process consists of only three steps, but the main step is to check the tension on the Priore with air conditioning and power steering (or with these components separately). In this case, the tension should be stronger when compared with the basic version of the VAZ 2170 with 16 valves. On the longest distance between the shaft and the pulleys, the material should bend approximately 5-6 mm.
You can determine the result by sound: when driving, slipping is audible, the belt whistles - insufficient tension; from under the hood, after adjustment, the hum of the bearings is heard - the component will be overtightened, the clip must be loosened.
Replacement
Required tools
We will prepare everything you need for repair:
- Lubricant WD-40.
- Keys 19, 17.
- Two copies of the key for 13.
- Head for 10 and 17.
- Jack.
- Special wrench for tensioning.
- Lever arm.
The alternator belt on the modified Priore with air conditioning and power steering runs around the engine mount. The designers decided to perform such a revision for the Priora 16 due to the fact that the power steering pulley is set low. Hence the additional steps to be aware of.
Step-by-step instruction
- First of all, we need to moisten the bolts that hold the bracket and motor mountings. Wait 10-15 minutes for the grease to spread over the surface;
- Now you can unscrew the bracket securing nut, the next step is to raise the front right wheel. The operation is performed using a jack;
- The Prior should be slightly released on the lift. We turn to the tension roller - now it can be easily removed;
- We need to unscrew the bolts of the engine mount, for this, bend the belt so that it does not interfere with the work;
- When the bolts of the cushion are removed, the Prioru must be lowered so that the motor begins to hang out. It is not necessary to completely remove the pillow, just move it towards the motor. Now you can dismantle the alternator belt and install a new consumable;
- When the replacement is completed, we need to return the engine on the Priora to its original position, for this we raise the Priora 16 on a lift. Observe the position of the alternator belt and engine mountings. Do not forget about the bracket and pillow attachments that we removed at the beginning of the process;
- The final step is to mount the wheel.
The replacement is over, it remains to adjust the alternator belt with power steering and air conditioning. The new consumable on the Priora will have to be tightened several times until you get the required tension. If a component whistles or a hum is heard from under the hood, then you need to re-adjust until these defects are eliminated.
Car Lada priora is very popular. This is further proof that russian cars can be of high quality. They actually boast good comfort, handling, and attractive appearance.
The differences between the new model and previously released cars, first of all, are hidden in engine compartment... Everything is arranged in a completely different way here. Therefore even experienced craftsmen they do not always know how to replace the alternator belt on the Priora, as well as its tension.
New Priors are equipped with a large number of systems, and are also available with an impressive list additional equipment... Read more about the new generation in our article.
Although the installation of an air conditioner and power steering on the Priora had a positive effect on comfort, however, as a result of such changes, access to the generator became quite difficult. The Priora alternator belt with power steering or air conditioning has a longer length compared to the usual version of the car, so we will consider for two modifications.
How is the tension of the alternator belt on the Prior
As a rule, the need to tighten the alternator belt arises in connection with its wear during use, as well as a decrease in the quality of adhesion of the belt surface with the planes of the alternator rollers and pulleys.
If your beloved Lada Priora is on, you will have to start tightening it. You can tighten the alternator belt on the Priora using a 19 key and a special roller key. He is shown in the photo below.
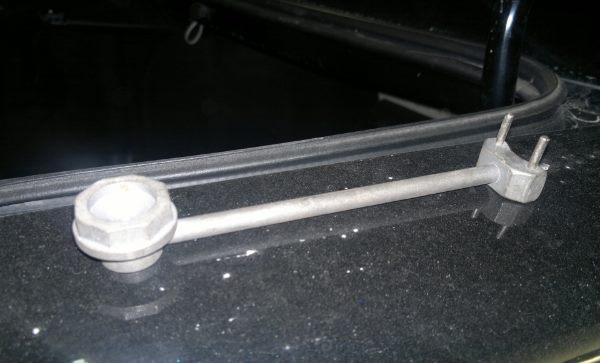
Belt tension runs like this:
- Loosen the roller nut, for which its holder must be held with a wrench.
- Turn the eccentric ring of the alternator belt tensioner with the minimum wrench rotation, which will result in better belt tension.
- Tighten the tension roller nut.
When correct execution procedure in the basic version of the model, in the longest section between the pulleys, the belt should bend by about 10 mm. In the case of the version equipped with air conditioning or power steering, you need to tighten the belt a little more. As a rule, this procedure is trusted by specialists. If you do not have such an opportunity, we advise you to do everything "by ear". If the belt is too loose, whistling or slipping will occur. Otherwise, you will hear the hum of the generator bearings.
Replacing the alternator belt Priora (version without additional equipment)
According to official data, the belt should be replaced every 60 thousand kilometers traveled. If the car is used very rarely, it is necessary to change the alternator belt on Lada Priora every two years, and in this case it does not depend on the mileage.
Before replacing the belt, you must install vehicle on inspection pit... Next is the preparation of the following tool:
- key for 10;
- key for 13;
- devices for dismantling the fender liner (it also needs to be removed);
- a wheel wrench (we will use it to remove the right front wheel).
First you need to loosen the nut using a 13 spanner (see photo).
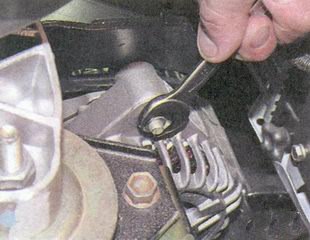
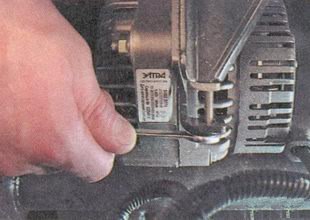
Next, we move the generator itself in the direction power unit... Unscrew the front right wheel and remove it. Then we perform similar actions with the fender liner. Only then can the old alternator belt be removed and replaced.
After installing a new belt, you must complete all the steps in reverse order... Do not forget to correctly adjust the tension of the alternator belt on the Prior. If the belt is too loose, the battery may not be fully charged, and if the belt is overtightened, this will lead to too quick failure of the generator bearings.
How to replace a generator belt on a Priore with power steering and air conditioning
Since the power steering pulley in this modification of the model is installed at a low height, the designers decided to run the generator belt around the support of the car's power unit. This means that in such a machine, the replacement of the alternator belt can be carried out only under appropriate conditions.
- wrench for tensioning the alternator belt;
- key 17;
- keys for 13 (2 pcs.);
- 10 head (under an asterisk or regular);
- head 17;
- WD40;
- suitable lever.
First, use WD40 to moisten the engine mount and bracket mounting bolts.
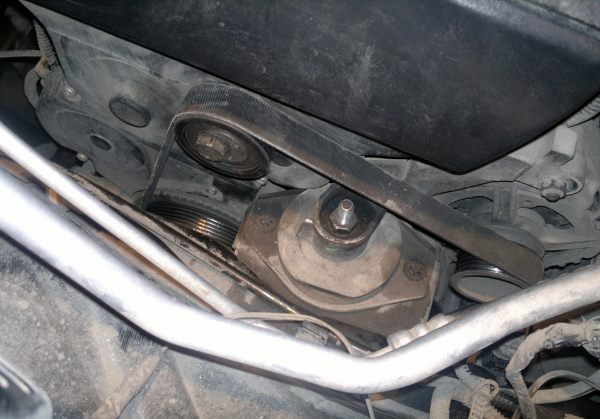
After about 10-15 minutes, you need to unscrew the bracket nut, after which we raise the front right wheel with a jack. Then you need to put something suitable under the motor and remove the wheel.
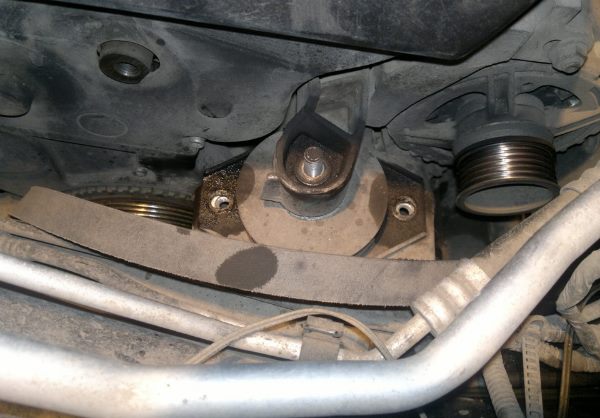
After that, you need to lower the car so that the engine starts hanging out. The pad should be pushed towards the engine, which is enough to remove the alternator belt and install a new one.
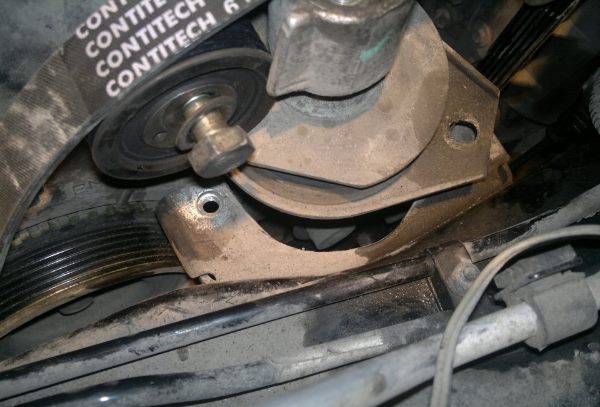
At the final stage, it is necessary to raise the car on a jack to lower the motor. During the procedure, it is necessary to control the position of the pillow, as well as the alternator belt, which we replaced. Then don't forget to tighten the cushion bolts as well as the nut that secures the bracket. At the end, you need to put on the wheel and completely lower the car.
As you can see, those who want to change the alternator belt on the Priora will have to work a little, but the reward will be correct work of all auto systems.
He was eventually changed. I bought it myself. We put it on the Dubrovka service. Generator KZATE 90A
New generator
And everything seems to be working out. But then the heat came and the need for an air conditioner. And the belt whistled all over the area. The napruga sags, the whistle. The result is that you cannot use the Conder.
Let me think I'll pull up the unfortunate. And then fail overtook me. Since the belt is not tensioned. The problem turned out to be trivial: merchants original spare parts were not aware of which belt should be on the Priora with air conditioning and sold me the following
Wrong belt
I confess, I myself am to blame for I did not bother to look into the Kama Sutra. There was no time for that - the generator died suddenly.
The correct belt for Priora with air conditioning and EUR has a code 6PK 1115!
So I went to the store and bought it.
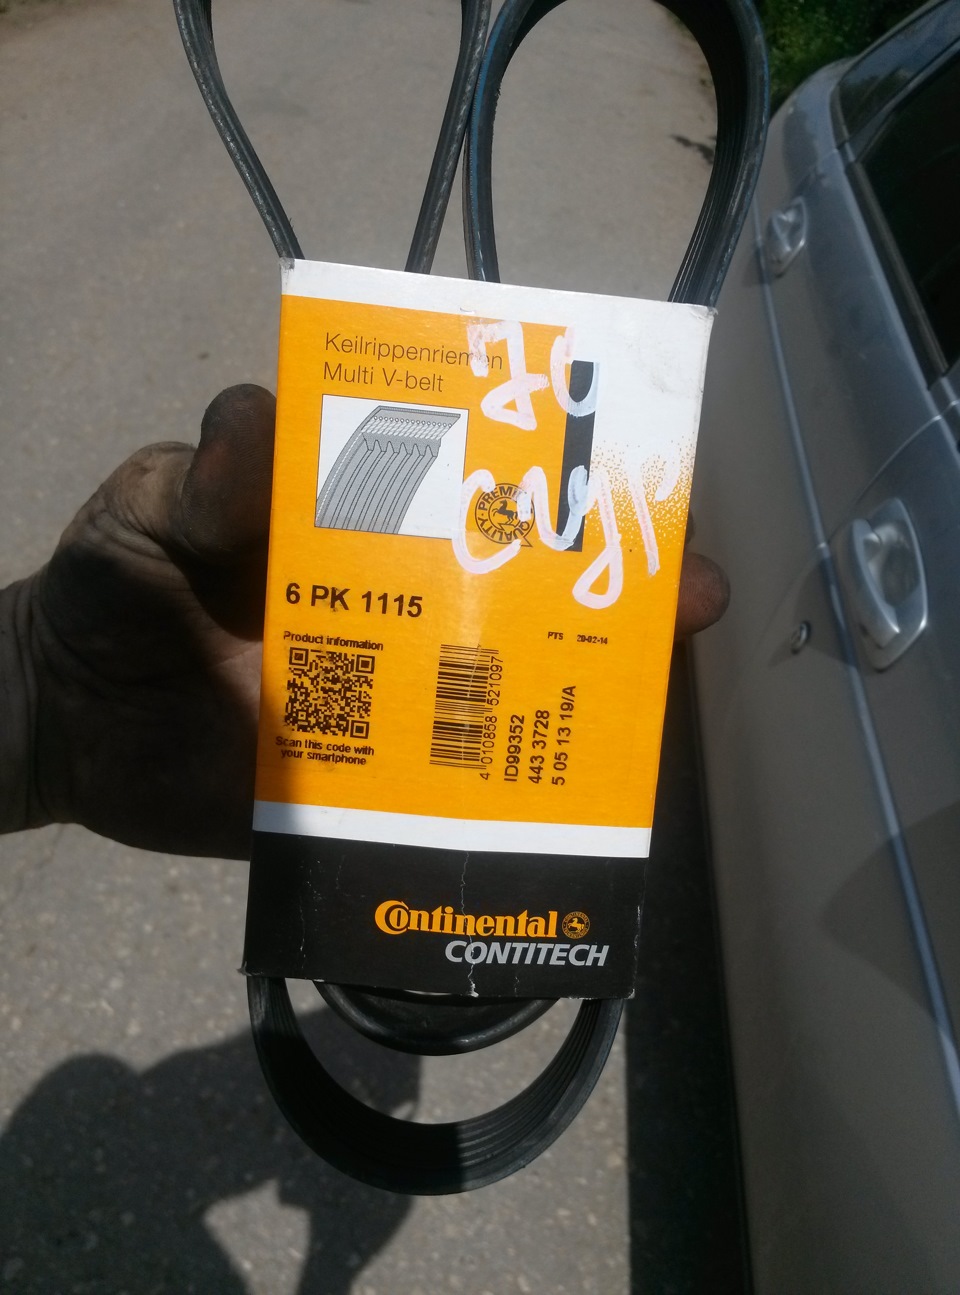
Correct belt
Then the question arose: How or Where to change?
After listening to the advice and comments that it was difficult and easier to give 350 hard earned rupees, I decided that I no longer want to trust the handshakes, at least for now. I will change myself!
And so, manual)
1. We buy a belt 6PK1115
2. Unscrew the tensioner roller with a 17 key.
3. Unscrew the bolts securing the engine mount with the TORX E10 head.
4. Lift up the front right wheel and remove it.
5. Remove the side dust cover (fasten with self-tapping screws under an asterisk!)
6. Substitute an emphasis (wood) under the engine crankcase
Framed a piece of wood
7. Slowly lower the car on the jack, allowing the engine to rise above the body just enough to fit the belt.
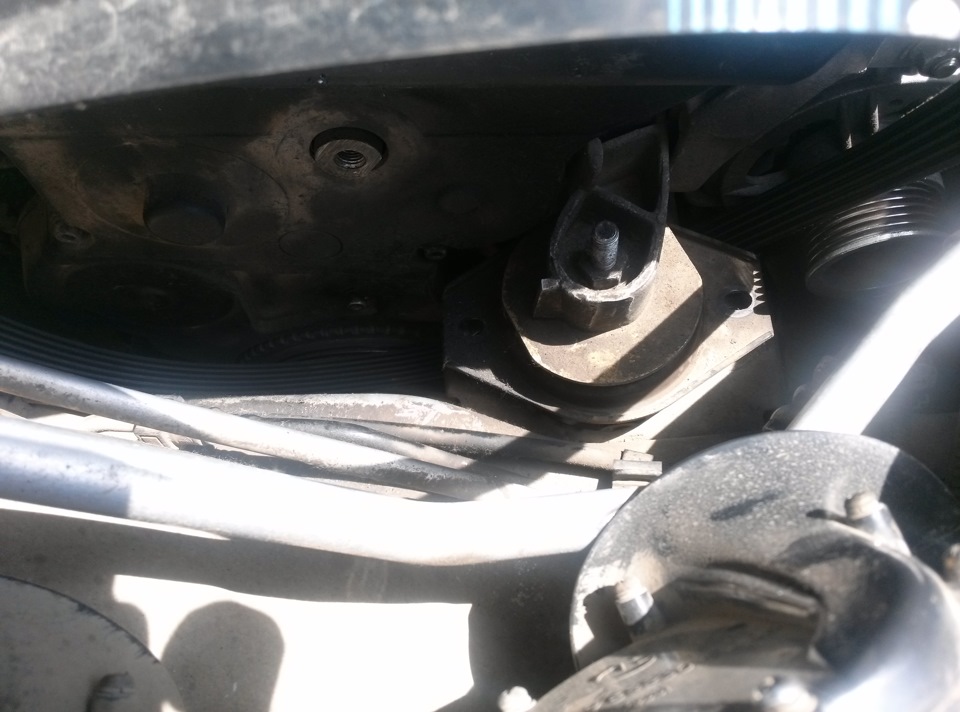
Suspended engine
8. Remove the old belt and put on a new one.
9. Check if the belt is on the air conditioner pulley.
10. Return the tension roller and tighten the belt.
11. Raise the machine to remove the support from under the crankcase.
12. We fasten the engine mount.
13. Check by starting the engine and turning on the air conditioner.
14. We return the plastic protective case and the wheel.
15. We lower the car from the jack.
16. We check on the go, rejoice at the result.
Finally, I will explain why I did not go to the service.
Starting to remove the old belt, I noticed that one of the timing cover bolts was almost completely turned out. It is in the very bottleneck and the servicemen simply put on it, what they have instead of hands.
Further more. I unscrew the pillow and see that the bolts are also not tightened by about 5mm. (The second photo shows). The belt is wrong - they didn't notice. Tired of this slovenliness.
Well, actually the afterword.
The whistling problem went away, but the drawdowns remained. Drops to 12.2 with the included Conder.
And yet, the day before the belt was replaced in the morning, I started it, but the charge light did not go out and the spill was 11.7, but it was worth the gas and the lamp went out and the spill was 13.3
Hiking on a new generator covered voltage regulator?
The belt transfers rotational energy between the pulleys crankshaft and generator. The technology for replacing the alternator belt on Priors) and air conditioning differs from that used on those machines where these units are not installed. There are also differences in belt replacement technology on 8- and 16-valve engines.
How to determine the need for replacement or adjustment
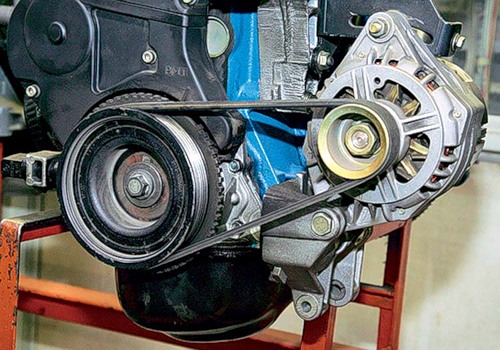
The condition and tension of the belt must be checked at least once a quarter.
This will allow early detection of weak tension or damage to the belt. A whistle that appears during engine start and acceleration indicates a weak belt tension. (as well as weak charging current) can also indicate a weakening of the alternator belt. The service life of a high-quality alternator belt is 40-60 thousand kilometers, or 2 years. The belt must then be replaced, even if it looks normal. If cracks or tears appear on the belt, it must be replaced regardless of the mileage. To determine the condition of the belt, it is necessary to carry out diagnostics.
Checking the condition of the belt
On 8 and 16-valve engines, the diagnosis is carried out in the same way. To do this, raise the right front side of the car with a jack and substitute a safety support for the mod. Do not work under the machine. Any awkward movement can cause the vehicle to jump off the jack and fall to the ground.
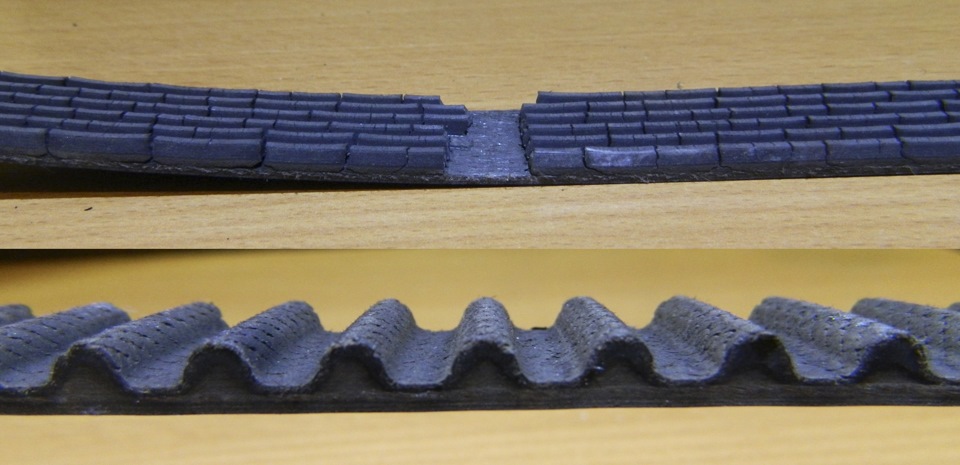
Remove the front right wheel, then unscrew the screws and remove the plastic fender liner. This will allow you to get close to the crankshaft pulley and alternator belt. To check the tension, press the belt on the longest section. When pressed, it should push through by 1 cm. If it is easily pressed by 1.5 - 2 cm or more, tighten it. If it is pressed by less than 1 cm, the tension must be loosened.
Inspect the belt and idler pulley carefully. If the belt has cracks, tears or severe abrasions, it must be replaced. If grease comes out of the roller, it and the belt must be replaced. Try to turn the generator impeller by hand. If it spins, the belt is not tight enough.
On 8-valve engines not equipped with power steering, the alternator belt is tensioned using adjusting bolt... To do this, you do not need to remove the wheel and wheel arch liner, because it is convenient to get to it through the hood. If the belt is loose, turn the bolt clockwise, when overtightened, counterclockwise.
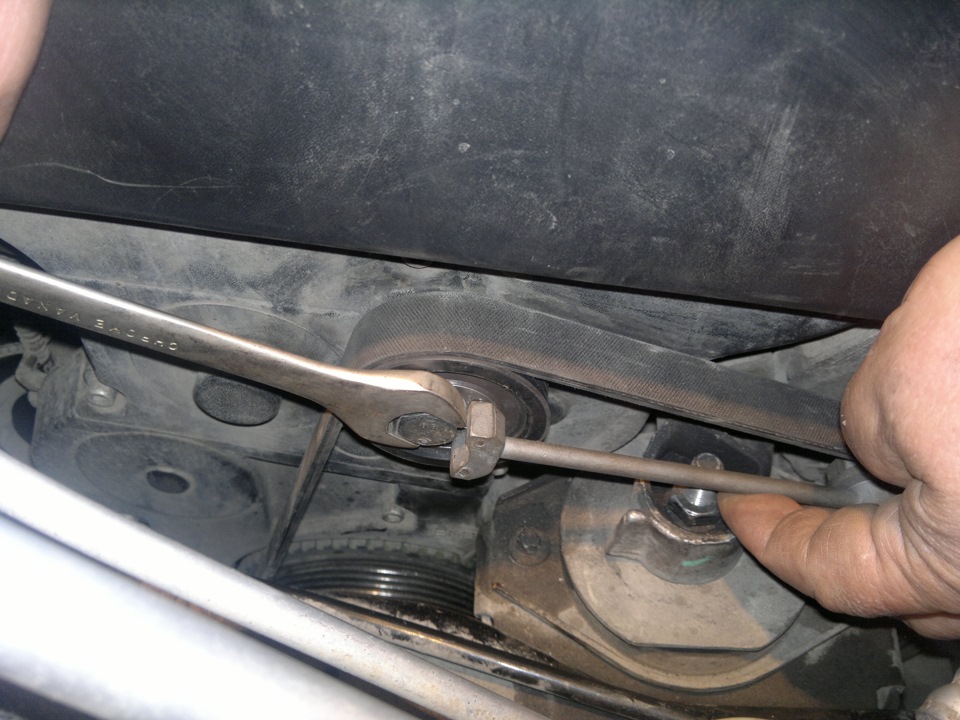
On the same engines with power steering and 16-valve motors, the belt is tightened using adjusting roller (alternator belt tensioner). To do this, you need a special key, which can be purchased at any auto parts store. For such an adjustment, you will need to remove the plastic liner.
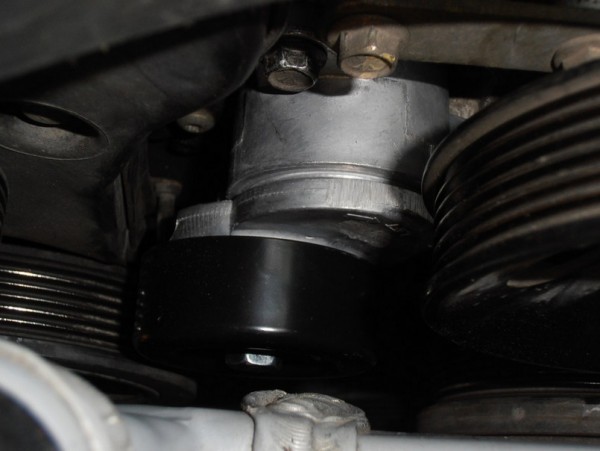
To adjust the tension of the alternator belt on power steering equipped 8-valve and any 16-valve engines, loosen the tension roller fixing bolt. Insert the special key into the roller and adjust the belt tension by turning the roller clockwise or counterclockwise, then tighten the fixing bolt.
How to change the alternator belt on different engines
The generator mounting location on 8-valve engines is subject to availability. If the power steering pump is installed, then the generator is placed above it using a mount similar to that used on 16-valve motors. Therefore, the technology on 8-valve engines without power steering and air conditioning differs from the same operation on any other engine.
8-valve engine without power steering
Loosen the nut that secures the generator to the guide bar and slide it towards the engine. Remove the old belt and put on a new one. Move the generator away from the motor and tighten the nut slightly. Tighten the tension bolt and from time to time with one finger press on the belt in the middle between the alternator and crankshaft pulleys. It should be pressed through by 1 cm. If it is pressed more strongly, it is necessary to tighten the bolt a little. If the belt cannot be pushed in, loosen the bolt. When you are finished adjusting the belt tension, tighten the fixing nut.
8-valve engine with power steering and 16-valve engine
Remove the front right wheel and plastic fender liner. Place a jack under the engine. Some car enthusiasts and craftsmen prefer to use a stand instead of a jack for this, adjusting the engine height by raising and lowering the body. But this method is much less secure, because it is impossible to install a support stand. Without it, any work under the car is associated with a fatal risk.
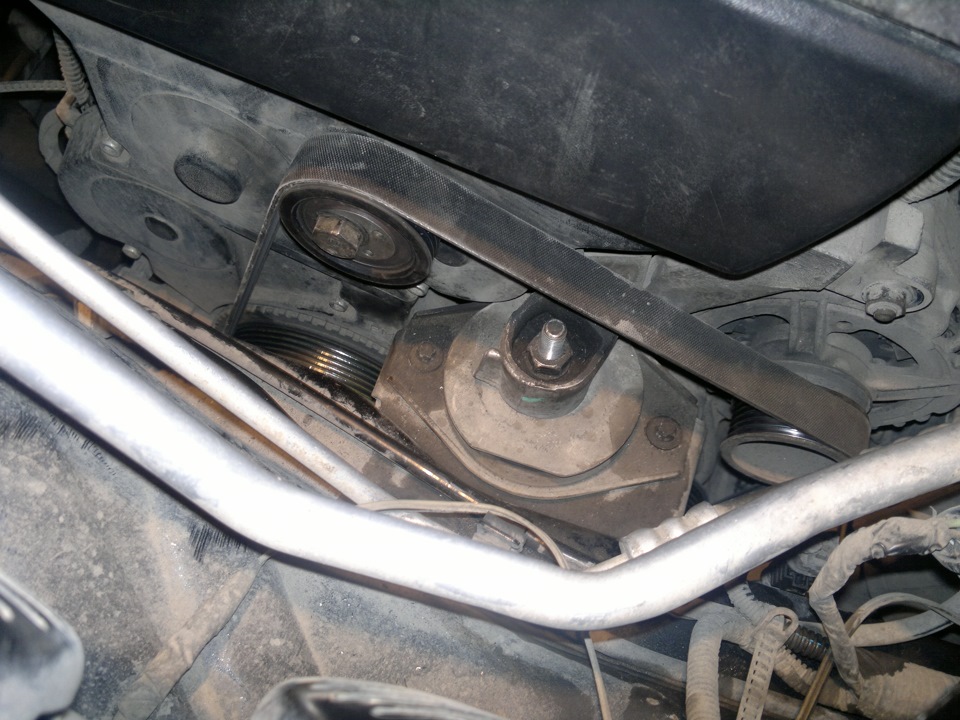
Loosen the adjusting roller fixing bolt and use a wrench to set the minimum tension on the alternator belt. Unscrew the front engine mount and raise the engine so that it is above the mount bolt. Remove the belt from the roller, and the generator, power steering pumps and air conditioning. Unscrew the tension roller fixing bolt completely and remove the roller. Every time the alternator belt is replaced, as well as when grease is found protruding from it, the roller must be changed.
Pull out the belt, then install a new one. Do not confuse the order of the belt passing through the pulley and rollers. Install the tension roller and adjust the belt tension as described above.


