Front camber is the angle between the vertical and the plane of rotation of the automobile wheel (in the figure, the "alpha" angle). If the top of the wheel is tilted towards the center of the machine, camber is considered negative, and if outward, then positive. It is important that the left and right camber sizes are as close to each other as possible. The difference between them is the following parameter.
The allowable camber difference should be no more than 30 "(minutes), as it can cause the machine to drift away from straight-line movement.
Front toe-in is the angle between the longitudinal axis of the machine and the plane that passes through the center of the left or right wheel separately.
Toe front total is formed as a result of mathematical addition of values \u200b\u200bof separate toe-in.
Caster (or caster) is the angle between the wheel's axis of rotation and the vertical in a side view. Caster is a very important parameter. The difference between the caster values \u200b\u200bfor the right and left wheels is greater than the permissible values, and the vehicle is skewed towards the wheel, which is of lesser importance. The difference between the caster values \u200b\u200bforms the next parameter.
The slope difference is expressed as a result of mathematical subtraction from the larger caster value of one wheel to the smaller one and should be no more than 30 ".
Front axle offset is the symmetry of the front wheels in relation to the machine's axis of symmetry. The front or rear axle is a drawn line between the center of rotation of the right and left wheel.
This is a very important parameter. After all, the closer the axis offset value is to 0, the better. A positive value of this parameter indicates that the left front wheel stands slightly closer to the back than the right. And with negative values, the opposite is true. therefore this parameter characterizes the state of the front part of the body (curvature of suspension elements, displacement of side members, etc.). In theory, a deviation of 20-30 "is allowed. However, the smaller the better.
To ensure good stability and control of the machine, the front wheels are set at special angles relative to the body and suspension parts. There are 3 parameters that can be adjusted: camber, toe and angle longitudinal tilt pivot axis.
So, the angle of the longitudinal inclination of the axis of rotation is the angle between the vertical and the line that passes through the centers of rotation of the ball joint with the bearing of the support of the telescopic strut, in parallel to the longitudinal plane of the machine axis. This angle helps stabilize the steer wheels in the forward direction. The angle depends on the number of shims at the ends of the brace. Washers are added to reduce the angle, and removed to increase. When installing or removing one washer, the angle changes by about 19 ". The reasons for the deviation of the angle from the norm are as follows: moving a moving machine to the side, different forces on the steering wheel when turning left and right, as well as one-sided wear of the wheel tread.
Camber is the angle between the plane of rotation of the wheel and the vertical. This angle during suspension operation contributes to the correct position of the rolling wheel. It can be adjusted by turning the steering knuckle top mounting bolt. In case of a strong deviation from the norm of this angle, it is possible to move the machine from the movement "straight", one-sided wear of the tread.
Toe-in is the angle between the plane of rotation of the wheel and the longitudinal axis of the machine. Toe-in can also be defined as the difference in the distance between the rim flanges measured at the front and rear of the wheels at the level of their centers. Toe-in ensures correct position steered wheels at different speeds, as well as angles of rotation of the machine.
Toe can be changed by rotating the adjusting clutches with loosened locknuts on the tie rod ends. Before making adjustments, the steering rack is set to the center position (when the steering wheel spokes are horizontal). Signs of a deviation from the norm are: squealing of tires in corners, strong sawtooth tire wear in the transverse direction (even with small deviations), increased fuel consumption due to high rolling resistance of the front wheels (the run-out of the car is several times less than intended).
It is recommended to check and adjust the angles of the front wheels at the service station. There the machines are installed on a horizontal platform and loaded in accordance with the recommendations of the manufacturer. It is possible to check and adjust the angles on an unloaded machine, but the results will be less accurate. Before that, it is necessary to do preparatory checking actions: the tire pressure must correspond to the norm, the tread wear on both wheels should be approximately the same, there should be no backlash in the bearings and steering, and the wheel disks should not be deformed (axial runout - no more than 1 mm , radial - no more than 0.7 mm).
It is imperative to check the wheel alignment angles when replacing or repairing suspension parts that affect these angles. Due to the fact that the installation angles of the front wheels are interconnected, first of all, the caster angle of the steering axis is checked and adjusted, then camber and, at the end, toe-in.
A run-in vehicle in a completed state and with a payload of 320 kg or 4 people in the cabin, as well as 40 kg of cargo in luggage compartment, wheel alignment angles must be within the following limits:
- caster angle 1 ° 30 "± 30"
- toe-in 0 ° 00 "± 10" (0 ± 1 mm)
- camber angle 0 ° ± 30 "
Wheel alignment angles in the completed state:
- caster angle 0 ° 20 "± 30"
- toe-in 0 ° 15 "± 10" (1.5 ± 1 mm)
- camber angle 0 ° 30 "± 30"
If you do not have money to adjust the wheel alignment in the service or the service station is located far away, then you can independently adjust the wheel alignment. There are many ways to make wheel alignment at home, but we offer 3 of the most optimal and interesting ones.
This requires a minimum of tools and devices.
And you probably have all of them at home.
The first way to self-adjust wheel alignment.
To complete the work, you will need such tools: a matchbox, scotch tape, threads, a needle, a ruler, a building level, a set of keys.
Before starting, you need to pump up the wheels, put the car on a horizontal overpass. You can do this on the inspection pit, but here it is necessary, due to the lining under the wheels of pieces of wooden boards or chipboard, to put the car strictly horizontally, checking the horizontal with a building liquid level.
It is possible to diagnose and perform wheel alignment not only at service stations, but also by your own efforts in your garage. This view renovation works if desired, even a beginner can do it. All that is needed for this is a minimal understanding of these concepts (camber and convergence), as well as a desire to delve into the device of the car. In this article I will try to present the information in more detail so that the reader, after reading it, can understand without any problems how to do wheel alignment at home and what should be done for what?
It is generally accepted that the angle between the vertical of the wheel and the plane of its rotation is camber. If you look at the wheel from the front, then its deviation to the left or right shows how much the angle has changed. Camber can be divided into two types: positive and negative. If the wheels are inclined inward, i.e. their extreme lower points are closer than the upper ones, then this position is called positive camber. And if everything is exactly the opposite, this is a negative collapse.
Convergence is usually called the angle that determines the ratio of the plane of rotation of the wheel to the plane of the surface on which the car stands. In this case, convergence can also be divided into two options: positive and negative angle wheel alignment. In the case when the wheels of the car are offset to the center, then this position is called positive, and if outward - negative.
In general, on many vehicles, only the front wheels may have very little positive toe. Predictability and stability on the road depends on this parameter (toe-in) and how it is configured. Incorrect diagnosis and adjustment can cause premature rubber wear.
Required tool
Initially, you need to prepare a place for the inspection. It is very important to have inspection pitas the jack will not be able to provide such access to the suspension. Therefore, it is imperative to create all the necessary conditions. You can also go to the overpass, but depending on how high it is, since the rise of more than one and a half meters will be too great, it is better to find a viewing hole. 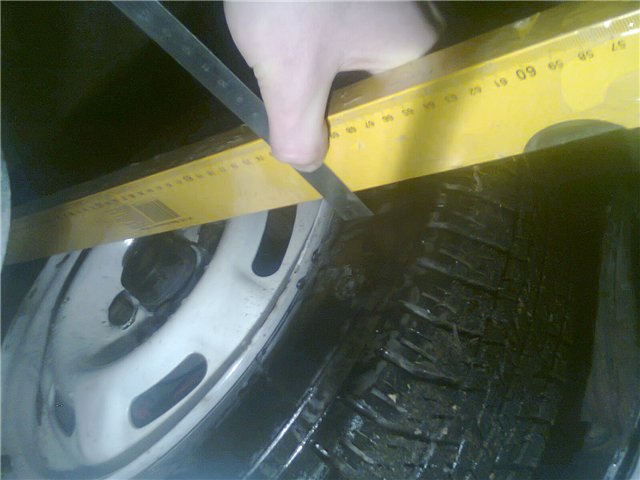
Next, you need to prepare a tool (any home tools are suitable for this kind of adjustment work). From the tool you will need: a standard motorist repair kit, a construction plumb line, chalk (you can take children's chalk kits). You can also prepare a container of clean water and rags. The latter can be useful for cleaning hands or some parts of the car. It is worth allocating special work clothes for such an occupation, since the pallet of the car is often dirty and in machine oil... The latter, as you know, is very difficult to wash with any means.
If you decide to do the wheel alignment yourself for the first time, it is better to bring good specialist, he can control the execution process. it good condition in order to do everything right.
Step-by-step instruction
How to do the camber toe? Before starting work, it is important to learn the basics of the car and its design. Each type of car has its own characteristics, so it is very important to take them into account when working. The meeting will be done quickly if you have all the home tools at hand or an assistant who will quickly give them. The first step is to do the collapse, and after the descent. 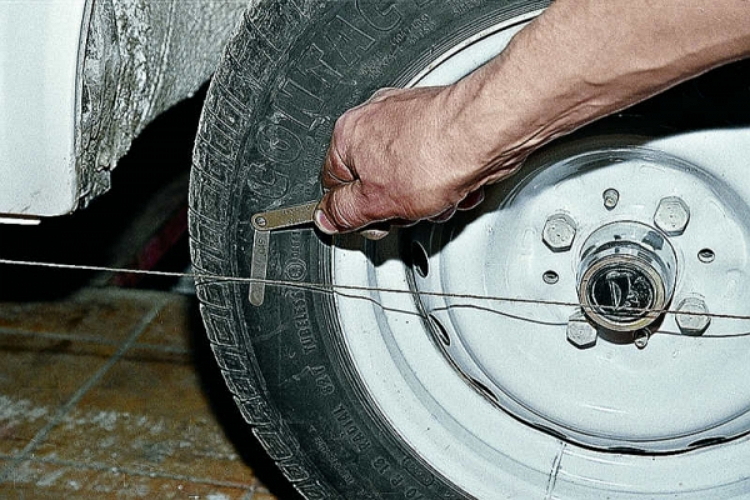 Since all this will be done outside the service station and not by specialists, you need to be careful and careful to make the collapse of the wheels of your iron friend no worse than an ace of professionals.
- We set the wheels of the car along a straight line of motion. This condition must be met to make correct measurements.
- Along the line of the diameter of each wheel with white chalk, it is worth making marks that run above and below.
- We take a plumb line and attach it to the wing of the car in the area of \u200b\u200bthose marks that we put.
- We measure the distance from the rim to the attached cord. If it is no more than three millimeters, everything is in order.
- We start the car, drive off the overpass or from the pit and turn the steering wheel 90 degrees. After that, we again call in at the place of repair and carry out similar actions. This action will be done in order to average the obtained values \u200b\u200band get a more accurate value, which does not depend on the positions of the wheels, the height of the wheel arch liners, etc.
- We average the obtained measurements and fix them. It is imperative to correctly record these values \u200b\u200band use the same tape measure for measurements.
- Remove the wheel, release the bolts of the shock absorber strut brackets in the direction steering knuckle... It will move outward or inward, it all depends on the correct measurements. For example, if the measured difference was 3 millimeters, then we shift the steering knuckle by this amount.
- After the work done, the wheels of the car are installed. Be sure to install them correctly and re-measure them. Now the difference should be zero, and if not, you can repeat the steps described above.
It should be borne in mind that the camber rate for rear-drive cars is + 1- + 3 millimeters, and for front-drive cars from -1 to +1.
 Now we will do the convergence. For this it is best to use telescopic ruler, but in the absence of it, you can do with improvised means and tools (rulers with a clear scale will do).
- In order to correctly do the descent, we install the car in the same way as when adjusting the camber. The wheels are set straight.
- Chalk marks inside the tires, put a ruler on these points.
- Next, the zero value is aligned with the fixed scale pointer. In practice, there are cases when the ruler is in contact with the body and suspension, but this is not correct.
- Next, you need to drive a little forward or push the car so that the ruler moves back a little, check its readings.
- If the measurement is zero, everything is in order, if it has decreased, tighten the steering rods, if it has increased, on the contrary, shorten it with the clutch.
- After these steps, it is worth re-doing the above work and checking the convergence again. Everything should be done according to the instructions, do not forget about the safety rules.
Now, after reading this article, it will not be problematic for any driver to camber and derail. There is no need to immediately contact the services in the event of a malfunction. 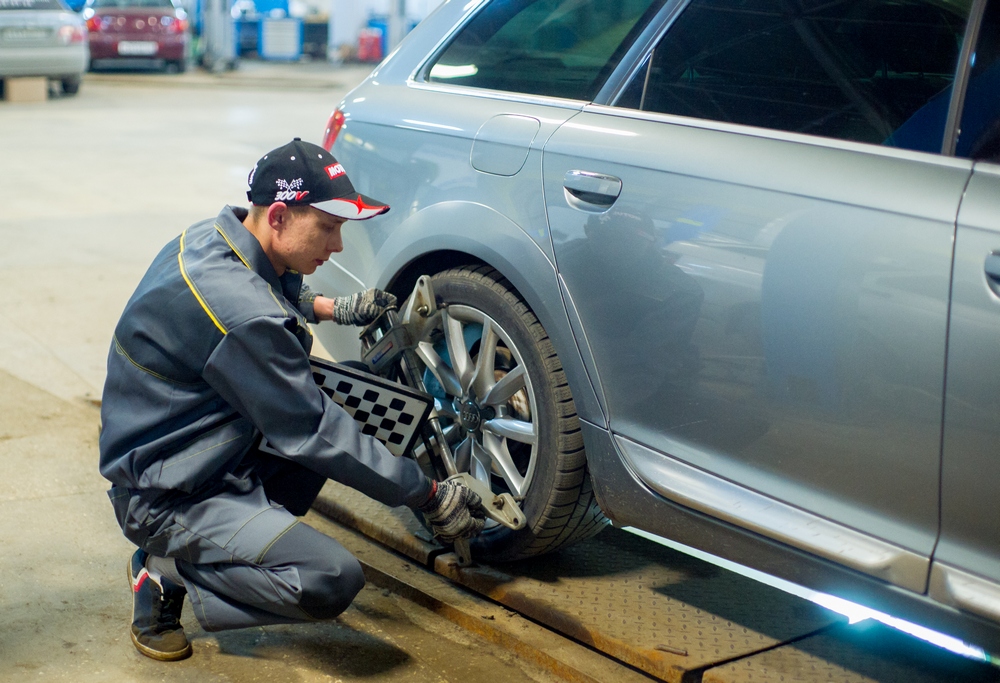
It is recommended to view the pages of this site with a monitor screen resolution of 800x600 pixels.
And again - the rope! The results are great!
One of best advice past years, which you sometimes remember, of course, I consider a way to check the wheel alignment angles using a cord (ZR, 1998, no. 6). I have been using it for over twenty years - first on domestic, and now on foreign cars. I changed it a bit.
I pull one cord along the front left wheel, the second along the front right, securing them to the suspension behind the wheel and to the stop in front (I use a suitable cinder block as a stop). Moving the stop, I set the cords as shown in the figure. Then I measure the distances and and b ... Of and subtract b ... Each millimeter of difference corresponds to an angle of 1.4 minutes. Toe-in of the rear wheels can be measured in the same way, if required.
Before doing this, you need to make sure that the suspension elements are working. To do this, I pull back the cord stops (cinder blocks) so that there is a gap of about 1 mm between the front of the tire and the cord. Then the assistant presses and releases the front of the car, and I observe the size of the gap. If it changes by less than 0.5 mm, the suspension elements are considered serviceable, if more, the suspension needs to be repaired, otherwise the adjustment of the toe angle will do nothing.