After replacing the shock absorbers on the front wheels, it is necessary to make the wheel geometry. What we need in order to make wheel alignment.
We need: a set of tools:

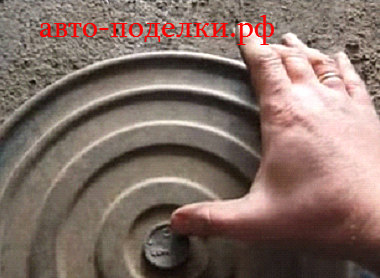
and two such pancakes, quietly rotating around their axis.
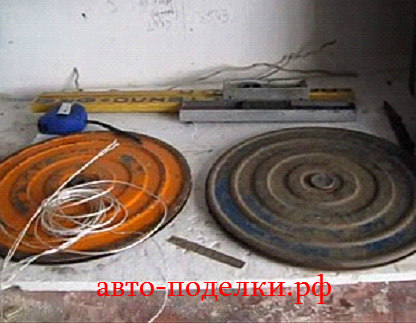
I think it's easy to make them yourself. Between themselves, they must be independent, since when adjusting one wheel, the second must stand without changing its position.
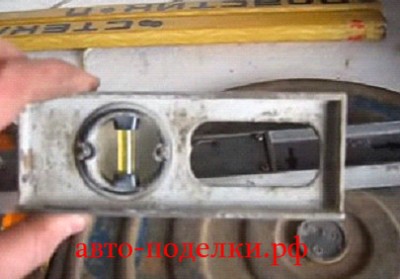
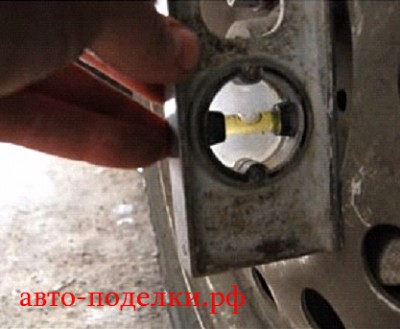
We also need such a plumb line:
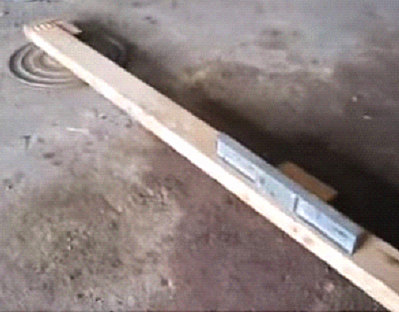
and two equal bars.
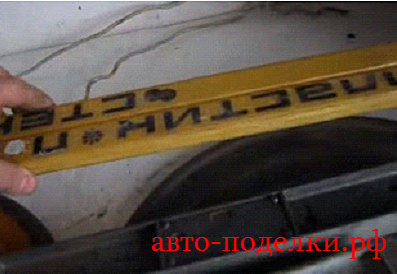
In our case, they are 60 centimeters each.
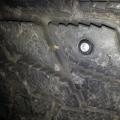
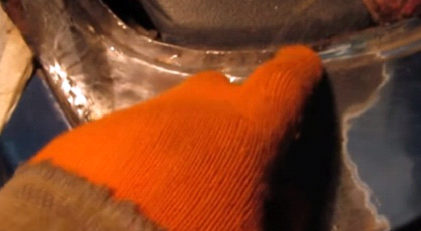
We also need a tape measure and two pieces of aluminum wire. The first step is to check the level of the curvature of the floor of the room where you are going to make the adjustment.
If the floors are uneven, then when installing pancakes, you need to achieve the same level between them.
Now we drive the car onto our pancakes, here in this part with the front wheels,
in order to make the collapse possible.
When we are done with the camber, then move the car in the center of the pancakes to adjust the toe.
On cars with front-wheel drive of the type: Samara, Lada, 2108-2110, wheel camber can be either negative or positive.
The literature says that camber can be from 0 ° ± 30 ′. This is approximately 2-2.5 mm. clearance. It turns out that there will be a gap either in the negative or in the positive direction.
We will make the camber negative, that is, the wheels will stand with the letter "M", and we will do it for about 1 minute. 30 sec.
Camber / toe adjustment process.
Before starting the camber / toe adjustment, do not forget to check the tire pressure and equalize if necessary.
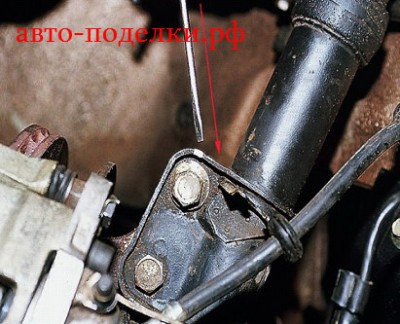
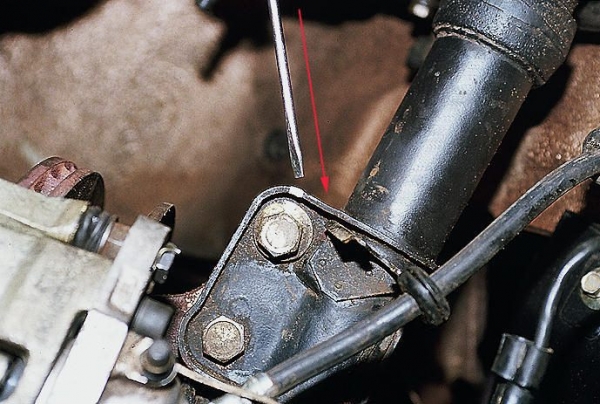
If the camber angle is different from the norm, then adjust it. To do this, loosen the nuts of the upper and lower bolts and, turning the upper adjusting bolt, set the required camber angle. After completing the adjustment, tighten the nuts to a torque of 88.2 N · m (9 kgf · m).
After we adjusted the camber, we got indicators of about 1m. 30sec.
On our plumb line, a plate with a thickness of 2.2 mm is welded.
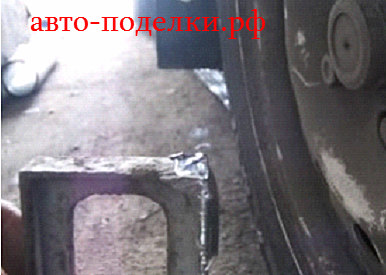
When we apply it to the disk, then the level should be equal. The father-in-law bubble is in the center.
The camber is also regulated on the second wheel, there we make the same angle.
Now we start adjusting the toe-in of these wheels.
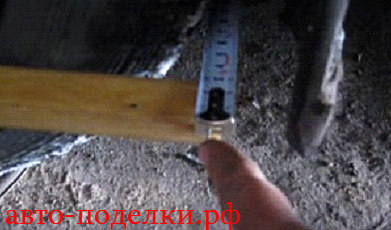
We rearrange the car with the wheels in the center of the pancakes. To the front discs, in this way we attach a bar with an aluminum wire.
There is a small stud on the edge of the plank, to which we will fix the tape measure.
We do the same on the reverse side.
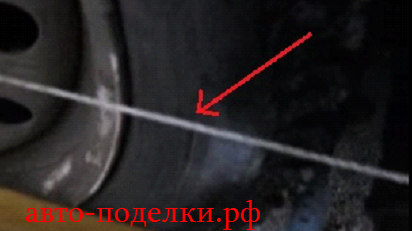
Now we stretch the nylon thread in such a way that it does not touch the rim in this place.
By cars Russian production, rear beam narrower than the front wheel track. Therefore, we need to put under the thread, on rear wheel, an ordinary plastic bottle cap.
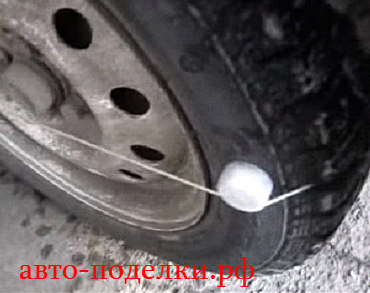
On the other hand, everything should be identical.
Next, we measure the front wheels with a tape measure and begin to adjust the wheel alignment. We write down the results of all measurements on paper.

In our case, it turned out:
- the front of the wheel is 163.7 cm;
- rear part of the wheel 162.6 cm:
- left wheel, 8 mm gap;
- on the right side there is a gap of 5 mm.
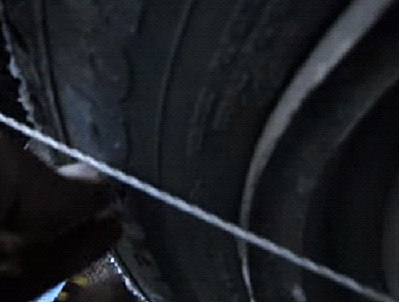
As a result of measurements, we got a discrepancy of 11 mm. We look at the gap here, that is, between the thread and the tire.
To make the toe-in, we need to roughly set a gap of 1-1.5 mm, and the width should be 163.5 cm.
Now we adjust the toe.
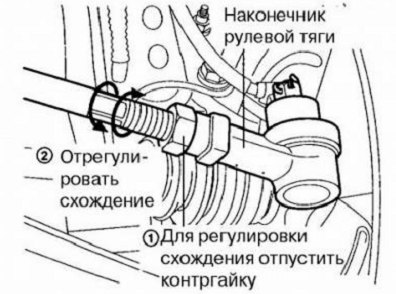
The convergence is adjusted by rotating the adjusting rods with loosened tie bolts of the steering rod ends.
When both rods are twisted, we take measurements
.
It should turn out on front wheel following:
- When measured at the front of the wheel, the distance should be 163.1 cm;
- When measuring the rear of the wheel, the distance between them should be exactly 163 cm, that is, we see a difference of one millimeter;
- The gap between the threads should be 1 mm.
The wheel on the other side should have the same performance.
This wheel alignment is very simple, which anyone can freely do garage conditionswithout resorting to any car services. Also, such an adjustment will help you save money and hassle.
Having made the adjustment yourself, you will be much calmer and more confident, you will see the results yourself and you will be satisfied.
Date: 01.12.2012Views: 1,050 19630
Many motorists find themselves in situations where the help of a car service is not available or there is no way to apply for qualified assistance... This can also happen in the case when it is required to make similar camber. If you have a VAZ 2110, then the front wheels are not so difficult to adjust and the procedure can be performed independently.
To carry out a similar collapse, the car must be put on an overpass or driven into a pit. The wheels must be set strictly straight, adjusting them with the steering wheel. Next, we take measurements between the wheel disks: you can use a simple tape measure, but in this case the measurements may not be very accurate and very laborious. A periscope tube or ruler can be used. If you decide to use rulers, it is very convenient to put risks on them. On the VAZ 2110, the wheel alignment can be done independently, only if wheel disks not deformed, have an even geometry. Measurements are carried out strictly in the horizontal plane, while measuring not only the front discs, but also the rear ones. The periscope ruler allows you to mark or mark: having measured the result in one place, you can mark the result of the second measurement, after which the measurements are compared with each other. If there is a possible difference, the wheels require adjustment and wheel alignment. Let's say you get the result with a 1 mm offset towards toe.
So, we proceed to perform the camber on the VAZ 2110. The locknuts are unscrewed on the steering rods. Further, having set the wheels in one position, the adjustment is made with the second nuts on the steering rods in the direction of decreasing or increasing. It is important that the tie rods are of the same length. If one thrust relative to the other decreases by 4 millimeters, then a skew will occur. Therefore, it is necessary to reduce one rod by 2 millimeters, and lengthen the second by 2 millimeters, thereby aligning them. After that, remember to carefully tighten the locknuts on each tie rod.
To check the convergence, the car must be accelerated to a speed of 60-70 km / h. You need to pay attention to whether there is beating in the wheels or whether the car is driving to the side. If these indicators are present, you need to perform the adjustment again.
It is important to remember that initial measurements are the basis for the entire camber process. If you answer the question: can I measure with an accuracy of 1 millimeter, yes. Then you will be able to carry out competent similarity collapse. If not, then it is better to find the time and money and seek the help of qualified employees in the car service.
Situations may arise when, even after correctly performing the camber, the car behaves incorrectly: it scours or leads to the side even after performing the camber. Possibly wrong geometry rims, malfunction of steering rods, misalignment of ball joints or others. Elimination of such malfunctions is carried out in a car service.
Today, car towing is one of the popular services that allows you to quickly deliver a damaged or faulty car to the place you need. In order to order a SAO tow truck, you need to contact the dispatcher of our company and tell him where your car is located and where you need to transport it.
Angle longitudinal tilt pivot axes - the angle between the vertical and the line passing through the centers of rotation of the ball joint and the bearing of the support of the telescopic strut, in a plane parallel to the longitudinal axis of the vehicle. It helps stabilize the steered wheels in the direction straight motion... This angle is adjusted by changing the number of shims on the ends of the stretch. Washers are added to decrease the angle, and removed to increase. When installing / removing one washer, the angle changes by approximately 19 ". Symptoms of the deviation of the angle from the norm: car drift to the side when driving, different forces on the steering wheel in left and right turns, one-sided wear of the tread.
Camber angle - the angle between the plane of rotation of the wheel and the vertical. It promotes correct position rolling wheel during suspension operation. The angle is adjusted by turning the upper bolt of the telescopic strut to the steering knuckle. With a strong deviation of this angle from the norm, it is possible to drive the car away from the straight-line movement, one-sided wear of the tread.
Wheel alignment - the angle between the plane of rotation of the wheel and the longitudinal axis of the vehicle. Sometimes this angle is calculated from the difference between the distances between the rim flanges, measured at the rear and front of the wheels at the level of their centers. Toe-in contributes to the correct position of the steered wheels at different speeds and angles of rotation of the vehicle. The convergence is adjusted by rotating the adjusting rods with loosened tie bolts of the steering rod ends. Before adjustment, the steering rack is set to the middle position (the steering wheel spokes are horizontal). Signs of deviation from the norm: severe sawtooth tire wear in the transverse direction (even with small deviations), squealing tires in corners, increased consumption fuel due to the high rolling resistance of the front wheels (the vehicle run-out is much less than intended). It is recommended to check and adjust the angles of the front wheels at the station maintenance... The vehicle is placed on a horizontal platform and loaded in accordance with the manufacturer's recommendations. Checking and adjusting angles on an unloaded vehicle is acceptable but gives less accurate results. Before that, you should make sure that the tire pressure is correct, the tread wear on the left and right wheels is approximately the same, there are no play in the bearings and steering, the rims are not deformed (radial runout - no more than 0.7 mm, axial runout - no more than 1 mm).
Checking the wheel alignment is mandatory if you have changed or repaired suspension parts that affect these angles. Due to the fact that the installation angles of the front wheels are interconnected, first of all, the caster angle of the steering axis is checked and adjusted, then the camber and, last of all, the toe-in. For a run-in vehicle in running order and with a payload of 320 kg (4 persons) in the cabin and 40 kg of cargo in the trunk, the wheel alignment angles must be within the following limits.
Toe adjustment is no longer a big problem today. Many stations provide services for adjusting the wheel alignment, it can be used both in the city and on the highway. Services that carry out wheel alignment have equipment that meets the "latest" technology. With the help of computer, optical and laser stands, it is possible to perform the toe disorder procedure. maximum effect and in a matter of minutes. But before, drivers had to set the necessary angles on their own. Let us analyze in detail how to make the camber of the vehicle.
If a positive angle toe-in (the front of the wheel "looks" inward) is greater than the norm, the rubber will wipe off the outside, and if it exceeds the norm negative angle (the front of the wheel is facing outward), then the wear will be visible on the inside of the tire.
Equipment and materials for adjusting wheel alignment on their own
Types of malfunctions wheel alignment
To carry out the adjustment, you need a platform, it must be flat, and a viewing hole is also desirable.
Prompt! If the camber is adjusted in the "field" conditions, then to create the effect of a flat surface, flat boards can be placed under the wheels.
In order to fulfill camber do-it-yourself convergencewill need:
- a rope with a plumb line,
- telescopic ruler,
- wrench.
Prompt! Instead of a telescopic ruler, you can use any device that resembles a fishing rod, or a holder for a shower curtain or a home horizontal bar. In fact, these should be 2 pipes of different diameters with extension and the possibility of fixation.
Camber adjustment
- We put the car on a flat area, steering wheel we expose strictly directly.
- With chalk we put marks on the wheels along the entire diameter from above and below.
- We attach a rope with a body kit to the wing and measure the distance from the rim to the rope.
- We rent the car half a wheel turn to swap the marks;
- Again, measure the distance from the rim to the rope at the top and bottom.
- Remove the wheel and loosen the steering knuckle and shock absorber bolts.
- Shifting rounded fistto equalize the measured distance.
- We tighten the bolts.
Toe angle adjustment
- The car is still on level ground.
- We put marks in chalk, but now on inside wheels at the junction of the disc with rubber.
- Place the telescopic ruler on the marks and align the “0” mark with the fixed pointer, and then fix the ruler.
- We move the car a little forward and backward, and check the readings. If the distance between the wheels at the rear has decreased, then you need to shorten the steering rods using the clutch. If the distance has increased, then the tie rods must be lengthened.
Prompt! During movement and fixing, the telescopic ruler or a device replacing it must not touch any parts of the suspension and body.
If everything is done correctly, then after performing the camber adjustment, you can already drive the car. In this case, it is better to check whether premature and uneven wear of the rubber occurs.
This article describes a way in which you can adjust the camber angles of a VAZ car with your own hands. But if you own expensive car with expensive tires, it is best to repeat the adjustment procedure using modern equipment.
In the video: How to make a toe camber. Part 1 of 2
In the video: How to make a toe camber. Part 2 of 2