Remember how you get up in the morning or in the middle of a working day, you tiredly wipe the lenses of sunglasses or ordinary glasses ... After all, you can hardly see anything through dirty and dim glass. Now imagine that the glasses we mentioned at the very beginning are reflectors on the headlights of your car.
Yes, scratched, poorly transmitting light and blinding other drivers on the road, headlights are not very pleasant ...
What can be done to avoid such problems? First of all, to properly care for the headlights, and knowing what material the reflectors are made of will help to do this.
Glass - the highest degree of transparency and presentability
The most stylish and chic headlights are undoubtedly glass ones. Everything is like in life, or expensive glass or its more practical, but less presentable and quality replacement - plastic.
Glass transmits light better, looks more attractive, and dims more slowly. But! Glass is more fragile and if it is already covered with scratches, it inevitably goes to waste. Therefore, pampering your car with glass headlights is not a cheap pleasure.
A special protective film will help to extend the life of the glass on the headlights. Such armor will be able to protect the headlights from impacts equivalent to the impact of a ball flying from an air pistol. True, the light transmission of glass will drop to about 97%. But you will save at least $ 130, which is required to buy a new glass headlight to replace the damaged one. Moreover, over time, the film can be replaced without any damage to the headlights.
Coated glass protective film not afraid of scratches, and therefore, in case of emergency, it can be wiped with a napkin from a tube or snow from the roadside. But it's best not to practice this too often. Using a car brush and plain water is the best solution.
Polycarbonate - cheap, durable and practical
Polycarbonate is a carbonic acid polyester. This material is very practical, as it has high impact resistance, resistant to the effects of various detergents, does not change its properties at different temperatures. The downside is that it does not withstand the effects of alkalis, bases, and partially dissolves in esters, aromatic hydrocarbons and ketones. But the worst thing is that polycarbonate deteriorates when exposed to ultraviolet radiation. That is why it turns yellow rather quickly and consequently loses transparency.
Polishing with sandpaper, abrasive pastes and polishes helps to extend the life of polycarbonate headlights.
Acrylic glass - main competitor polycarbonate
In fact, the same plastic, only a slightly different quality. Acrylic or, in other words, plexiglass, consists mainly of polymethyl methacrylate hydrogen, a special combination of hydrogen, carbon and oxygen. It is obtained as a result of a stepwise polymerization process.
The main advantage of glass is its ability to melt and take any desired shape. After hardening, it becomes hard and fairly transparent.
But, like any other synthetic material, acrylic glass quickly cracks and becomes cloudy. Polishing with special abrasives and pastes will help to update it, which, as a result, significantly extends the life of plastic headlights.
Acrylic and polycarbonate do not tolerate processing with simple napkins and water pumps. Use only special auto brushes and plain water to clean them. And now you can wipe clean, but wet headlights with a napkin made of non-woven material.
Hello everyone. As I promised, today I'll tell you about how to make "angel eyes" at home, using available tools and materials. The article will be useful for those who love, as well as do it yourself. Go!?
We all know what angel eyes are, and who owns (the chip belongs to BMW) this invention, which is so liked by millions of motorists around the world. But, unfortunately, not everyone has the opportunity to buy a BMW, but they want to have beautiful tuned optics. What to do in this case? It's very simple, you need to "strain your brains" and make angel eyes with your own hands.
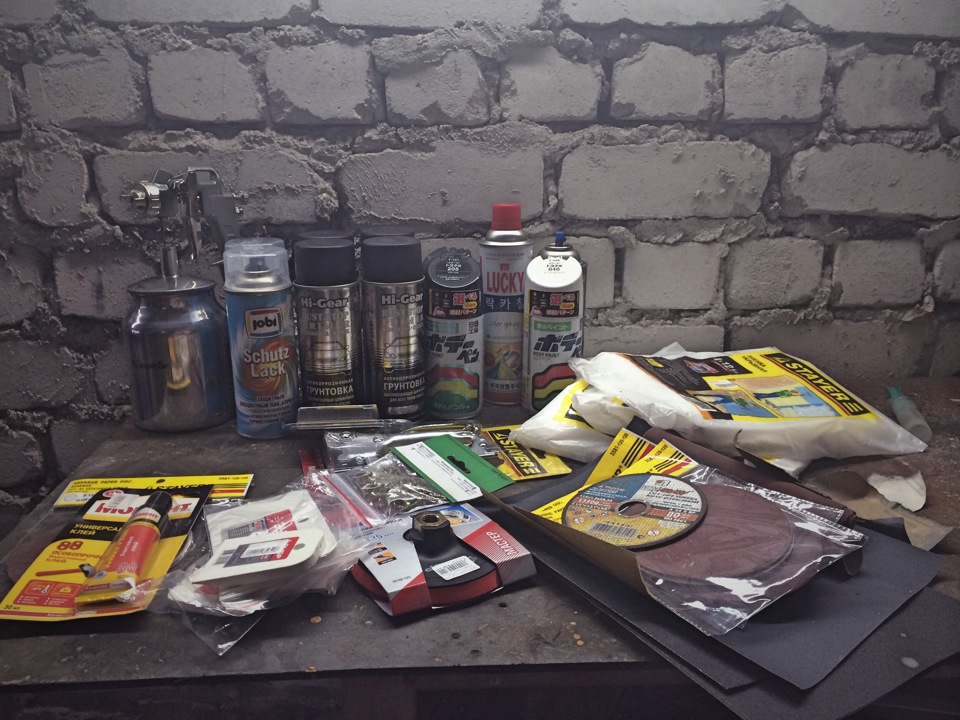
To work, you need to prepare:
- "Straight arms" :-). Just kidding, of course, but without the slightest experience in hand-made homemade products, you most likely will not succeed ... Therefore, before taking on this work, you need to really assess your own abilities.
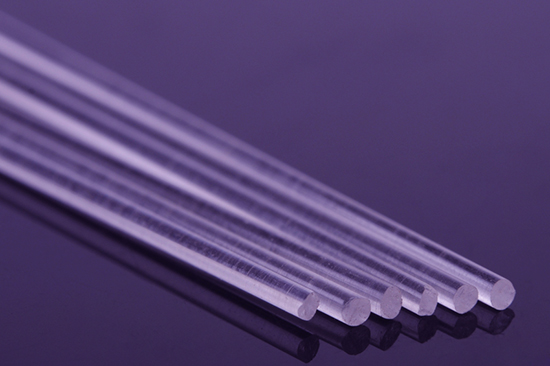
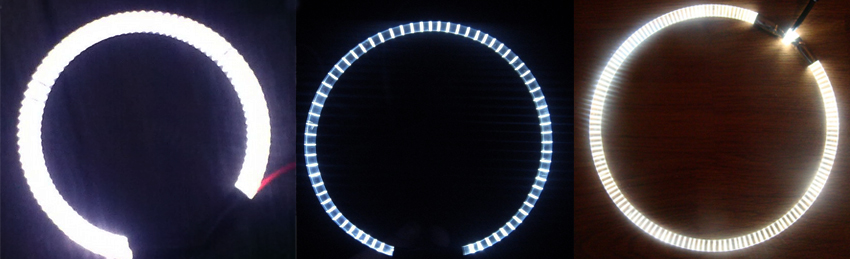
- Plexiglass tubes (transparent PVC tubes). You can buy these on the Internet, at a hardware store or a decor store. Some craftsmen twist and use plexiglass or PVC strips as a plexiglass tube, which are cut into square strips, after which they are brought to a round shape with sandpaper of various grain sizes. As an option, some people use LED strip, but this is a completely different story ... I think someday I will tell you about this option for creating angel eyes.
- Soldering iron, four 12V resistors, bright 3.5-volt LEDs. The color of the LEDs is up to you.
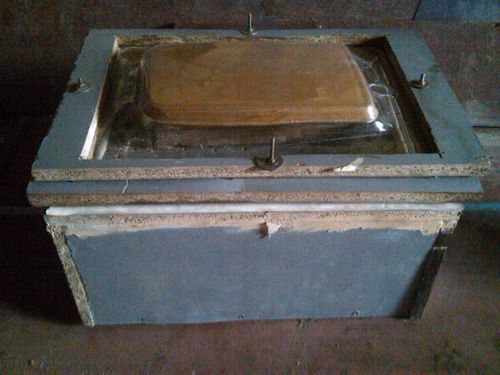
- The template or layout along which the tube will bend. The diameter of the template should match the diameter of the place where you are going to install the angel eyes. You can use anything here: from a coffee can to a downpipe of the required diameter ...
- Electrical tape, heat shrink, soft copper wire. The length of the wire will be different for everyone, it all depends on the method of wiring and the connection point.
- Pliers, household hair dryer, metal cloth or a special miniature cutting wheel for a screwdriver or drill.
- Sandpaper of different grain size, file or file.
We make angel eyes with our own hands - step by step instructions
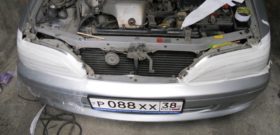
1. First you need to remove the headlight. I think everyone knows how to do this, I will not describe the process, since this process will take place differently for everyone.
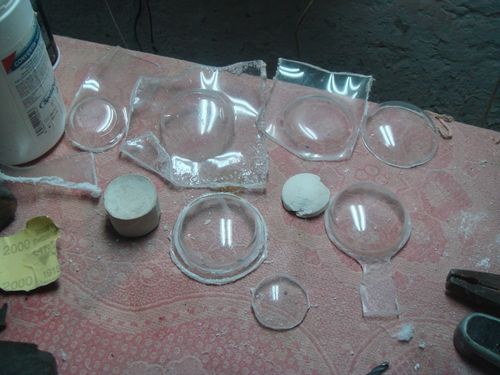
3. Taking measurements. Select a template of the required diameter along which the plexiglass tube will be bent.
4. Before heating and bending the tube, I'll tell you about an interesting way to apply edges to angel eyes. We will do this using a metal file, or using a cutting wheel, but there is another, no less interesting way. It consists in the fact that before bending the tube, apply a notch (edges) using a die of the required diameter. The result, frankly speaking, is very decent, it comes out even better than when applying incisions with a canvas. In short, decide for yourself which method you like best. Note, however, that in the case of a die, the notches are applied before you begin to heat and bend the tube.

5. Cut off the necessary piece of the transparent tube and start heating it. Wear gloves and gradually warm up the tube along its entire length. As it softens, the tube will take on the shape you want. Take your time and be careful, in case of overheating the plexiglass tube will deform and you will have to start over. Before how to make angel eyesthat will be installed on your car, I recommend that you practice bending the plexiglass tube.
6. When the tube takes the required ring shape, do not rush to remove the tube, it is still hot and does not hold its shape. Wait 10 minutes until the formed ring hardens, then remove it.

7. Now armed with a soldering iron, you need to connect with resistors - see photo. After everything has been soldered, it is necessary to check if everything is connected correctly. If everything is connected and soldered correctly, we take heat shrinkage or, in extreme cases, electrical tape and begin to isolate the contacts.

8. We do the same with the second LED and the resistor, after which we connect the two LEDs using electrical tape and heat shrink - see photo. 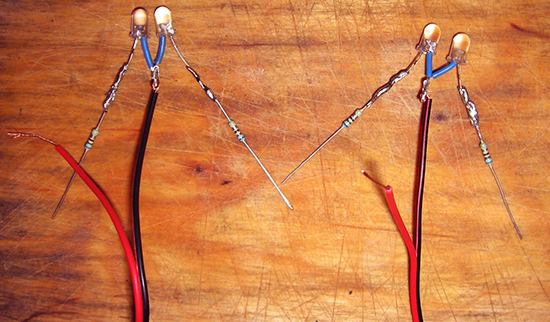
![]()
10. Next, cut off the ends and connect the LEDs. Before connecting to the tubes, I want to say a few words about how to connect the LEDs. You can simply lean the LEDs against the ends, placing them, for example, on hot melt glue or electrical tape, or you can go another, more correct, in my opinion, way. On the network, among thousands of instructions for making angel eyes, I came across one photo report in which a craftsman connected LEDs and the ends of the tube by drilling holes in the ends into which the LEDs were glued to the glue. See the photo below.

11. After assembly angel eyes need to check. If everything works, we isolate the connections and proceed with the installation of products in the headlights. I can't help you in this matter, use your imagination ...
12. You can connect the angel eyes on your own if you understand electronics, or you can simply entrust it to a familiar electrician.
It remains to assemble the headlights, install them in place and check the results of the work. That's all for today. I hope you succeeded and handmade angel eyes, will delight you for a long time and shine on the envy of everyone around you. Thank you for your attention, and see you soon.
If you decide to transform appearance car, but there is no desire to spend large sums on tuning, then the best way - these are cilia on the headlights. They will help to highlight the car from the stream of fellows. Despite the small size, the eyelashes give the car a new character. Today you can easily find options for ready-made eyelashes for any car, but if you want to give the "look" of a car originality, then you should try to make a unique part yourself. The process of creating cilia is simple, even a person without experience in tuning production can handle it, and the materials that are required for work can be found in most car dealerships. And what could be nicer than seeing a hand-made beauty on a car!
General information about cilia
Cilia are small pads that fit tightly to the headlight and cover part of it (usually the upper one). The main function is decorative: such elements are used to visually change the shape of the optics, but they also serve as protection against mechanical damage and impacts environmentif you don't drive very carefully.
Photo gallery: images of eyelashes on headlights
Tuning on headlights: Honda hr-v
 Tuning on Mazda 3 headlights gives the car a showiness
 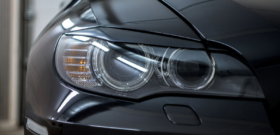 Many owners of foreign cars do not disdain such elements - in front of you bMW headlights X6
  Headlamp eyelashes: Subaru Legacy
In addition to the variety of shapes and colors, the main parameter for the classification of cilia is the material of manufacture. The most popular are cilia made of self-adhesive film, PVC and fiberglass. To understand which material is better to choose, consider the pros, cons and difficulties of working with each of them.

Today you can find any colors and textures of a self-adhesive film to make eyelashes from it for headlights.
The easiest way to make eyelashes is to use self-adhesive. To work with the film, no special skills and tools are required, it is cheap, you do not have to paint it, you can choose any color, you do not need to remove the headlights, and the whole process of making cilia will take you no more than 40 minutes.
It would seem that they are solid pluses, but they are also minuses at the same time. The film is inexpensive, but it looks cheap on a car, doesn't require painting - and doesn't match the body color, it's easy to use - so anyone can do the same.
In addition, the service life of the film on the headlights is limited: the edges of the "self-adhesive" after washing are lifted and torn, dirt gets clogged into scratches from stones, and after 3 months of driving on russian roads such tuning will not improve, but spoil the look of the car. Consider also the fact that 10 years ago, when stores were not yet overflowing with auto accessories, tuning studios were developed only in the capital, and ordering tuning via the Internet was just becoming a reality, cilia from the film could cause admiration and the desire to “do the same”. Today it is difficult to surprise someone with them.
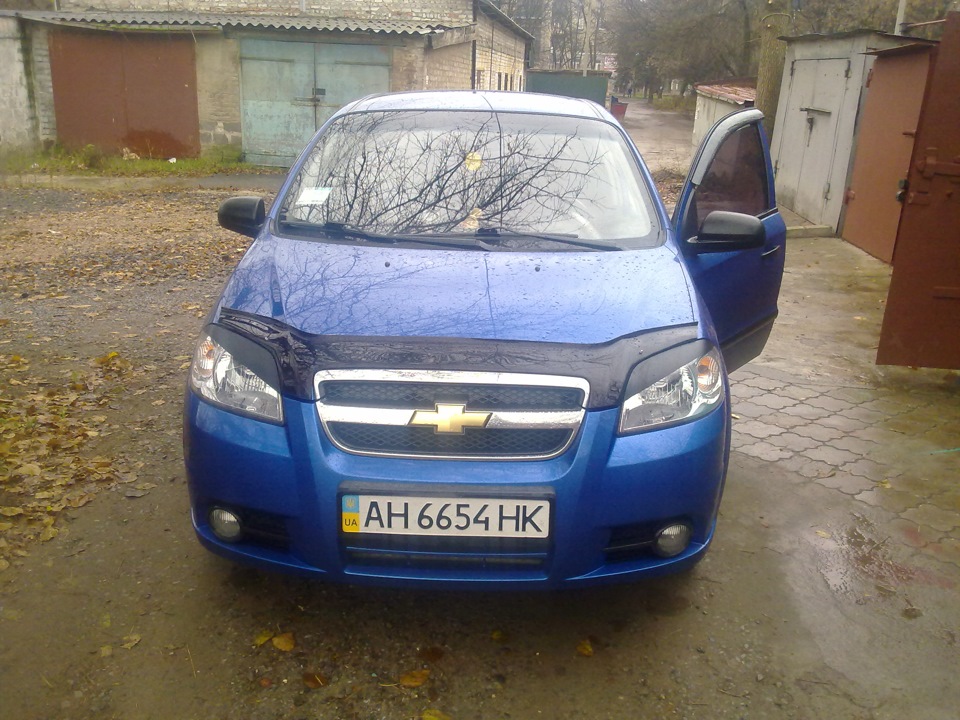
Element of tuning a Chevrolet car - stickers from self-adhesive paper
How can you glue cilia from a film
To make such elements yourself, you need the following set:
- sheet of self-adhesive film;
- scissors or utility knife;
- degreaser;
- clean cotton rag;
- paper and pencil.

Of course, changing the appearance of a car for only 100-200 rubles (the cost of a sheet of film) is a great temptation. But if you want to get a quality result, we advise you to overcome this temptation. The film is suitable for beginners for the first experiments with the appearance of the car, and will also be very convenient for "trying on" the shape and color of the future eyelash on the headlight.

Carbon film coatings do not decorate the car, but give it a cheaper look
I would like to separately mention the film a la carbon: we do not recommend using it even for the first experiments. Real carbon is a unique material, lightweight and durable. Due to its high cost, it is used by factories only in premium cars, and is also used in the preparation of sports cars for professional competitions, in which even a slight decrease in the weight of a car can improve acceleration dynamics, save a fraction of a second and affect victory. Products covered with "carbon" film bear little resemblance to real carbon fiber and give themselves away immediately, making the car look cheaper.
Video: glue the eyelashes from the film to the headlights
What can be done from plastic with your own hands
Plastic eyelashes look more presentable. The cost of a sheet of plastic is low, and you can buy it at a building materials store or at a manufacturing advertising agency. Wide choose colors allows you to choose the material in the color of the car and do without painting, and making cilia does not require special skills from you. You will have to spend more time and effort on such cilia, since it is imperative to dismantle the headlight. From special tools you will need a hair dryer.
The easiest way to make and install headlight eyelashes
To make cilia you should use:
- pVC sheet 2-3 mm thick or other suitable plastic;
- construction hair dryer;
- phillips screwdriver
- sandpaper for plastic of three types (coarse, for primary sanding, for final sanding);
- degreaser;
- a clean cotton rag;
- double-sided tape (or sealant);
- pencil.
As a rule, the headlamp is mounted with 2-3 bolts at the top and has additional lower mounts. Finding the upper mounts and unscrewing the bolts is not difficult (you will see them immediately after you open the hood), and to get to the lower ones, if they are present in your car, you will have to remove the bumper.
Then you need to act according to the algorithm below.
- Cut a sufficient piece from the PVC sheet, on which the eyelash will fit with allowances for the engine compartment and the side parts of the headlight bordering the radiator grill and wing.
- Attach the cut sheet to the removed headlight, and, heating with a hair dryer, smooth it until the sheet completely repeats the shape of the headlight.
- Do the same with the second headlight. When the plastic hardens in the desired shape, draw the boundaries of the eyelash on it with a pencil, leaving a small allowance - about 0.3 mm - and cut it out according to the drawing.
- Sand the edges with sandpaper, starting from the coarse one to clarify and leveling the edges, and working down to fine to get rid of possible nicks, scratches and make the edges perfectly smooth.
- We proceed to the installation: we clean and degrease the headlamp, we do the same with the inside of the eyelash.
- After the degreaser has completely dried, we glue double-sided tape on the headlight, carefully attach the cover and enjoy the updated look of the optics.
Photo gallery: easy way to stick eyelashes
 Making eyelashes from plastic requires dismantling the headlight
  A sheet of plastic that is needed to make cilia
  We heat the plastic with a hair dryer and give it the shape of a headlight
 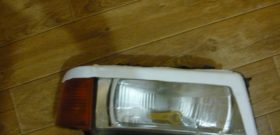 Cut out the workpiece for subsequent processing
Be careful with your hair dryer. The sheet may melt to a liquid state and ruin the workpiece. If you do not have experience in handling a building hairdryer, it is better to practice on another sheet in advance, heating it and studying how it will deform.
Review the material on your headlamp prior to a hairdryer. Cheap optics are now widespread chinese manufacturers, which is often made not of glass, but of plastic. If one is installed on a car and you heat it with a hairdryer, the headlight can be thrown away.
I would like to add a few words about painting plastic eyelashes: it is believed that painting is not needed, because you can choose the plastic in the color of the car, and, if you wish, change its color with a self-adhesive film. But an exact color match is almost impossible to achieve, and since the plastic is more matte than paintwork auto, a plastic eyelash can look foreign.
If the plastic gets worn out from time to time, it will look unattractive. Therefore, we recommend to spend a little more time and still paint the plastic eyelashes before installing.
How to color eyelashes
To paint plastic eyelashes, use:
- sandpaper;
- degreaser;
- a clean cotton rag;
- cans with varnish, acrylic primer and paint.
Varnish, primer, paint can be found in specialized stores selling car paint. When buying, pay attention to the applicability of materials for plastic. When choosing paint, if you want to accurately match the color, use the paint code of your car, which is indicated on the metal plate under the hood (when the car has not been repainted).
Before starting work, collect everything you need: primer, paint, spatulas, sandpaper, sanding discs, spray gun, varnish, film
Check how purchased spray cans work on any unnecessary surface. They can spray at different intensities. To achieve the desired effect, it is worth a little practice, choosing the optimal distance at which you need to hold the spray can, and the speed of paint application. Choose a dust-free fishing spot.
If you plan to dye your eyelashes in the garage, water the floors beforehand - all the dust will settle and not spoil your creation.
Now you should proceed in the sequence given below.
- Remove dust and degrease the eyelash, place it on paper or film in a place convenient for painting, wait until the degreaser is completely dry and start applying the primer.
- Cover the tuning parts with a primer. In order for the coating to be smooth, without drips, two basic rules must be observed: keep the can at a fixed distance from the product (for this you need to move not with your whole hand, but only with a brush, turning the can) and apply the material with an overlap.
- After drying, smooth out any unevenness and sand the surface with fine sandpaper. You need to sand the surface not by hand, but by placing sandpaper on a sponge to avoid the appearance of irregularities from pressing with your fingers.
- Degrease the polished eyelash again and apply the first layer of paint in the same way, after complete drying - the second layer, and then, after the paint has completely dried, varnish.
- Wait until the part is completely dry and start installing the cilia. The result will please you - the parts will look like the factory ones.
Video: features of painting plastic
For achievement best result when applying primer, paint and varnish, it is worth using a pneumatic spray gun: correct adjustment the pressure of the inlet air and the flow rate of the material, you can perfectly paint the part. But to paint with a spray gun, you need a compressor and training in setting up and working with a spray gun, and you will also have to learn how to mix the paint correctly. This is a time-consuming process that cannot be mastered in half an hour, and if dyeing cilia is a one-time action, and not a constant hobby, feel free to paint them from a spray can.
Fiberglass
For several reasons, this is the most difficult version of the design: there is no ready-made material (the overlay will have to be sculpted from scratch), the headlight must be dismantled, painting is required. But the result is worth the effort: if you set out to make fiberglass eyelashes, you will get a high-quality durable product at the end.
Easy way to make, paint and install
To make fiberglass eyelashes, we need the following set of tools:
- crosshead screwdriver;
- masking tape;
- pencil;
- brush;
- epoxy resin;
- several sheets of fiberglass;
- primer;
- clean cotton rag;
- degreaser;
- putty;
- three narrow spatulas (3, 5 and 8 cm);
- grinder (grinder with grinding wheels or long and hard manual labor);
- acrylic paint;
- sandpaper;
We dismantle the headlight and start the process of installing the cilia.
- We glue the headlamp with masking tape (in order to avoid accidental ingress of resin, it is better to glue it completely, and not just the part on which the eyelash will be placed).
- We decide on the shape, make a stencil and cut out fiberglass along it (from 2 to 5 layers for each eyelash; the amount will depend on the quality of the fiberglass and the volume of epoxy resin), with allowances for grinding the edges.
- We begin to create a blank: using a brush, we put a thin layer of epoxy resin on the headlight, carefully apply a pre-cut sheet of fiberglass, press it, smooth it and leave it to dry. This is not a quick process, the layer can dry from 1 to 5 hours, depending on the temperature and humidity in the room.
- After complete drying, put the next layers in the same way.
- Then we remove the workpiece, adjust the shape with coarse sandpaper and carefully grind the edges, remove the most obvious roughness on the eyelash.
And then we work according to the standard scheme, which was described above. Degrease, put putty on, wait until dry, grind. We degrease, prime, grind. We degrease, paint and varnish, wait until it dries.
Co headlamp removed it is easier to work, but you can do without dismantling if you close the adjacent elements of the car with a film. Choose a thick film - thin epoxy is corrosive.
Photo gallery: a proven method of making cilia
 Getting ready - glue the headlights with masking tape
  Draw a blank cilia for headlights
 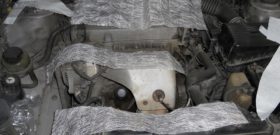 We take fiberglass, cut it into the desired pieces
  On the headlamp, protected with masking tape, we apply a layer of epoxy resin and lay fiberglass, then dry it
 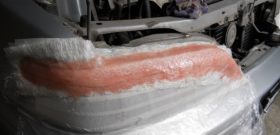 Apply a new layer of resin and fiberglass to the dried layer in the same way
  The eyelashes dry, and the owner of the car is impatiently waiting for the result of his work
 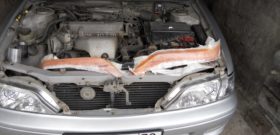 Removing fiberglass eyelashes for final processing
  We cut the eyelashes, see the result
 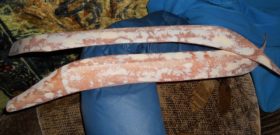 This is how the eyelashes look after filling and sanding
 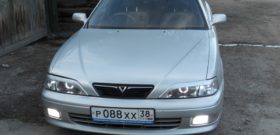 Here are some cool eyelashes after priming and painting
We install on the headlamp using double-sided tape or sealant. We enjoy our victory! A lot of time and effort has been spent, but such cilia look great and will delight the eye for years.
Video: DIY cilia making
LEDs as the basis for trendy headlights
There are cilia that are mounted in the headlight housing, namely from led strip. However, July 21, 2016 was introduced new law on tightening measures for installing tuning. Regular cilia are not banned if their presence does not interfere with the supply of light.

LED tuning elements look stylish: it's a shame they are banned
But the installation of LED cilia is a change in the design of lighting devices that was not provided for by the manufacturer (except for those cases when the LED cilia were installed on the exact same model, but in a different configuration). For this, according to the current legislation, you may face absolutely legal deprivation driving license for a period of 6 to 12 months. Is the game worth the candle? You decide.
Tuning does not have to be expensive or labor intensive. Even without special training, you can create an original detail with your own hands in a few hours, which other motorists will pay attention to. Self-tuning your favorite car is always a pleasant and interesting experience that you will remember every day, looking at the transformed car. Stock up on everything you need and try to make eyelashes - you won't regret it!
Every car owner at least once during the entire time of using the car noticed that the headlights became dim, and because of this, the road was poorly lit. There can be only one reason - the headlights have lost their former transparency, and the light simply cannot be brighter. In this case, it is necessary to restore the transparency of the headlights by polishing. This can be done at any service station or with your own hands. How to restore the transparency of the headlights at the service station is clear, but we will tell you how to polish the headlights yourself.
Why do the headlights lose transparency?
Headlights lose their factory transparency for several reasons:
- the impact of the external environment. Dirt, sand and other road materials, when exposed to the plastic or glass of the headlight, wear off its layer, leaving a rough surface. As a result, the light becomes dim;
- plastic wear due to the age of the machine. If during use you have never polished the headlights, then for obvious reasons, visibility in the dark will deteriorate significantly. Car lights must be looked after as carefully as the entire car as a whole;
- poor quality material. Plastic can also tarnish because low-quality raw materials were used in its manufacture. Here the polish will not help, you will have to change the lantern completely.
Headlight restoration
Headlight restoration is the process of cleaning the outer plastic lens using a special restoration and resurfacing kit. To restore transparency on your own, you do not need special training and training courses. All you have to do is watch the video and carefully read the instructions that come with the headlight polishing kit.
Polishing methods
There are usually two ways to polish headlights:
- polishing using chemicals;
- polishing by wet grinding.
Both methods do an excellent job of the task. Their difference is only in the materials used. Thus, restoration with the help of chemical agents is easier to use and does not require additional equipment, while wet grinding is impossible without a special grinding tool. Which way to choose is up to you.
Important! Only those headlights with protective plastic caps can be polished. It is better not to polish other types of headlights yourself!
What equipment is needed
To restore the transparency of the headlights yourself, you need to have a sander, abrasive material with a grain size in the range of 600-4000, as well as a circle with foam rubber, an eyeliner for polish, polishing varnish and paint tape.
Important!! If you are afraid to polish the headlights yourself, it is better to drive the car to a service station and ask the specialists to restore transparency!
How to polish your headlights with your own hands
So, you have decided on the method of polishing, made sure that your headlights can be polished on your own, now you can start working. The process of restoring transparency, using polishing, takes place in several stages and is somewhat similar to the process of body polishing. We will dwell on each of them in detail:
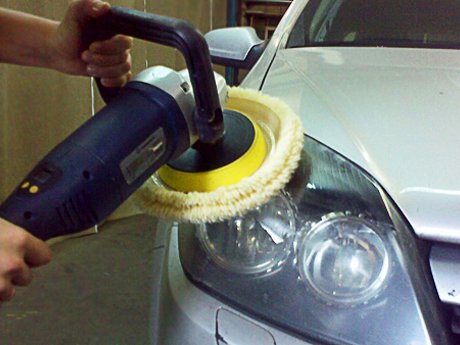
You can also restore the transparency of the headlights of your car using ordinary sandpaper. The scheme is the same: first we rub it with coarser paper, gradually moving to a finer one. This method is very convenient if you do not have a sander, but it takes more time. Before using sandpaper, be sure to immerse it in soapy water for 5-7 minutes. This is necessary to ensure that no scratches remain during the restoration of transparency. When polishing with sandpaper, be sure to wipe the headlights with a special polish that removes oxidation. To do this, soak a sponge in this product, wait a little while it is absorbed, and wipe the plastic cap.
Important! When polishing the headlights, use only the specified grit size. Larger circles can spoil the look even further, leaving deep scratches.
You can assemble the polishing kit yourself. It includes:
- the above wheels and grinder;
- antioxidant;
- polishing varnish;
- microfiber napkins;
- rubber gloves;
- respirator.
So that you can clearly see how plastic headlights are polished, we suggest you watch the video:
Is it possible to restore transparency without sanding?
Many car owners want to polish their car headlights on their own, but they do not have the necessary tools, and using sandpaper is long and dangerous. There is another way to restore transparency - using chemicals. Thanks to modern technologies, it became possible to restore transparency without polishing. Using chemical agents, you will not only protect the headlights from possible scratches obtained during grinding, but you will also be able to polish the "eyes" of your swallow yourself at any time convenient for you, without causing any damage. This type is very convenient and easy to implement, and its main advantage is its low time cost.
Important!! Always wear gloves and a respirator when restoring headlamps with chemicals.
What kits and varnishes to restore transparency are better to use
At the moment, car care manufacturers offer huge assortment different polishes, varnishes and sets to restore transparency. The choice at car markets and in auto cosmetics stores is such that the eyes run up. How to do right choice? Very simple. There is a good and proven brand of cosmetics for cars by many car owners. This is the Delta kits brand. Polishes of this brand have great quality, hold for a long time and the price is very reasonable. High demand car owners for the products of this brand speaks about high quality auto cosmetics.
Polycarbonate is the most demanded building material, which is used not only for the arrangement of the civil and industrial sector, but also in mechanical engineering. Indeed, for several years now, the industry has been trying to minimize the use of glass, since acrylic is 200 times stronger and safer, while not inferior in its functional features. That is why more and more often experienced car enthusiasts prefer headlights made of polyester carbonic acid. In the review, we decided to tell you how headlights are made of polycarbonate.
Demand
Polycarbonate headlights are an excellent marketing ploy that significantly increases the vehicle's initial value. One of the most important requirements for a material for making headlights is strength. As mentioned above, polycarbonate is 200 times stronger and more durable. And if you remember the quality road surfacethen polycarbonate becomes the favorite.
In the event of a minor accident, the front or rear of the vehicle suffers first. Most often, the headlights are broken, and their replacement requires a significant investment. Unlike glass, polycarbonate products remain intact. At the same time, they retain their functional properties at temperatures from -50 to + 100 degrees Celsius.
Manufacturing sequence
To make a polycarbonate headlight with your own hands, you do not need expensive special tools... If you doubt your abilities, you can contact the service station, there they will individually select the headlights for your car model. Design sequence:
Making polycarbonate headlight glasses is less painstaking as it might seem at first glance. The production time for acrylic is about one hour, not counting the hardening of the mold under the press.

Advantages and disadvantages
Automotive products made of polycarbonate material are in high demand. Many foreign manufacturers make front parts of cars not solid, for which polycarbonate is used. Indeed, today there are a number of specific regulations on the safety of pedestrians, which say that the front part of vehicles should not be made of solid materials.
In addition to all that has been said, the following positive properties can be distinguished:
- If you have the appropriate tools, you can make the polycarbonate lining with your own hands;
- In the event of a lack of skills in the sphere of manufacturing and assembling polycarbonate, you can contact the auto repair shop, the cost of the product is available to every amateur;

- Racks for various types of detergents;
- The durability of the product consists in a special protective film, which is directly applied to the polycarbonate product. Even if the film becomes unusable today, the product continues to serve the wrong time;
- In the event that small scratches are found, the service life can be increased with the use of suction paper, polish, abrasive paste, etc .;
- High impact resistance. Withstands strong impacts from metal objects.
A number of disadvantages of polycarbonate headlights:
- Resistant to UV rays. Over time, the product grows dimmer, reducing the transmittance of the emitted light;
- Cannot resist alkaline substances;
- In a small degree can dissolve in esters, ketone and aromatic hydrocarbon.

Let's sum up
In this article, we tried to tell you about the most popular material for the production of headlights - polycarbonate. After all, its functional features are in no way inferior to glass. In addition, you can design them with your own hands within one day, the quality and appearance of which will be no worse than in the photo in glossy magazines.