Anti-lock braking system is an essential option for any modern car from economy to premium class. The ABS system allows you to drive comfortably and safely on any, even the most difficult, surface. During the operation of the car, the driver may encounter the problem of an inoperative anti-lock braking system (ABS) and, as a result, ineffective braking of his car. In this case, it may be necessary to replace the ABS sensor. Depending on the age and condition of the vehicle, replacing the ABS sensor can be quite time consuming.
First, you need to study the available technical documentation regarding the ABS operation scheme on a specific car model. On VAZ cars, the ABS system consists of the following parts:
- ABS activation sensors, 4 pcs. (one for each wheel);
- Hydraulic pressure modulator.


By the way, having such a set of spare parts, you can install an anti-lock braking system even on those VAZ models that do not have such a system.
Installing ABS on a VAZ is one of the best ways to improve vehicle handling and safety. Consider the installation process (you will also need new calipers, brake pads and outer CV joints, these parts will fit from Lada Priora).
Installation of ABS
First you need to put the car on a jack and remove the wheel. Then unscrew the caliper mounting bolts with the appropriate wrench. Press the caliper with a screwdriver and remove it. Pinch the brake hose to prevent leakage of the brake fluid. Next, the caliper union is disconnected and a new one is installed in its place, with new brake pads(you need to choose them carefully - you need a model that has a seat for the ABS sensor). After that, the ABS sensor itself is installed. It is important not to confuse the sensors in the front and rear wheels, they have structural differences.

Moving on to replacing the CV joint. First you need to turn the wheel in the direction from which you plan to replace the part. The lock nut is unscrewed (during assembly it must be replaced with a new one). Unscrews spherical bearing from the steering knuckle.
Using a punch or a special puller, the SHRUS slot is knocked out of seat and then removed from the drive shaft. When installing a new CV joint, it is better to change the boot along with it. In this case, it is necessary to treat the surface under the anther with lithol.

Before installing the hydraulic modulator, you need to remove the "minus" terminal from the battery. Next, remove the modulator cover, disconnect the electrical connectors. Detach gently brake pipes to avoid draining the liquid and, finally, remove the modulator. A new block is installed on the new hydraulic modulator ABS control... After that, two additional relays(The installation locations depend on the specific car model). Brake pipes, wiring wires are connected.
ABS installation is complete! Bleed the brakes before use.
Replacing the ABS sensor
Almost all cars produced today have ABS, which has repeatedly proven its effective work: when braking, the wheels scroll a little, hence the high. In critical driving situations, this gives the driver of an ABS vehicle an additional chance for safe maneuvering. Especially young drivers cannot do without ABS, whose skills are still insufficient to drive a car without additional systems security.
The scheme of operation of the ABS on VAZ cars is as follows: pulse signals with ABS sensors enter the ABS control unit. If one wheel is blocked, the hydraulic modulator, based on the command from the control unit, limits the pressure in the corresponding channel.
If possible, it is best to place the machine on a lift or drive it onto inspection pit... In the absence of such conditions, jacking can be dispensed with.
Scheme of work
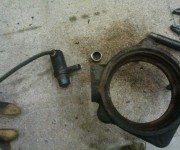
First you need to remove the wheel. Be concerned about the safety of your operations in advance. The vehicle must not roll and fall from the jack during repairs! The wheel is removed. The sensor is located behind brake caliper... Looking behind it, you can see what size keys are required to remove and replace the sensor. Since the sensor is located at a rather low point of the car (also constantly in contact with dirt and water), threaded connections can corny "sour". In the fight against this nuisance, various products such as WD-40 fluid will help.
You can go a little differently and remove the caliper from brake disc... This is also how the sensor can be accessed.

Next, you need to hold the metal part of the ABS sensor with pliers of suitable size and, swinging it with pendulum movements, pull it towards you. Be careful - slipped pliers can damage the plastic protection of the sensor (which can lead to contamination of the latter). When taking out the part, you can use a flat screwdriver (or preferably two). When a hole is formed between the sensor body and the support, the screwdriver must be inserted into this hole, and, prying the part in a circle, try to get it out. A partner can help a lot in this process if he also acts with a screwdriver, but in the opposite side of the part (this way it will come out faster and more evenly). If it was possible to remove the part by 5 mm or more, then the tools can be put aside and try to get the sensor with your hands with rotational or pendulum movements. The ABS sensor has been removed.


As a rule, the connection is made via the electronic unit ABS control (located under the hood of the car). The installation of a new sensor is carried out in the reverse order.
Checking the old sensor
Perhaps the installation of a new sensor is not required at all, since the old one could simply get dirty and for this reason refuse to work. To fix this, it is necessary to very carefully clean the sensor, check its electrical connection to the unit (you can use a screwdriver with an electric indicator). It should be noted that in the overwhelming majority of cases, cleaning the sensor is quite enough to solve the problem of the missing ABS or early activation of the system.

However, if cleaning does not help or the sensor has finally "died", then it will need to be replaced. When choosing a sensor, pay particular attention to the part model. Remember that sensors differ not only in different models, but also at the place of installation "front-back".
To install a new sensor, an additional tool may be required - pliers and a piece of pipe (as a lever). Again, due care must be taken as the ABS sensor is a rather fragile system. Having installed the sensor in its proper place, you need to screw in the mounting bolt. Then the wire going to the ABS control unit is fixed in place and connected.
Finishing touches
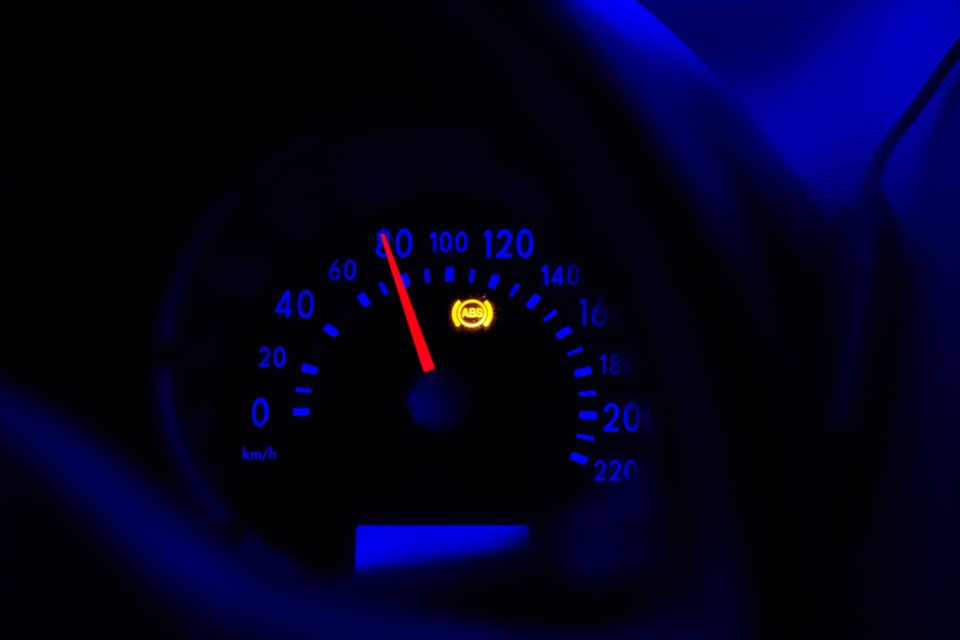
This completes the replacement of the ABS sensor. With proper installation quality and compliance with the necessary requirements for parts (including their quality - beware of fakes), on-board computer the vehicle should not display any information about the failure of the ABS. Before installing the wheel, you should turn on the ignition and check the onboard computer for such errors. And only after making sure that there are no errors, you can put the wheel back in place.
The provisions technical regulations Of the Customs Union "On the safety of wheeled vehicles" (hereinafter referred to as the Regulation), providing for the presence of an anti-lock braking system and a speed limiting device for vehicles, referred to in UNECE Regulation No. 105-04, as you know, have been applied since January 1, 2015. Earlier, namely from September 23, 2010, on the territory Russian Federation similar requirements were applied, which were included in the technical regulations with the same name, approved by Decree of the Government of the Russian Federation dated September 10, 2009 No. 720. Moreover, the requirements of the Russian regulations applied to vehicles regardless of the date of their release into circulation. In this regard, the reference to the “direct instructions” contained in the Regulation does not comply with Russian national requirements for vehicles put into circulation or in operation on the territory of the Russian Federation (see paragraph 3.2 of the Decision of the Customs Union Commission dated 09.12.2011 No. 877 “ On the adoption of the technical regulations of the Customs Union "On the safety of wheeled vehicles").
In the Russian Federation, a national system for admitting vehicles to operation has been created and is functioning, which meets the requirements included in paragraphs 72-74 of the Regulations. In particular, according to Federal Law No. 170 dated 01.07.2011, vehicles for the transport of dangerous goods are subject to technical inspection every 6 months. In fulfillment of the requirements of the Rules for the carriage of goods by car(approved by the Decree of the Government of the Russian Federation of 15.04.2011 No. 272) admission of vehicles EX / II, EX / III, FL, OX, AT and MEMU to the carriage of dangerous goods is carried out in accordance with the provisions of Chapter 9.1 of Appendix B to the European Agreement on the International Road transportation of dangerous goods (hereinafter referred to as ADR). Based on the results of the examination of documents and inspection of the vehicle, a certificate of its admission to the carriage of dangerous goods is issued. According to paragraph 9.1.3.1 of Appendix B to ADR, this certificate confirms the compliance of the vehicle with the requirements set out in Part 9 of Appendix B to ADR.
Installation of ABS and ABS + ESP for Ford Focus. URAAAA! I am posting a long-awaited report. Finished the alteration, the car was with ABS delivered the rest! Everything is installed, the brakes are pumped, the system is tested in the parking lot at the belt and one month of operation! The effect is super !!! I didn't even think that it would be! Car without ABS and ESP (we put only ABS without ESP)
Required spare parts:
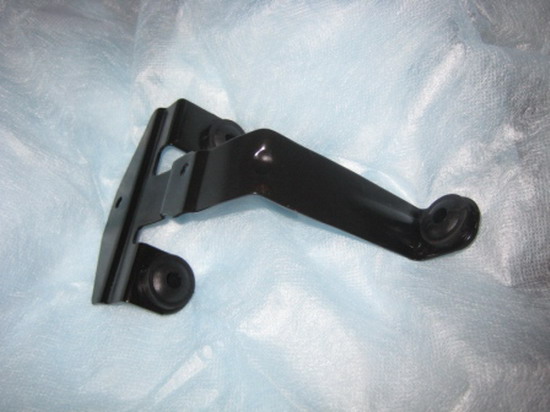
1. ABS module with bracket
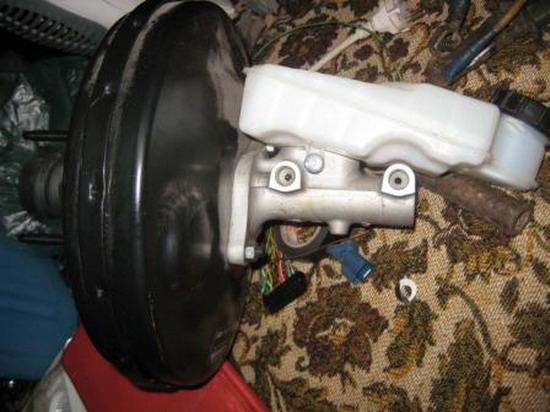
2. The main brake cylinder (GTZ)
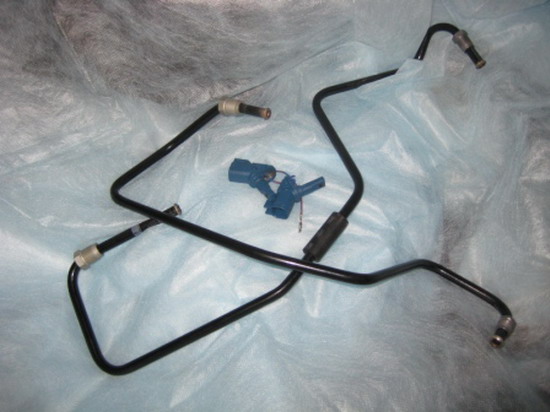
3.6 tubes (2 from the GTZ to the ABS module; 2 from the ABS module to the front wheels; 2 from the ABS module to the intermediate connection on rear wheels)
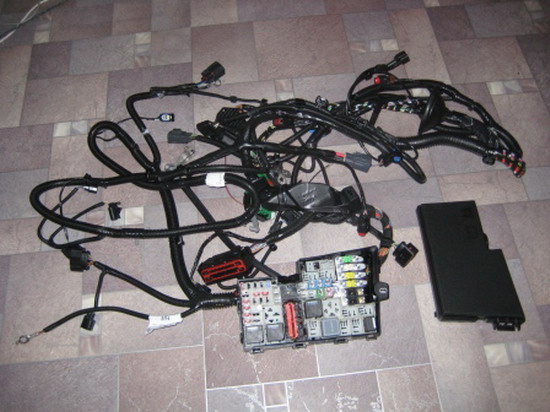
4. Wiring to the ABS module (or complete engine compartment wiring MAX configuration)
5. Wiring to rear sensors and rear sensors (if necessary, they are on the dorestayle, on the restyle you will have to change the hub for the sensors)
6. Wiring to the front sensors and the sensors themselves
7. Fuses 30A, 20A, 10A
8.3-4 liters of brake fluid (better than the original)
9.vacuum booster and main brake
Car without ABS and ESP (put ABS + ESP)
Required spare parts:
those on the ESP plus a part from ABS since it was not there (tubes, sensors, wiring to the rear wheels ...)
MY VERSION!
Car with ABS but no ESP (add ESP)
Required spare parts:
1. ESP module (preferably with a bracket, since the brackets are different)
2. Wiring to the ESP module (or full engine compartment wiring of the MAX configuration)
3. Clock spring and connector to it (if necessary)
4. Yaw rate sensor (there are 3 types and different connectors)
5. Fuses 30A, 20A, 10A
6. 3-4 liters of brake fluid (better than the original)
7.vacuum booster and main brake
Here short report about the work done: to rework the machine with ABS engine 1.8 it took:
Here's the wiring under the hood!
two tubes and 2 sensors for the front wheels
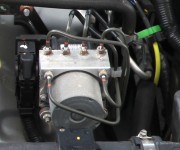
here is the IVD module itself
It has ABS and ESP at once.

The roll sensor which is installed under the pass. seat

fixing the IVD module
steering wheel sensor

well, the actual vacuum cleaner with the main brake
And now the hardest part begins!
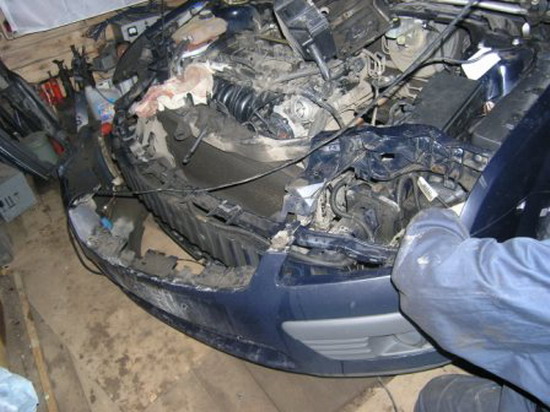
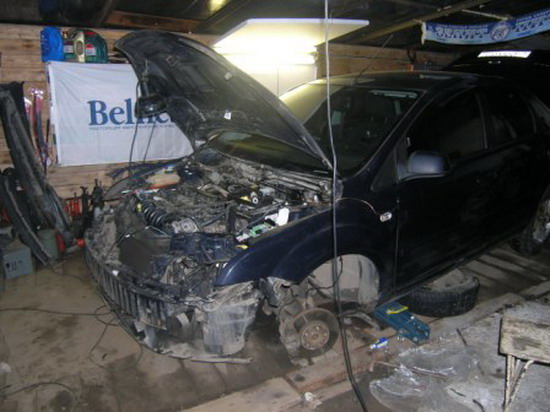
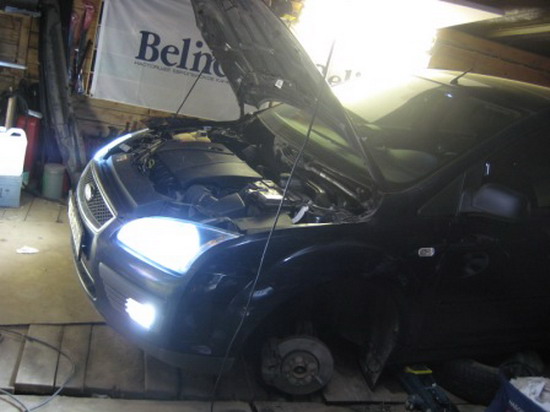
We start all by removing the headlights!
and here the headlight connectors didn't want to be removed for a long time with them ...

and here he is filmed
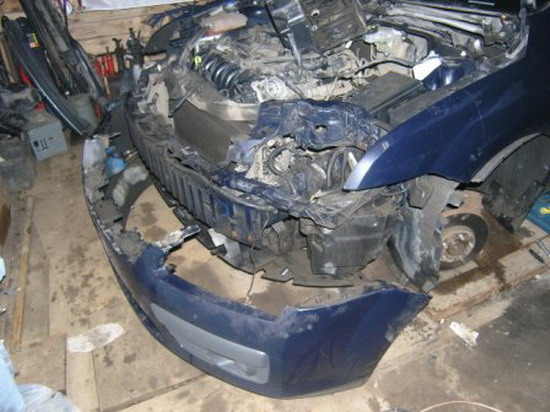
turn off the fog lights and remove the bumper until better times.
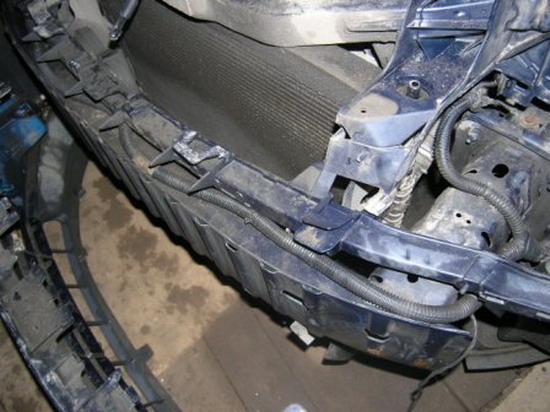
But the actual wire because of which I had to remove the bumper (whether it is not okay)
So!!
We remove the engine filter.
Unscrew the wiring masses (under the wings and from the side members) CAUTION BOLTS CAN BE BROKEN
remove the battery
unscrew the battery pad and take it to the side with the brains (be careful with this part)
Change ABS sensors
Unscrew the tubes
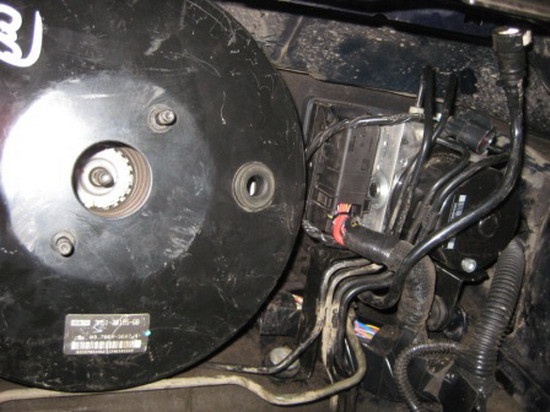
We unscrew the vacuum cleaner, from the passenger compartment 4 bolts by 13 (unscrewed with a long head), and one piston for attaching the pedal to the rod
Next, we proceed to replace the wiring. (it's difficult to write here, as it is done along the way and there is no specifics here), the most important thing is to change CAREFULLY AND LAY THE WIRING EXACTLY AS THE OLD LAYED! Check all connections so that later there are no problems. !!
here the wiring is already standing

here is the installed vacuum cleaner and IVD module
we pull the wires into the salon and connect!

We put everything back and check the lights, turn signals, and everything else
we are stitching and a valid ABS - ESP icon appears on the tidy

The shutdown button (as on dorestayle) did not have enough strength at once and there were no pins ... with it later. In the meantime, it turns off here.

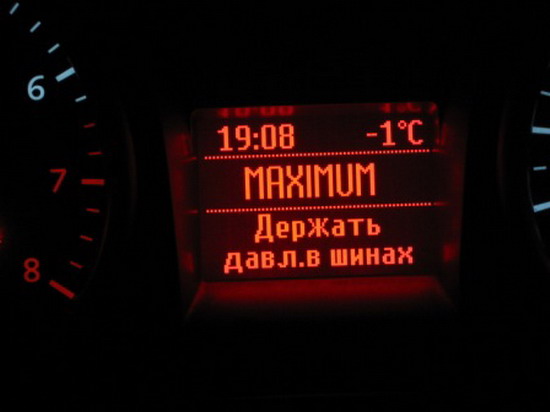
Well, there was also a new function Tire pressure. NICE FEATURE (works)
Conclusion!
The whole system works, specially went to the tape and raped it (so to speak, diagnostics), the entire installed system on the car proved to be just EXCELLENT! In the off and on mode, the difference is very, very noticeable. Such that the system turns off the engine I DO NOT OBSERVE everything within the normal limits and ride comfort. There are no errors at the moment, everything works for 5 with a huge \ "+ \". SATISFIED LIKE AN ELEPHANT! ALL ADVISE
The only thing .. with the weather I was lucky damn .... -17 horror ...., my heat gun can not overcome this frost to the desired state, but as soon as it was collected it was -7 again. Mockery!!!

FAQ on installation ABS and ABS + ESP for cars without these options
Machine without ABS and ESP(put only ABS without ESP)
Required spare parts:
1. ABS module with bracket
2. The main brake cylinder (GTZ)
3.6 tubes (2 from the GTZ to the ABS module; 2 from the ABS module to the front wheels; 2 from the ABS module to the intermediate connection to the rear wheels)
4. Wiring to the ABS module
5. Wiring to the rear sensors and rear sensors (if necessary, they are on the dorestayle, on the restyle you will have to change the hub for the sensors)
6. Wiring to the front sensors and the sensors themselves
7. Fuses 30A, 20A, 10A
8. 3-4 liters of brake fluid (the original is better)
9.vacuum booster (if required)
Installation:
2. We unscrew the tubes of the front wheels from the GTZ and from the rubber tubes
3. We unscrew the tubes of the rear wheels from the GTZ and at the intermediate connection (located below the vacuum cleaner)
4. Disconnect the clutch pipe and brake fluid level sensor connector
5. Unscrew and remove the GTZ
6. We put the ABS unit (placed behind the battery)
7. We put GTZ
8. We put 6 pipes and connect them
9. We disassemble the fuse box under the hood and connect according to the diagrams the contacts we need from the ABS module connector and assemble in the reverse order
10. Then we stretch the wiring to the front sensors (there are special holes), then remove the wheels, install the sensors and connect
11. We stretch the wiring to the rear sensors (goes to the salon and connects to the C113 connector, see the diagram), then remove the rear wheels, bend the fender liner and in the back we see the connectors, connect to them and to the sensors in the hubs
12. Fill the GTZ tank brake fluid and pumping the brakes, preferably then pumping it on IDS
13. Let's go flashing the ABS
ABS circuit(IMG :)
Machine with ABS but without ESP(add ESP)
Required spare parts:
1. ESP module (preferably with a bracket, since the brackets are different)
2. Wiring to the ESP module
3. Clock spring and connector to it (if needed)
4. Yaw rate sensor (there are 3 types and different connectors)
5. 3-4 liters of brake fluid (the original is better)
6.vacuum booster (if required)
Installation:
1. First of all, we remove the battery and the box from it, it becomes available master cylinder with tubes
2. Unscrew the tubes from the ABS module and remove it
3. We put the ESP unit (placed behind the battery) and fasten the tubes to it
4. Pinout the ABS connector and pin all the pins into the ESP connector and add wires for the yaw rate sensor and clock spring
5. We stretch the wiring to the yaw rate sensor (it stands under the front passenger seat, in order to put it, the seat must be removed) and to the clock spring (it stands on the steering column, remove steering wheel and there is a clock spring behind it, we remove the old one and put a new one, provided that you do not have an adaptive, if it is, then nothing needs to be changed)
6. Installation of the ESP shutdown button
7. Fill the GTZ tank with brake fluid and pump the brakes, preferably then pump it to IDS
8. We're going to flash the ESP
Machine without ABS and ESP(put ABS + ESP)
ABS + ESP installation report from symbol