Equal joint angular velocities or CV joint - an important part of any modern car.This element is capable of transmitting torque from the transmission to the driving wheels of the car, while setting the direction of its movement.
The hinge angle is limited to 70 degrees. Thanks to a fairly simple and reliable design, CV joints are widespread today, and also directly influenced the dominance of front-wheel drive cars.
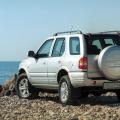
Obviously, it is advisable to install CV joints on those cars whose wheels are both driving and guiding, therefore all full- and front-wheel drive vehicles are equipped with such hinges.
CV joints are made of durable materials, which usually undergo additional heat treatment - hardening. Also, the hinge has a very good design that allows it to work through a huge number of cycles without much wear. Under normal operating conditions (which includes constant and sufficient lubrication of the joint and its isolation from the environment), the life of the joint exceeds that of most of your vehicle's mechanisms. Unfortunately, even the most reliable machine part is not immune from accidental malfunctions.
Device and appearance
Before you run into problems with your car, it's important to understand how it works. That is why, before talking about malfunctions in an external grenade or about methods for eliminating them, it is necessary to show the general structure of the wire. This paragraph will be especially informative for those who first encounter the concept of a constant velocity joint or the abbreviation SHRUS. So, the photo below shows the CV joint drive assembly. The photo shows all the main elements of the drive.

Of course, it's not enough to look at something to understand its structure and how it works. In the next photo you will be able to see the CV joint drive in section, with all the parts that make up its design indicated.

As you can see from the photos above, the drive has two CV joints: one external or external, the second internal. When in conversation it comes to CV joints, then you can hear the term "grenade" - this is the popular name for CV joints (obviously due to a certain external similarity).
We also suggest that you familiarize yourself with the video, which shows the operation of all elements of the CV joint:
The principle of operation of the CV joint drive is very simple : the shaft meshes with the differential, which transmits the torque from the transmission to the front wheels.The inner CV joint is attached to the gearbox, the front one is connected to one of the drive wheels. Obviously, the outdoor grenade will experience heavy loads and interact more often with the environment... Such operating conditions can lead to increased wear in the grenade and its faster failure. Therefore, it is especially important to monitor the condition of the outer CV joint and observe changes in its operation and possible malfunctions.
How to diagnose a malfunction
It is clear that there are no problems with the diagnosis of obvious faults. But what if there are no visible faults, the machine is working normally, although in fact, minor, minor damage that can lead to costly repairs has already appeared? There are two main effective methods for determining a malfunction:
- Listen to the operation of the car while driving. If you think you have heard unusual sounds, do the following: stop, put the gear lever in first or forward gear (depending on the type of transmission), then turn out steering wheel to the limit in any direction. Next, start abruptly by depressing the gas pedal fully. If during such a maneuver you hear a crackling or clicks from the front of the car, check the condition of the CV joints.
- Variants of visual diagnostics of malfunctions consist in a careful external examination of the condition of the anthers. If when looking at wheel disks (this will be especially noticeable on alloy wheels, since stamped ones make it difficult to see) you saw traces of grease on the front, which means that the boot is torn and urgent intervention is required. If there are no traces of grease on the discs, then carefully examine the boot itself. Any defects on it mean the possibility of dust, dirt and water entering the hinge. Therefore, make sure that there are no scratches or cracks on the boot itself, as well as that the clamps are tightened securely (the most common reason ingress of dirt and leakage of grease from the boot).
You can find out in more detail and clearly about the possibilities to determine a malfunction in the outer CV joints from this video instruction:
Details of faults
The article will focus specifically on the outer CV joint because it is with him that troubles most often happen. Troubles should be understood as both serious malfunctions and breakdowns, and minor problems that can be easily and quickly eliminated. The latter include minor boot defects that do not require replacement of the entire CV joint. We will dwell on them in more detail.
For those unfamiliar with the boot, this is a protective cover for the constant velocity joint. It is quite obvious that remaining open, such a transmission would not be able to work for a long time: it would clog up with dirt and wear out very quickly, and all the grease would flow out of it. That is why the boot was invented, which is attached to the drive shaft with clamps and provides protection and tightness of the assembly. In the photo below you will see a specific clamp for attaching the anthers to the shaft, as well as the method of direct installation and tightening.

Usually, minor damage to the boot does not require replacing the entire CV joint, because with timely diagnosis they do not have time to cause harm. If you find a defect on the boot, remove the boot, disassemble the CV joint and inspect its condition. If there is no corrosion or heavy wear, it will be enough to rinse all the parts in kerosene and treat with a rust neutralizer (just in case). In this case, the boot itself cannot be ignored, because through the cracks formed, water and dirt will again enter the CV joint. In this case, it is necessary either to repair the boot or install a new one.
Replacement
Faced with a situation where a malfunction in an external grenade cannot be repaired, it will be necessary to replace the entire external hinge. Since there are a lot of features associated with removing and installing a grenade on a shaft for each specific brand and car model, we will analyze the replacement using the example of one of the most popular and widespread cars on the Russian market. Further, we will talk about replacing the outer CV joint with Hyundai Solaris, but this does not mean that the described process will not be useful for owners of cars of other brands.
For replacement you will need
First of all, you need to purchase a new front outer CV joint. Usually they are sold immediately as a kit, that is, the hinge itself, the boot, clamps, retaining ring, grease and sometimes even a hub nut. The original outer CV joint for Hyundai Solaris has the article 495261R001 or 495261R002. This is how the set of the new outer CV joint will look like:

Also, during the replacement process, you will need: a jack, a balun, a set of keys, a screwdriver, pliers, a hammer and WD-40
Replacement process
Find a dry area with a flat floor, ideally work in a garage equipped with a viewing hole or lift. Rip off the wheel nuts and the hub nut. Jack up the car; for greater reliability, place another support under it. Then unscrew the nuts and remove the wheel (by the way, it can be used as additional support). Now, using a screwdriver and pliers, remove the retaining ring and unscrew the hub nut.

Remove the wheel speed sensor mounting bolt and remove the sensor.

Advice! Most likely, the nuts are stuck, so before unscrewing them, treat them with WD-40.

Next, you have to unscrew steering rod and press in ball joint from a fist. To do this, first unscrew the ball stud fastening nut and then remove the tie rod end. In more detail, you can see the process of removing the tie rod end in the video tutorial on how to replace them:
Now pull the ball joint out of the steering knuckle and remove it. Again, you can see in more detail the process of removing the ball joint in the video for replacing it on a Hyundai Solaris car:
Since we unscrewed the stand for greater convenience when accessing the outer CV joint, now we need to take care of securing the caliper brake disc (so that it does not hang on the brake hose, as it can simply break off). To do this, find a wire, make a hook out of it, and attach the caliper to the shock absorber. Naturally, you must first remove the drive shaft end from the hub. It probably won't work, so use a hammer and knock it out.

In order not to drain the oil from the gearbox and not to touch the landing of the shaft in the differential gear, we will not remove the CV joint drive. It is quite possible to replace all the elements while the shaft is on the vehicle. To do this, we have freed up the working space as much as possible and made it easier to access the external grenade.
Important! Place some support under the drive shaft to prevent it from falling.
So, cut off the boot clamps and cut the boot itself for more convenient and quick removal. Next, remove the retaining ring.

Next, you need to remove the hinge itself. Since the old one is no longer useful to us, knock out the outer CV joint with a hammer with seat... Next, thoroughly clean the shaft from traces of dirt and old kerosene grease and put on a new boot and a new circlip.

Fill a new outer CV joint with grease, the more the better. A large amount of grease will prolong the life of the joint.

Then pull the boot over the grenade, tighten the clamps securely. The car is assembled in reverse order. If you still have questions about replacing the outer CV joint on a Hyundai Solaris car, then watch the following video:
To begin with, you need to understand which CV joint requires replacement for Hyundai Solaris: internal or external. Replacing the outer SHRUS Hyundai Solaris is done without removing the drive (drive shaft), and to replace the inner SHRUS, the shaft will have to be removed. On some models, partial disassembly of the suspension may be required for replacement.
Despite the fact that the CV joint rarely breaks down by itself, it fails due to a torn boot or breakage of the clamp (tie) that secures the boot. If there is a tripod on the inner CV joint, then only one tripod can be replaced, which will be significantly cheaper. To extend the service life of the CV joint, you need to do a suspension diagnosis every three months, in which you inspect the condition of the anthers and, if necessary, lubricate the CV joints.
The cost of replacing the CV joint:
| Type of work | Replacement |
|---|---|
| Replacing the outer CV joint | from 1500 rub. |
| Replacing the inner CV joint | from 1800 rub. |
Car services for the replacement of CV joints in St. Petersburg:
Kupchino - 245-34-84
Citizen - 603-55-05
Bolsheviks - 701-02-01
Courage - 748-30-20
WhatAapp / Viber: 8-911-766-42-33
If by design features, it is impossible to replace the SHRUS with a Hyundai Solaris, then you will have to replace the drive shaft assembly with the SHRUS.
When to replace the CV joint:
- the appearance of a crunch at the beginning of the movement of the car;
- crunch when turning the wheel at speed;
- jerks when starting the car.
Untimely replacement may result in sad consequences, up to the accident on the road. Take care of yourself and your loved ones!
Complexity
Tool1 - 3 h
Tools:
- Medium flat screwdriver
- Nippers
- Beard
- Big hammer
- Retaining ring puller
Parts and consumables:
- Protective hinge covers
- Wheel drive shaft
- Clamps
- Retaining rings
- SHRUS-4 grease
- Kerosene
- Outer constant velocity joint
- Internal constant velocity joint
Note:
If knocking is heard while driving in bends front wheel drive, check the constant velocity joints. If a backlash is felt when the drive shaft is wiggled by hand or the protective covers are torn, then such a hinge must be replaced. Disassemble the outer joint (Bearfield type) of the drive front wheel makes little sense. This work is very laborious, and if the cover is torn, dirt trapped in the hinge quickly makes the hinge parts unusable. It is not possible to replace the hinge parts individually, so the best solution is to replace the hinge assembly. As a last resort, disassembly is allowed to replace the lubricant of the inner joint of the drive of the right front wheel (Tripod type) as it is simpler and less susceptible to water and road dirt. If there are traces of grease on the hinge, the cover is torn.
1. Remove the front wheel drive assembly as described.
2. Clean the parts and inspect the outer hinge.
Note:
The outer hinge of equal angular velocities must rotate with light effort, without jerking and jamming, radial and axial play. Replace the hinge if present.
3. Clean the parts and inspect the inner hinge.
![]()
Note:
The inner hinge of the wheel drive should move in angular and axial directions with light effort, and there should be no jerks, jams and radial backlash. Otherwise, replace the inner hinge.
USEFUL TIPS:
Protective covers for the outer and inner hinges must not have cracks or breaks. Replace damaged covers.
The wheel drive shaft must not be deformed. Replace the deformed shaft.
4. To replace the outer hinge or its cover, disconnect with a screwdriver or use side cutters to cut the clamp of the clamp for the large cover of the external hinge and remove the clamp.
![]()
5. Remove the small clamp of the cover in the same way.
![]()
Note:
Fastening clamps protective covers single-use constant velocity joints, replace them with new ones during assembly. Clamps are usually included with the new joint.
6. Slide the protective boot off the hinge housing.
![]()
7. Knock the hinge clip off the shaft with a hammer through the bit, overcoming the force of the retaining ring.
![]()
8. Remove the outer joint from the shaft splines.
![]()
WARNING:
Disassembly of the outer hinge is not permitted.
9. Remove the retaining ring by pulling it out of the shaft groove with a screwdriver.
![]()
Note:
When assembling, replace the retaining ring with a new one. The ring is usually included with the new joint.
10. Remove the protective boot from the drive shaft.
![]()
Note:
When installing the hinge, replace the protective cover with a new one. A cover is usually included with a new hinge.
11. Before installing a new outer hinge, fill its cavity with grease (if the hinge was not lubricated by the manufacturer) in an amount of (135 ± 6) g: put (70 ± 3) g in the hinge, and (65 ± 3) g in the cover.
![]()
Note:
12. Install the outer hinge cover and hinge in the reverse order of removal.
13. To remove the inner hinge of the front right wheel drive, remove the clamps securing the hinge cover to its body.
![]()
14. To remove the right front wheel drive inner joint, remove the clamps securing the joint cover to the shaft.
![]()
15. Disconnect the inner pivot housing from the drive.
![]()
16. Use a puller to open the hinge hub retaining ring.
![]()
17. Remove the retaining ring by pulling it out of the shaft groove.
![]()
Note:
For clarity, grease has been removed from the joint.
18. Remove the hub with rollers from the shaft splines.
![]()
19. Remove the protective cover from the shaft.
![]()
Note:
When installing the hinge, replace the protective cover with a new one. It is usually included with a new joint.
20. Flush all metal parts with kerosene until all old grease is removed.
21. Before assembly, fill the body cavity and the inner hinge cover with (145 ± 6) g grease: put (100 ± 3) g in the hinge, and (45 ± 3) g in the cover.
![]()
Note:
22. Assemble the right front wheel drive inner joint in the reverse order of disassembly.
Note:
After assembling and installing the hinges, check the tightness of the belts of the covers and the tightness of the clamps. The covers should not rotate on the hinges and the shaft, and the clamps on the covers. If not, replace the clamps.
The article is missing:
- Photo of the instrument
- Photos of parts and consumables
- High-quality photos of repair
What to do if the CV joint boot is broken or cracked? A similar problem is quite common as on Hyundai solarisand many other vehicles. It should be noted right away that there is no point in even trying to repair something. The diagnosis with such a problem is unambiguous - replacement... It should be said right away that a boot for any car will not cost a lot of money. It follows from this that you should not save on the purchase of this gum, because the dirt or stone that gets in can damage the system, which is protected by a similar method.
If you look at this problem from the other side, you will notice that the process is labor intensive and will take a lot of time to complete. Hence, we can conclude about the price that the auto repair shop will provide, because it is unprofitable to "tinker" with one car for a long time for little money, especially if it is a Hyundai foreign car. It is better to do everything yourself, especially since it is not so difficult.
Replacement
To change the CV joint protection, just a drop of patience and some tools that are not so difficult to find in stores are enough.
Internal CV joint with two clamps, boot and grease.
Required tool:
- wheel wrench;
- container for draining oil;
- rags, knife;
- a hammer;
- open-end or cap keys;
- set of socket heads;
- assembly;
- oil filling syringe.
Replacement begins. We call in inspection pit... Remove the engine protection. We drain the oil from the gearbox by unscrewing the plug (you can drain half of it). Ripping off wheel nuts, jack the car. We unscrew the wheel and set it aside.

We unscrew the hub nut. We unscrew the front strut from the steering knuckle. We take out the outer CV joint from the steering knuckle. Using a mounting tool, we pull out the drive from the gearbox (you can put the mounting on the inner CV joint and hit it with a hammer - the CV joint will come out), carefully without damaging the oil seal. Removal completed.
Remove the clamps from the CV joint.

We cut the boot with a knife and remove it. It's pretty easy on Hyundai. We remove the grease with a rag. We knock down the CV joint from the shaft, directing one hammer to the inner holder, and powerfully hitting the other on it. When the CV joint flew off we wipe the shaft, put on the boot. We take a new CV joint and put fresh grease into it in the center until it starts to crawl out from the edges. We put a grenade on the shaft splines and powerful blow we put it on the shaft. We put grease under the boot and put it on the CV joint, straightening and releasing excess air.

We put on and clamp the clamps in the direction of travel. We put the drive assembly into the gearbox. We push the outer CV joint into the hub. Fix rounded fist and rack. We tighten the hub nut. We put the wheel on the hub and twist it. We lower the car from the jack. Fill the drained oil with a syringe in the gearbox and check the level, if the gasket on the filler plug is damaged, we change it to a new one. We fasten the engine protection.
The replacement of the CV joint for Hyundai Solaris is completed. Of course, this took a lot of time, but any car enthusiast will surely be sure of the quality of the work performed. Also saved is not a small amount of money, which is simply a pity to spend on some simple breakdown, because the price tag in the workshops can only grow because of the word "Hyundai". But in order to understand well the structure of one system, you need to understand the device with another, for example, to understand how to replace a grenade.
An external boot for a CV joint on a Hyundai Solaris is quite cheap, so with the help of these instructions, any motorist can do all the work himself. Replacing this part shouldn't give the driver a lot of headaches. In general, Hyundai Solaris is a rather picky car to repair.
Why rush to replace?
In general, any boot on a car is a very important part that can protect the whole system from dirt, moisture and other unwanted elements. It doesn't matter if it's a Hyundai or another car, if you delay the repair of a similar problem, corrosion will begin, which will inevitably lead to more expensive repairs. Few car enthusiasts will be happy with this turn of events.
If you do not rest only on money, then it is worth noting that damage to the CV joint can lead to a complete blocking of the wheel right while driving. Hyundai Solaris is believed to be pretty safe vehiclebut at high speeds even in such a vehicle, serious injuries can occur.

Symptoms: crunch from under the front wheel.
Possible reason: internal CV joint is faulty.
Tools and materials: cloth gloves, a set of heads and wrenches, a set of screwdrivers, pliers, tools necessary for dismantling the front wheel drives, a side cutter.
Spare parts and fuels and lubricants: inner SHRUS - 495361R001 or 495361R001, lubricant type ShRB.
1. Remove the front wheel drive from the side from which you hear the crunch.
2. Clean the parts from dirt and carry out an external inspection of the actuator:
- the inner CV joint should easily move in angular and axial directions. Jerks, seizing and radial backlash are not allowed. If defects are detected, the inner CV joint must be replaced;
- protective covers of the inner CV joint should not have any damage (cracks, tears and similar defects). Damaged covers must be replaced. Also, if the cover is damaged, the hinge on which it is installed should also be replaced, since dirt that gets into the cover quickly makes the CV joint unusable;
- the drive shaft of the wheels must not be damaged, and it must not be deformed. Replace defective shaft.
To replace the inner CV joint, do the following:
3. Remove the clamp securing the inner hinge protective boot to the hinge housing.
4. Dismantle the clamp securing the protective cover of the inner CV joint to the drive shaft.

5. Separate the housing of the inner CV joint from the drive shaft.

6. Use a puller to spread the swivel hub retaining ring.

7. Dismantle the circlip by pulling it out of the groove in the shaft.
8. Remove the hub with the rollers from the splines of the drive shaft.

9. Remove the protective cover of the inner constant velocity joint from the shaft.
Note. When installing the hinge, be sure to replace its protective cover. Typically, a new protective cover is included with the new hinge.
10. Flush all metal parts - old grease must be completely removed; use only kerosene.
11. Fill the inner CV joint and its cover with lubricant.
Note. total weight lubricant should be 139–151 grams: put 42–48 grams of grease in the protective cover, and 97–103 grams in the hinge.
Note. In the absence of the possibility of using the original lubricant recommended by the manufacturer, it is allowed to use a domestic analogue of the SHRUS-4 type.
12. Assemble and install the inner CV joint in reverse order.
13. After the inner and outer hinges are installed, check the tightness of the belts of the protective hinge covers and the reliability of the fastening clamps of the covers.
Note. It is prohibited to rotate the protective covers of the joints on the shaft.
Turning the fastening clamps on the covers is not allowed.
Pavel Kurakin Motorist