The need for a detailed discussion of the problems that arise during the tuning of the "VAZ 2110", or rather, its external optical devices, is due to the presence of some features of this process. As a rule, it (tuning) includes several main areas: revision (replacement) of existing structural elements, installing new ones, as well as combining the first two with each other.
Tuning "VAZ" 2110, the headlights of which, more precisely, their design, allow you to do it yourself, every motorist is able to produce, in accordance exclusively with their design priorities and their own taste.
Tuning of VAZs with replacement of light bulbs
The meaning invested in tuning the headlights of this VAZ model lies not only in improving the exterior of the car, but also in optimizing the performance of standard lighting devices, the quality of which (as, indeed, on models 2111, 2112) leaves much to be desired. Especially a lot of complaints from domestic (and not only) motorists have to do with electric lamps installed by the manufacturer. The only one effective solution of this problem is their replacement with electric lamps that form a light beam, which is different increased brightness and intensity.
Electric bulbs most popular with headlight tuning enthusiasts

Modern manufacturers of electrical products are able to offer domestic amateurs "VAZ 2110" wide choose types of car electric lamps, each of which has certain advantages and disadvantages:
- Halogen... Motorists consider the main advantages to be a wide variety of standard sizes, long operating periods and an acceptable cost for most. However, such disadvantages as high energy consumption, installation and operation features are rapidly reducing the number of their adherents among motorists.
- Xenon. Despite the obvious advantages of this type electric lamps (high intensity of the light beam, low power consumption, environmental Safety, the proximity of the beam to the spectrum daylight) their widespread use is limited by some disadvantages. This, and a rather high cost, and the need for equipment vehicle special control unit (controller). However, the main reason for the frequent refusal to use xenon is called an increase in the risk of dazzling drivers of oncoming cars, which, in fact, was the reason for the prohibition of their use by the traffic police.
- Lamps type "GT"... They harmoniously combine most of the advantages of the above electric lamps, which is quite logical for the stable growth of their popularity, including for carrying out such an operation, which is the tuning of 2110 headlights.
So, we are performing tuning of external lighting devices "VAZ 2110" using lamps "GT".
Application of the "GT" lamp in tuning
Understanding the breadth of tuning capabilities provided by the above lamps lies in the plane of a careful consideration of their technical and operational features:
- Glow temperature coefficient, Kelvin - 4000-5000.
- Maximum luminous efficiency,% - 45-50.
- Enlarged quartz glass bulb enclosed in a chrome-plated body.
- Long spiral length.
Electric lamps "GT" are quite widespread in retail chains, which allows a car enthusiast who has decided to tune external lighting devices to purchase them (lamps) without much effort.
Tuning headlights on the VAZ 2110 in the style a la "angel eyes"
Another of the most widespread methods of tuning the headlights of the VAZ "dozens" is making an impromptu copy of the "angel eyes".
Equipment and materials
Operations for performing such tuning on the VAZ 2110 headlights will require some preparatory measures, consisting in providing the workplace with the following materials and tools:
- a medical syringe with a volume of 5 cubic centimeters;
- painting brush;
- office knife;
- container for paint;
- automotive two-component white enamel;
- with a blue tinting dye.
Work instructions
Motorists who have previously carried out similar work recommend the use of completely new headlights, since the technical and aesthetic condition of used external lighting devices, as a rule, does not correspond to the main tasks of tuning.
- Dismantling the headlight... We release the latches-latches from the engagement (three at the bottom and at the top). Using a clerical knife, cut (in a circle) a layer of sealant located between the glass and the plastic headlight housing. It is very important to cut through the sealant completely, as surface cutting will not detach the glass from the body. We unscrew the screws for fixing the reflectors (decorative), which allows you to dismantle the lens module. Remove the lens module and remove the lens.
Attention!To prevent paint particles from falling on the reflector mirror, reaming the rolled bushings.
- Preparation of the paint solution... Combine 5 milliliters of white enamel with the amount of colourant required to form a light blue color and 1 milliliter of enamel hardener. Mix thoroughly until a homogeneous mixture is obtained.
- Received paint paint the inner surfaces elements and leave to dry.
The 2110 headlight tuning has several " professional secrets", Helping to create not only beautiful, but also original, and sometimes exclusive, exterior. We offer one of them.
Do-it-yourself small tricks for tuning VAZ lighting devices
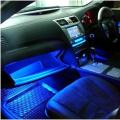
The process of giving the tuning uniqueness to the lighting devices of your "top ten" will require some additional materials, in particular, a phosphor. It is its properties, which are similar to those of phosphorus, which ensure the glow of this material in the dark, that are used to create the original design of headlights.
The cover of the headlight is covered (around the circumference) with a mixture of phosphor and varnish. The coating is made on both sides, after which the parts are thoroughly dried and installed in their original place.
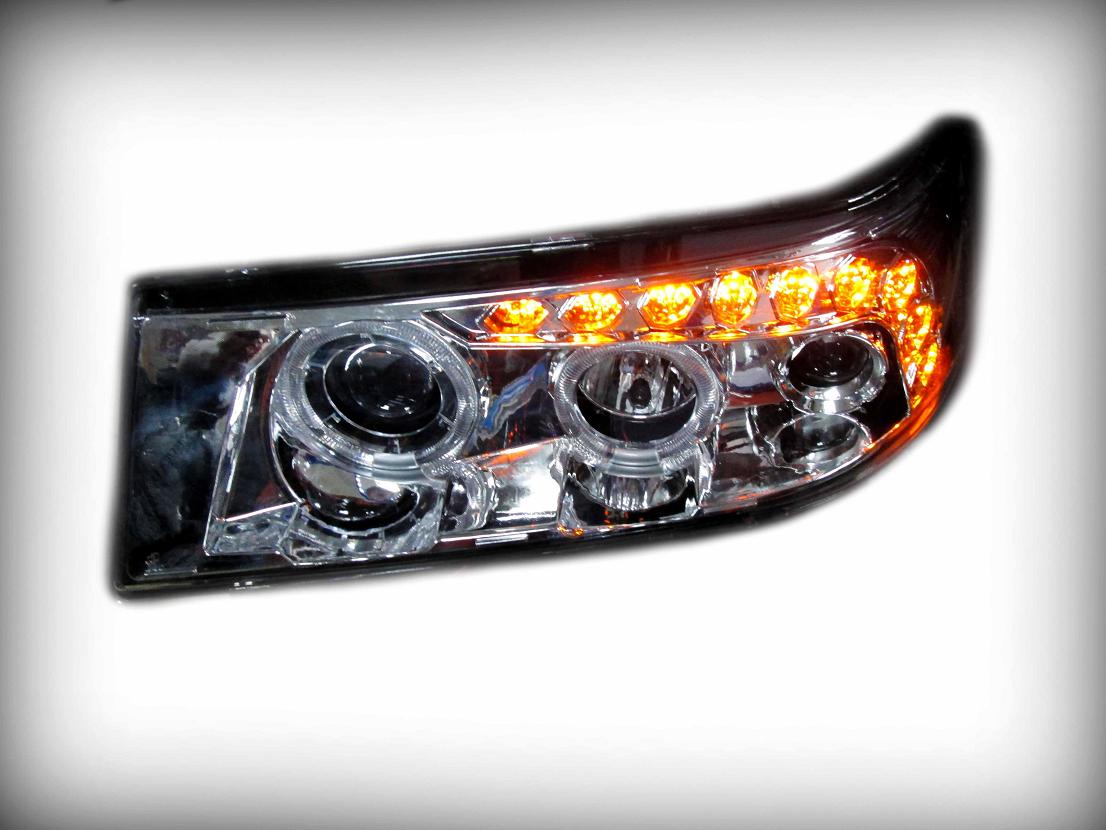
As a result, the car enthusiast receives lighting deviceswith a chic and almost unique exterior. Such tuning of headlights "2110" allows you to get not only a lighter beam, but also decorative lighting, very reminiscent of the famous "angel eyes".
The information presented in this article will relate to the parsing of the headlight of the VAZ 2110. Why do you need to disassemble the headlight? In my case, I did this in order to insert the diode strip inside the headlight. It is also useful for those who have headlights sweating. The reasons may vary.
I will not describe how to remove the headlight from the VAZ 2110 in this article, since detailed information about this you can find.
Well, let's get down to the process itself. In order to disassemble the VAZ 2110 headlight, you need to be patient. Since the parsing process is simple, it can take a while.
First, let's look at how to disassemble the headlight VAZ 2110 (Kirzhach)
- So, the first step is to remove the glass from the headlight. I consider this stage to be the longest and most dangerous. Dangerous, because glass can be broken if not careful.
A) We insert a screwdriver or knife into the edge of the headlight, between the glass and the plastic block.
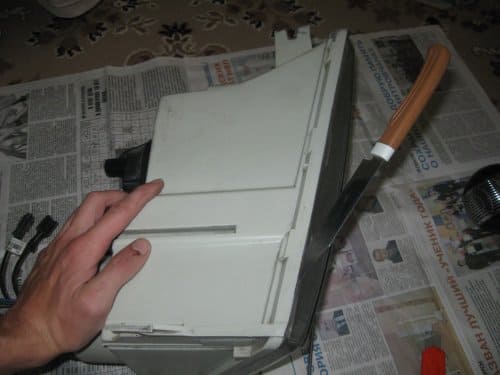
B) At the same time, a small gap will appear through which you can insert a clerical knife and start cutting off the sealant.


C) be careful, do not rush, do not insert the screwdriver too deep, otherwise the headlamp glass will simply crack.
D) We go with a knife around the entire perimeter of the headlight. If the sealant does not lend itself, the headlight can be warmed up with a hairdryer.

E) When the sealant has been slightly cut around the entire perimeter of the headlight, you can gently sink the screwdriver more deep into the headlight or insert a thicker screwdriver.

E) And again we go with a knife along the entire contour. (I played with the first headlamp for 2 hours, with the second less, either I gained experience, or there was less sealant there. The second gave in to me in half an hour).
G) When the glass is completely removed, remove it from the headlight. Be careful, as my glass caught on the chrome plastic inside the headlight. And it is then fastened behind the headlights with three bolts. Therefore, if this happened with you, pry it off with a clerical knife so that it unhooks from the glass.

2. Remove the chrome insert. To do this, unscrew 3 bolts at the back of the headlight.
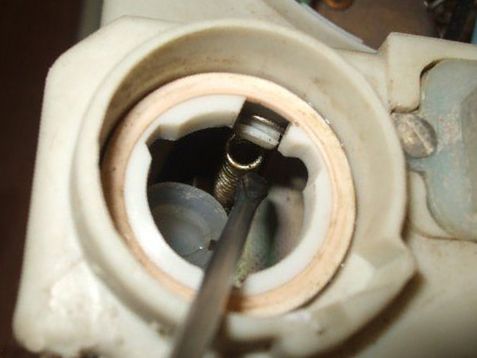
 3. If you need to remove the headlamp module and reflector, remove the spring through the hole for the hydrocorrector.
 4. Now tighten the adjusting screws as far as possible, insert the screwdriver handle and unscrew the adjusting screws.
 5. Now the board can be removed from the plastic housing of the headlight.
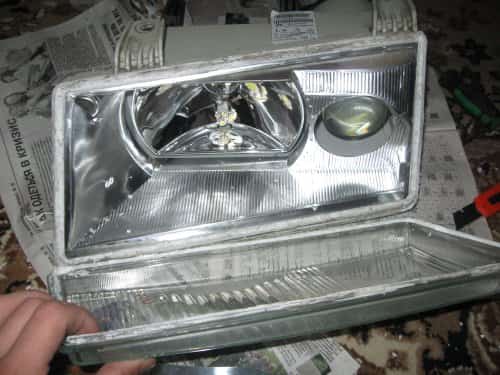
That's it, now consider the analysis of the headlight VAZ 2110 (Bosh)... With her, everything is much easier.
- The glass on the Bosch headlight can be removed very simply, since it is not glued with a sealant. Unfasten the headlamp catches.

- Remove the glass.
 3. To remove the reflector, unscrew the adjustment screws and pull out the cap that covers the low beam bulb, for this pry it with a screwdriver on the other side.
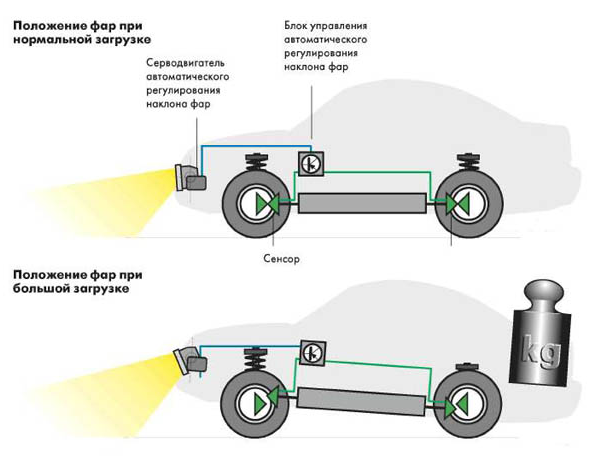
Using the headlight hydrocorrector in modern models VAZ made it possible to ensure the supply of light under the right angle regardless of the operating conditions of the vehicle. With a loaded rear end of the model without a hydrocorrector, the headlights blind the drivers of oncoming vehicles. At the same time, the road surface is less illuminated, which directly affects safety while driving. Consider how to repair or replace the device yourself.
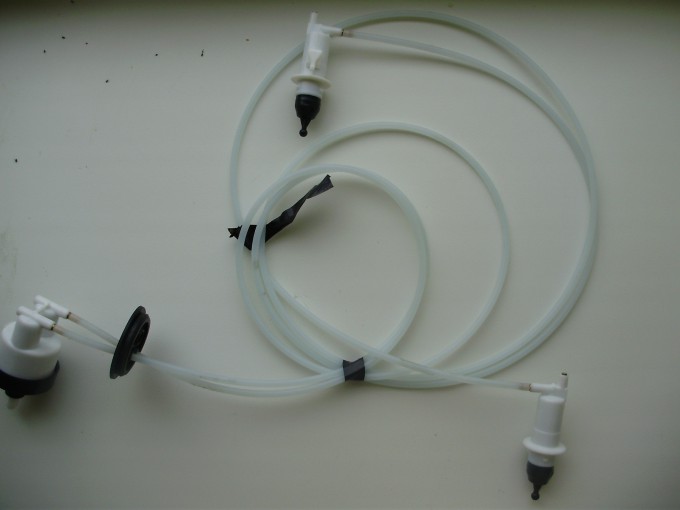
What does a hydraulic corrector look like and what it consists of
The device adjusts the angle of the light flux depending on the position of the car body. The shape of the regulator resembles a long tube, one end of which is located in the passenger compartment, and the other is attached to the headlights. The construction of the hydrocorrector consists of:
There are no complicated parts here, small repairs can be done with your own hands. This does not require a complex tool and special skills.
Principle of operation
The general principle of operation of the device is as follows: a working corrector sets the required pressure, thereby holding the lighting fixtures at the desired angle. If the luminous flux is to be directed lower, the pressure in the system drops. The piston lowers the rod, the position of the headlights changes. The system must be sealed, if a fluid leaks, the hydraulic corrector will not be able to perform its function and repairs with the replacement of some parts will be required.
When a replacement is needed
- If you notice that the adjustment does not work, you need to accurately determine the cause of the breakdown. Most often, depressurization and leakage occurs in the system. working fluid... This can be revealed by visual inspection. But if there is no leakage, the cause of the malfunction may be in other details. Perhaps the point is in the stock itself, the movement of which is difficult due to pollution or deformation. To measure the stroke of the rods, you must first remove the cylinders, the stroke length should be 6-7 mm.
- If the stroke is normal, then there is a breakdown in other parts of the hydrocorrector. In the VAZ 2110 model, this device is non-separable, if one of the nodes fails, it will be required complete replacement... There are kits on sale at different prices. It is better not to save money and buy a regulator with quality cylinders and tubes.
- Some motorists recommend trying to repair the hydraulic corrector with your own hands. You will need to use the materials at hand: threaded bolts, washers and clamps. This will save money on buying a new kit, but the service life and reliability of such a design leaves much to be desired.
Tip: More often than not, if the device breaks down, one or both of the headlights will come up and the light is directed higher than usual. You can see this by parking your car in front of a garage door or in front of a flat wall.
How to repair your device
In the process of repairing yourself, you will need to make some parts and consumables yourself.
Tools
From the tool you need to prepare:
- Screwdrivers.
- Metalworking machine.
- Plastic dowels that will serve as a cap.
- Washers.
- Anaerobic sealant.
Description of the repair process with a photo
The repair differs depending on the type of fault. In most cases, factory headlight mounts are replaced with homemade ones, and the cylinder rod is also lengthened.

How to extend the stem
If you want to extend the road lighting next to the vehicle, it makes sense to lengthen the stock. This will change the position of the headlight. You will need to use a 7-8 mm plastic tip. We recommend using a regular dowel with a suitable diameter. It is attached to the top of the stem with glue or sealant.
Replacement instructions
Since the cost of a new hydrocorrector is 200-300 rubles, most motorists do not get tired of manual repairs. To replace the device, we need:
- Flat screwdriver;
- Long head wrench.
The first step is to remove the old hydraulic corrector:
- Open the hood and remove the slave cylinders from inside headlights. To do this, simply turn the cylinder counterclockwise until it clicks.

To get to the slave cylinders, you need to open the hood and lower to the headlight attachment point
- We remove the cylinders from the holes.
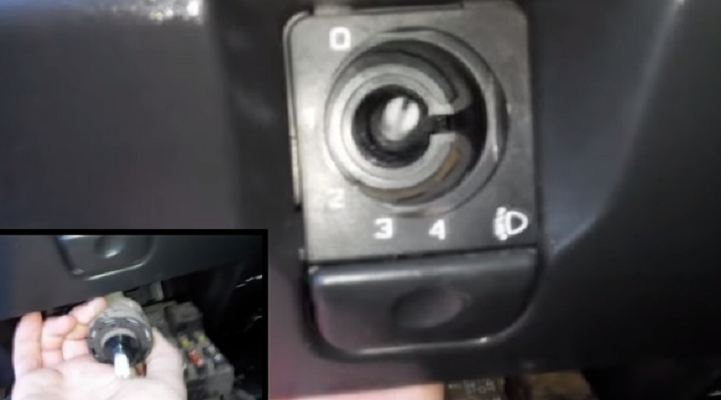
- We go to the salon and remove the control knob. It is to the left of the steering wheel. To remove it, pull it towards you until it disengages.
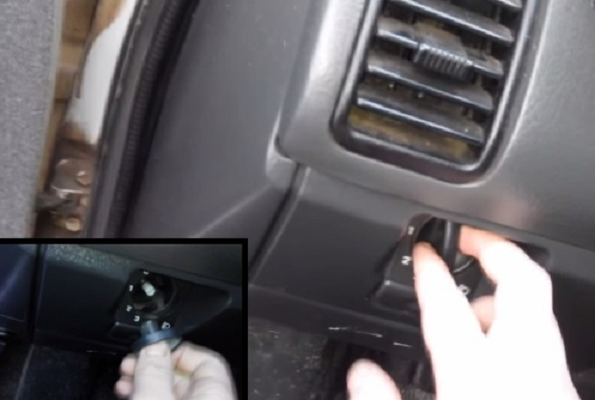
Remove the adjusting handle by pulling it towards you
- Now you have access to the nut that secures the regulator to the instrument panel. Remove the nut with a cap wrench.

The fastening nut is removed with a spanner
- We press the lock button under the hydraulic corrector to open the cover and gain access to the master cylinder.

Press the button to open the cover and gain access to the main cylinder of the hydrocorrector
- We take out the rod through the hole, and then the cylinder itself.
Pulling the main cylinder through the hole
- We take out the tubes.
Tip: If snagging occurs when removing the pipes, you will need to squeeze the fastening clamps under the hood or remove the water tank.
The installation of a new kit is carried out in the same way, only in reverse order... You need to feed the tubes from the passenger compartment through a special hole, as shown in the photo.
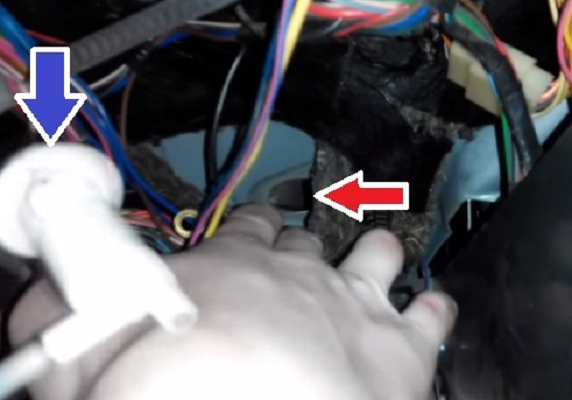
We stretch the tubes through a special hole in the cabin
Video: how to replace the headlight hydrocorrector on a VAZ 2110 with your own hands
Headlamp hydro-corrector allows you to smoothly adjust the direction of light, provides good visibility road surface... If this device breaks down, it can be easily replaced with a new one, the cost of the kit is quite small. Before repairing, it is better to carry out a visual inspection and measure the stroke of the rod - this will help to understand the cause of the malfunction and eliminate it.
Many car owners of domestic cars, faced with problems in the headlights, try to repair this part on their own, or install additional options... The optics on the VAZ 2110, currently on the market, will not only improve external appearance auto, but also significantly improve driving safety.
The proposed by different manufacturers illuminators can fit into the concept of the tenth family and emphasize favorably those points that make the car more attractive.
Find high quality optics for this model domestic auto not so easy. These parts often come to our market from China and Taiwan. Especially it concerns . They do not differ in the quality of workmanship, and their durability, according to the results of tests, is inferior to standard factory copies. High-quality illuminators cost a lot, but they have a long service life.
They do not have to be changed often when buying new ones. But if there is no desire to buy new optics, you can make improvements to the one that is available. You can do this yourself, because this work does not require any special knowledge or skills.
The headlights on the VAZ 2110 differ not only in technology, but also in the manufacturer.
Among the brands of regular headlights:
- Bosch headlights (reflectors only, no lens),
- Kirzhach headlights (with lens and reflector).
The most common malfunctions of this car part are:
- Breakage of the hydraulic corrector, which is better to replace with an electrical corrector,
- Trembling light
- Incorrect adjustment of the light beam.
Incorrect adjustment of optics due to breakage of the hydrocorrector
It is often necessary to adjust the light beam, especially with a heavily loaded car trunk, when the light is directed into the eyes of drivers traveling to a meeting. If the reflector falls, and the adjustment does not work, you can easily repair the VAZ 2110 headlight range control unit with your own hands. An example of the repair procedure is presented on the Kirzhach optics.
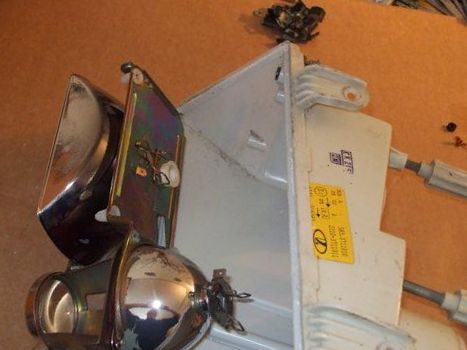
- We remove the headlights.
- We disassemble them: remove glass and metal clips (there are 6 of them).
- Cut off the sealant with a knife.
- Cut off the U-shaped convex profile on the glass.
- Unscrew from back side 3 self-tapping screws.
- Remove the paper reflector.
- There is a spring near the hydraulic corrector hole inside the illuminator, which must be removed.
- We perform the same actions with two plastic rosettes from two "twists" holding the reflector.
The ball snaps into the plastic and the metal bobbin into the second groove. She does not allow the adjustment to be twisted further than herself. If you twist the hydraulic corrector during the time, you can break the metal latch. The ball pops out of the plastic and the headlight "falls". All repairs will consist in replacing the broken metal part with a plumbing gasket, which does not make it clear when the adjustment has reached its extreme position. As a result, you can twist it again. It would be more correct to modify the mount: insert a cotter pin made of wire between the petals of this plastic piece.
We assemble the headlight in the reverse order, cleaning the old sealant and applying a new one.
There is another way to repair a hydraulic corrector:
- On the adjusting screws we cut the thread m3.
- We screw them into the illuminator, put on the washers.
- We pull out the plastic fasteners.
- We dress the bar with the high and low beam modules.
- We put on top: a washer, a spring, another washer. It is desirable to use a locknut. We twist everything.
- We fix the structure with an anaerobic sealant.
Repair of the illuminator without disassembling it
Particularly clever, you can try to snap the ball at the end of the "twist" into the plastic without removing the glass through the holes for changing bulbs on the back of the illuminator part. For this:
- We drill a hole opposite the plastic latch on top of the headlight.
- We insert a screwdriver into the hole.
- We snap the collet onto the ball of the regulator.
- We glue the drilled hole.
- We take one hinged hinge from the furniture cabinet for each knot torn out in the corrector. Hinges 5-6 cm long have holes for fastening to the cabinet and an oblong cutout on top with a hole to which it clings.
- Carefully insert the canopy into the slot on the adjustment screw.
- Move the screw so that the slot is in the narrow part of the canopy.
- Supporting the canopy, unscrew the screw with effort until it stops. This is how the canopy is clamped and fixed, which must be placed in a horizontal plane.
- With an electric drill with a 3mm drill, we make a hole in the metal base of the illuminator in the place where there is a hole on the canopy.
- We wrap a not very long self-tapping screw there so that it does not rest against the reflector high beam... This slot will secure the adjusting screw securely and will not break.
Eliminate headlight jitter
Some owners domestic VAZ 2110 noticed that the light trembled when driving. Such a problem often appears in Kirzhach headlights, but in this part from Bosch this phenomenon rarely occurs. Reason: Rattling of the reflector itself.
To eliminate the shake of light, you need to check:
- Is the reflector in place in the latch;
- Is the thrust of the adjusting bolt in place;
- Does the hydraulic corrector rod rest against the seat;
- Is the thread slack (swap the lamps of the high and low beam)
- Is the tube frayed in the hydrocorrector?
Among the most successful ways troubleshooting:
- Replacing the hydrocorrector with an electrocorrector.
- Increasing the length of the hydraulic corrector rod, which will help to tighten the spring.
This folk method allows you to get rid of the jerking of the light by putting a cap on the hydrocorrector rod.
Use as a cap:
- plastic dowel 8mm long,
- a cap from the brake union,
- another plastic cap.
The procedure is simple:
- We take out the hydrocorrector from the illuminator.
- We put a cap tightly on its stem. It is important that it does not slip inward.
We insert the hydrocorrector into the seat.
Replacement of optics VAZ 2110
Sometimes the VAZ 2110 headlight unit must be completely replaced. The job shouldn't be too difficult.
1. Disconnect the wire from the "-" terminal of the battery.
2. Remove the radiator grille.
3. Disconnect the block with wires.
4. Press the latch of the hydraulic corrector cylinder, turn it clockwise by 90 ° until it stops.
5. We take it out of the socket without disconnecting it from the hoses.
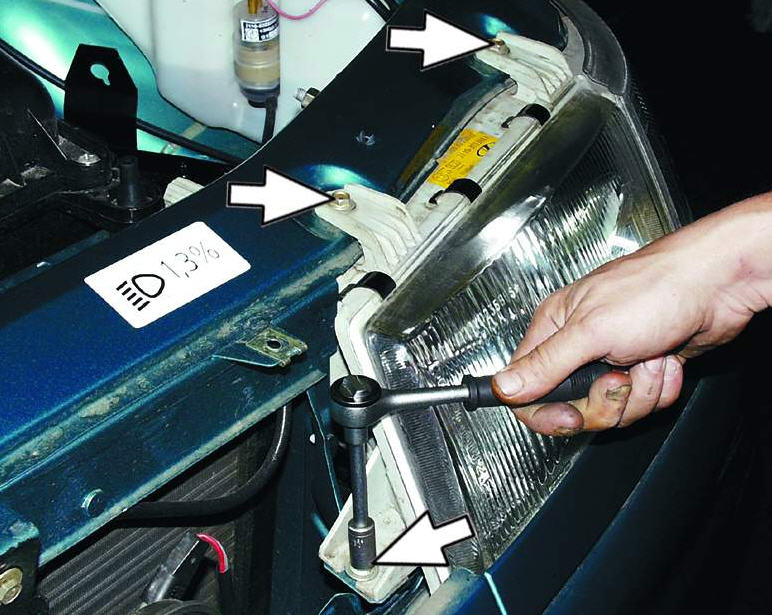
6. Unscrew the three mounting bolts and move the headlamp back.
7. Move the cover to the center of the car by about 4 cm so that its hook comes out of engagement with the wing.
8. In order to move the pad, loosen the tightening of the bumper mounting bolts from above to press it forward.
9. Press on the bottom of the pad so that the flange disengages easily and remove the pad.
10. Unscrew the nut of the lower fixture of the illuminator.
11. Disconnect the block from the direction indicator, push the illuminator towards you and remove it.
12. Unscrew the fastening screws for disassembling the illuminator.
13. Disconnect the headlamp and the direction indicator.
14. We remove two hooks on the indicator body from engagement with the body of the optics part.
15. In the reverse order, we assemble and install the headlamp unit.
Tuning VAZ 2110 by changing the type of optics
In addition to troubleshooting, car owners often do, thereby improving the car's appearance. A well-made tuning will enable the car to look more fashionable, more modern and more beautiful. If you choose the right accessory, you can change the appearance of the "dozens" quite dramatically.
The most popular tuning of the front optics in the form of tinting.
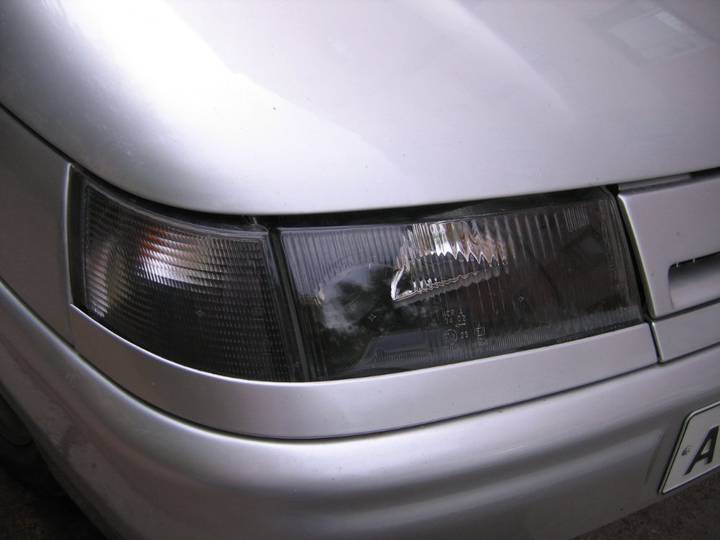
It can be carried out different waysthat practically do not affect the lighting of the road.
The tinting of the front lights itself can be different:
- Front optics mask painting,
- Glass painting,
- Glass film tinting.
The process of painting optical parts is shown in the video.
For those who do not want to paint or tint, you can purchase ProSport headlights for the VAZ 2110. They are already sold in black or chrome. It remains only to install them in place of the old regular ones. However, they are not different high quality and bright light.
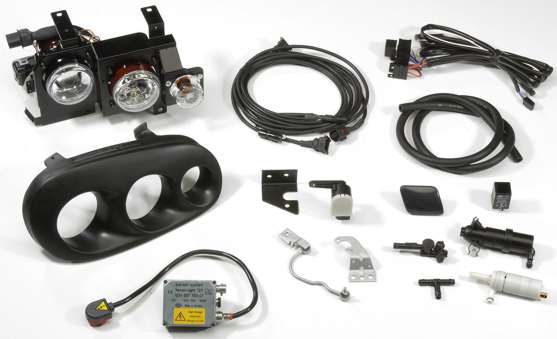
The second most popular tuning method is, which are a useful thing, but domestic cars rarely equip them. Installation process fog lights not difficult, but you can do it on your own. There are VAZ 2110 fog lights, both corrugated, scattering light, and transparent, shining spots. The latter are considered fashionable, but they are worse in operation. To connect such optics, you additionally need to purchase:
- key,
- headlight frames,
- key indicator (yellow),
- relay,
- wires,
- the terminal is narrow and wide "mother",
- terminal narrow and wide "daddy",
- terminal ground,
- plastic pads.
The diagram for switching on the fog lights is shown in the photo.
Operating procedure:
- We find 2 wires in the Ш1 connector - yellow with black and yellow.
- In the bundle from this connector, we take 3 wires: yellow-black, yellow and thin yellow-black.
- Disconnect the wires under the cap from the washer reservoir and from the fluid level sensor.
- We unscrew the nut that holds the washer reservoir.
- We pull out a bundle of wires from under the left side member.
- We cut off two pieces of wire from the yellow wire, we stretch them into the salon.
- We clean the wires, crimp them with “daddy” terminals, insert the wires into the block so that the yellow-black wire joins the marked wire.
- We connect the block.
- We press the two yellow wires to the harness and the washer reservoir.
- We put everything in place.
- We cut off two pieces of wire 50 cm long, crimp the terminals for ground with them.
- We attach all this together with the mass from the headlight on a hairpin.
- We extend the fog optics wire in the front spar.
- We pull out both wires at the headlight attachment point.
- We squeeze a wide mass for each wire.
- We put on the staples on the bumper, we put a block on the wires for a wide mother.
- We prepare the fixtures ourselves: we install the bulbs in them so as not to touch them with our fingers. Otherwise, they will burst immediately when heated.
- We attach a yellow wire to the lamp, and a black wire to the body.
- We install the headlights in place.
This procedure will take about one and a half hours.
About headlights on the "top ten"