Good day to you! Recently drove to the repair of VAZ 2101, it was necessary to produce overhaul Brake system in a penny. And I looked a little that they write about this on the Internet, I decided to write some kind of brake repair instructions.
I will try everything quickly and in essence. My opinion that the brake system in the car is not what you can save on, but as always, the budget ... ah budget ...
So with my repair, they drove and say that we can change everything at a minimum, in all cylinders repair kits and TP ... well, it is necessary so necessary. Diagnostics showed:
- The front cylinders are practically jammed, the hoses had cracks
- Main brake cylinder had huge working and leakage
- Cable of the crinic handbrake
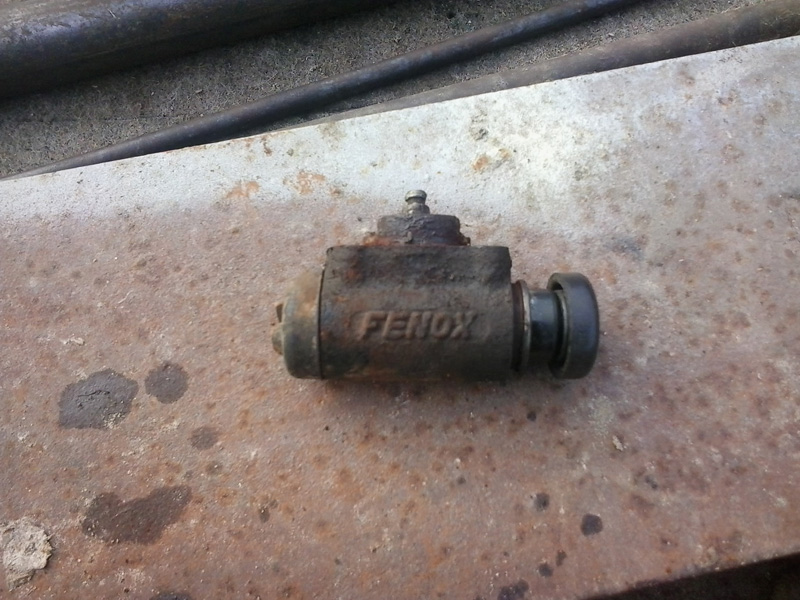
- Rear cylinders Lects
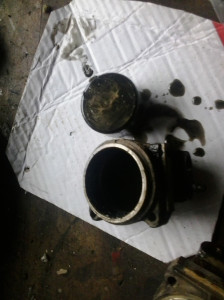
Moreover, so also in short repairmen were confused by the tube on the main cylinder, the rear circuit was connected instead of the right front wheel, and right wheel In the back circuit :) and the car went ...
Generally, repair brakes in penny The point is not too complicated, although work and a lot and it contains the following sections:
- Repair of front brakes
- Repair rear brakes
- Pumping brake system VAZ 2101
- Adjusting manual brake
And now everything is on points.
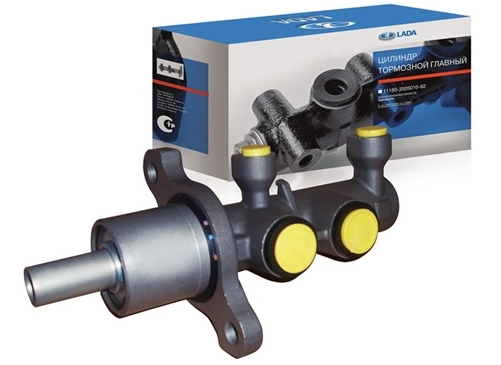
Repair or replacement of the main brake cylinder
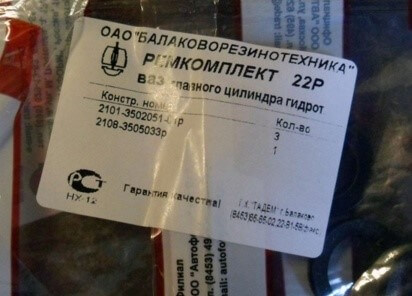
As for the main brake, then the main faults are - the shocking of the brake fluid between the contours, jamming the pistons and, as a result, not a complete dishevement of the wheels, the leakage of the fluid through the rubber seals. Personally, I would recommend replace the main brake cylinderSo, in most cases, the ease of pumping system depends on it, and the operation of the brakes will be trouble-free. If in mind the budget, you decide to repair the main, then I recommend that you buy a BRT repair kit or similar, do not buy dubious quality! Replacing Repair Kit is made similarly
By the way, when repairing all the details of the main brake cylinder are cleaned of dirt, washed clean brake fluidIn no case cannot be used gasoline, all rubber bands are not a rack to the effects of gasoline.
If you decide to replace the new one, then everything is quite simple here - the old shot, the new one set.
Repair of front brakes
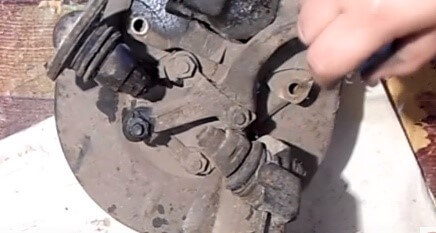
The repair of the front brakes should be started with inspection, first of all trying to turn the hub from the hands if the cylinders do not succeed then it will be possible. Next, you can remove, for this remove the corkscrews, pull out your fingers-guides.
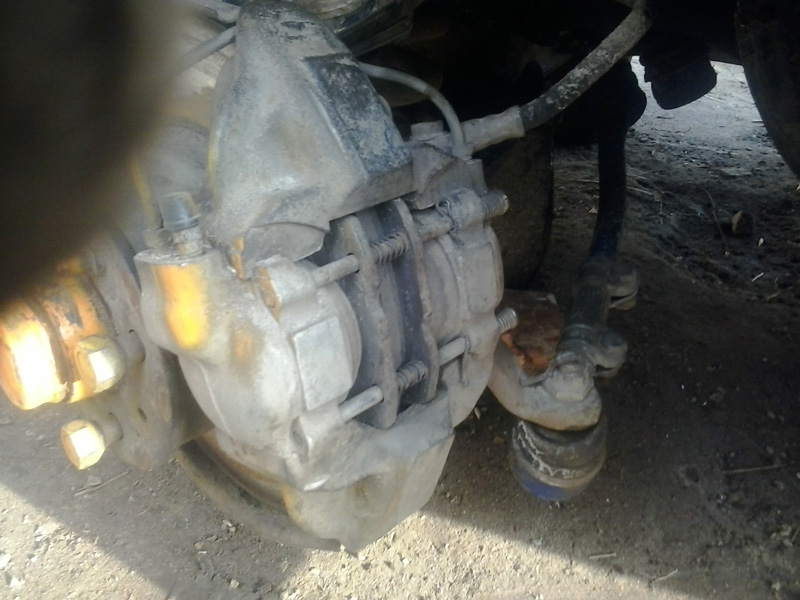
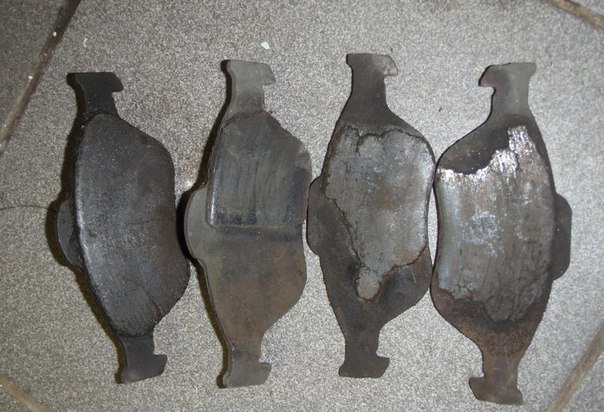
After pulling out the fingers, we try to drag the brake cylinder with a screwdriver, if it succeeds, it means the cylinder is in normal, working condition and in the absence of leaks and the integrity of the anther do not need to climb there. If the cylinders are not amenable to screwdriver force, they need to be repaired or replaced, I had this situation.

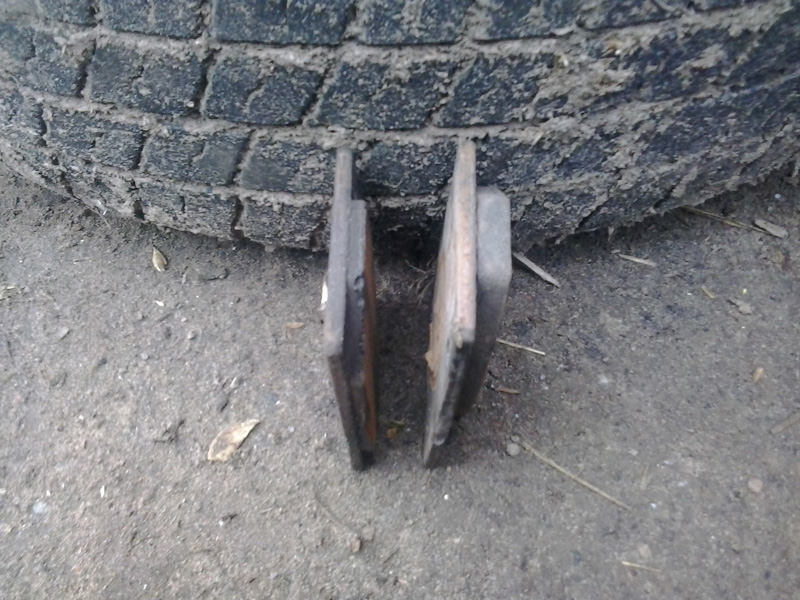
We see how the blocks were unevenly worn:
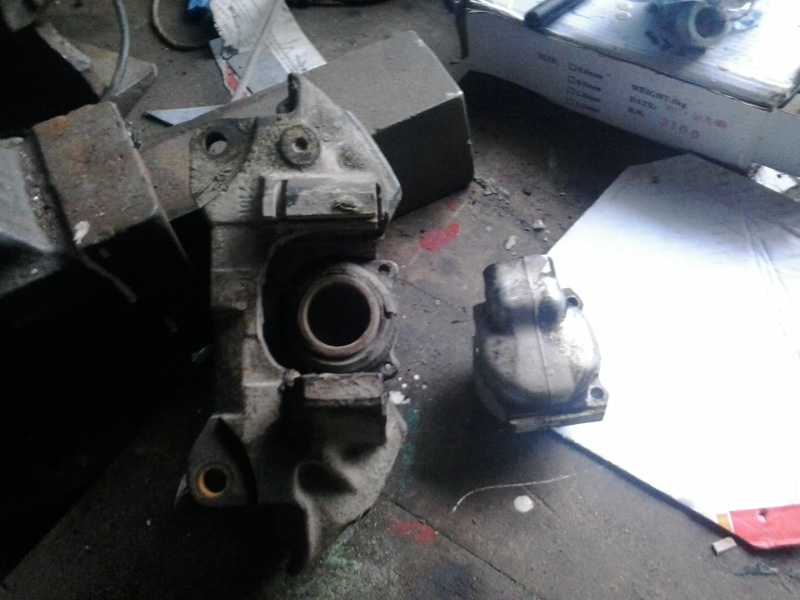
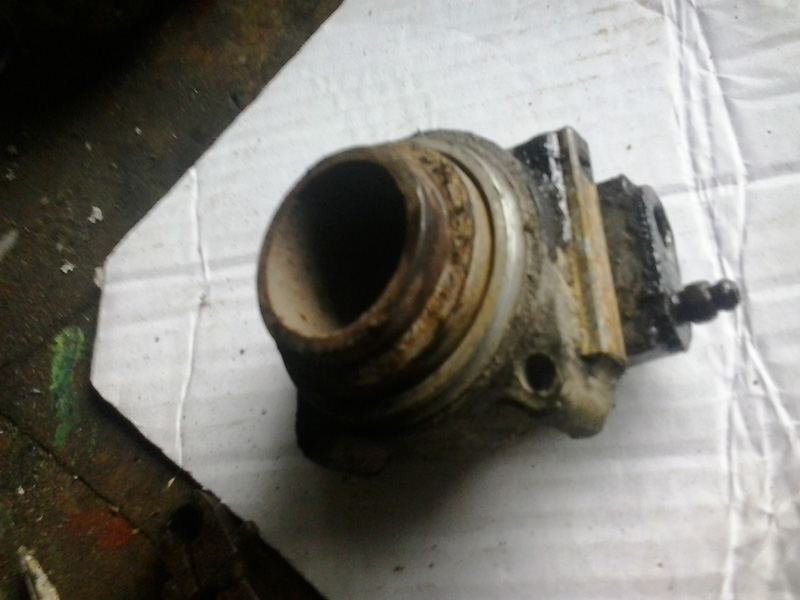
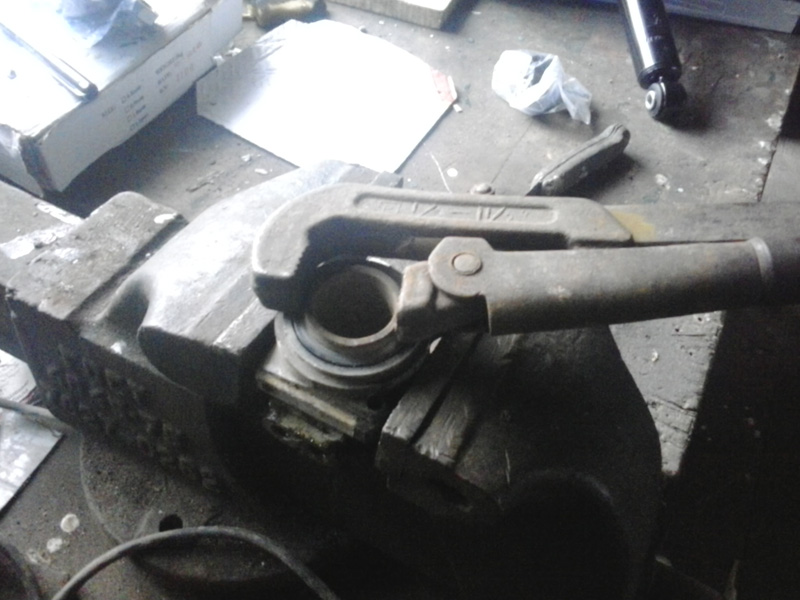
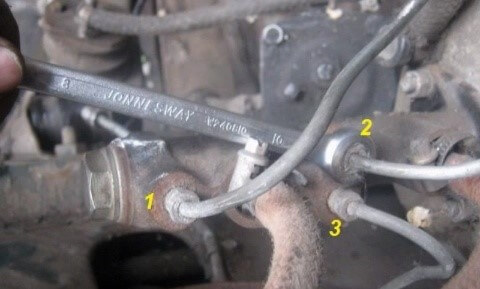
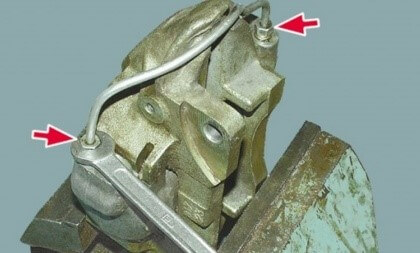
If you need to repair a braking cylinder, then you need to unscrew the hose and remove the caliper by unscrewing two bolts with the key to "17". After removed, it is necessary to carefully knock the brake cylinder from the caliper. It is necessary to do this carefully, since the duralum cylinder buildings are prone to cracking. I knock out the cylinders from the caliper through a wooden lining.
After the cylinder is removed, it must be cleaned of dirt. Next, it is necessary to remove the piston from the brake cylinder, it is possible to do this with the compressor, the intense pressure into the cylinder (do it very carefully!), I used the balloon key.
Thanks for the subscription!
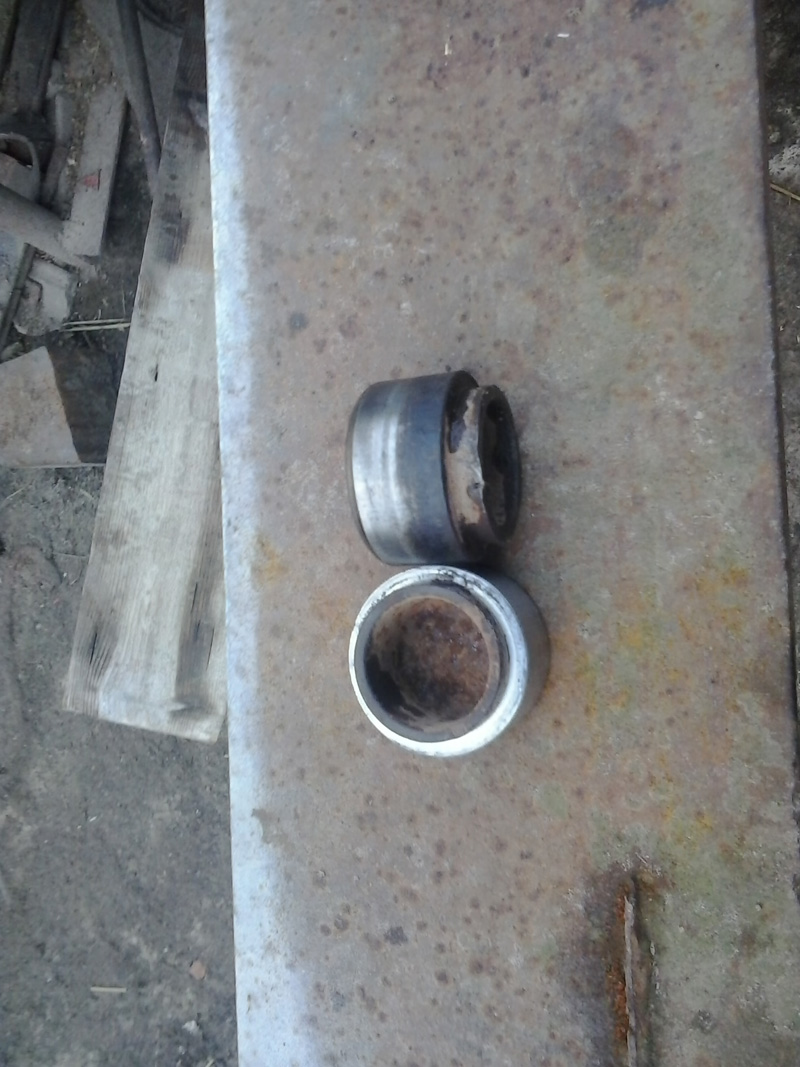
After removing the pistons from the cylinders, my and clean the brake cylinders from the dirt, especially paying attention to the cleanliness of the groove under the sealing ring inside the cylinder, often it is forgotten by the oxide from the duralum cylinder and the piston cries. After everything is cleaned, insert a new sealing ring, be sure to lubricate a clean brake fluid and insert the piston into place. Next, wear a new boot and insert the cylinder into the caliper.
Next, you can put a caliper on the car and fix it well tightening fasteners, in the factory embodiment of the caliper under the fastening screws, there are rolling washers, which will also not be superfluous. Next can be installed in place and screw the brake hose. It is very important when installing new brake hoses, install new brass sealing rings under the hose. If such is included with the hoses, it is very good if there is no, then you will definitely purchase, since they are practically disposable and new rings contribute to a reliable seal. On this, the repair of the front brakes of VAZ 2101 can be considered completed.
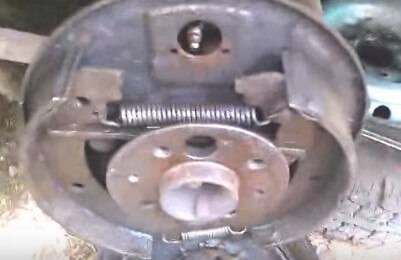
Repair rear brakes
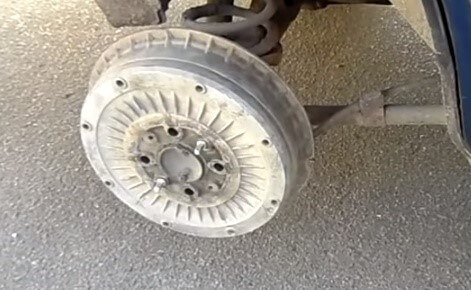
FROM rear brakes In the "penny" everything is not so simple, but the reason for this is the wear of the brake drum. This defect is often found and may happen that you set new pads and there are no brakes anyway, because even despite the new blocks of their thickness are not enough for braking. Accordingly, it does not hold and hand brake.
But the cause is not braking rear wheels It may be "sorcerer", so it is necessary to make sure of its work.
If the braking cylinder is drunk, then it is necessary to replace rubber seals, it is not difficult to do this, it is not necessary to even remove the cylinder from the car.
So all the same do with the worn brake drums? As an option and I often use it quite often, do it brake pads With your own hands, namely, labels on the VAZ 2101 pads from the UAZ car, they are somewhat longer, but they are fitted, and most importantly, they are somewhat thicker than standard Zhigulevsky.
For each motorist, the car breakage breakdown, but many problems can be solved without a hundred due to the finished Repair Kit. For the main brake cylinders, such sets also exist, but how to use them, we will understand below.
Functions of the main brake cylinder
This element can rightly be called the heart of the entire braking system. It converts an effort applied to the pedal into hydraulic pressure. In essence, it performs the functions of the hydraulic pump and is responsible for the correct fluid supply to each wheel. Structurally, it is divided into two sections, one is responsible for the operation of the front wheels, and the second is rear. Thus, even if the performance of one of the contours is broken, the second will still perform the task. On cars S. rear wheel drive These sections are divided by the axes.
The main elements of the main brake cylinder (GTC) is a housing, two pistons, return springs and a tank, also there is a locking washer and rubber gaskets. The principle of the work of the node is next. The piston moves along the cylinder and overlaps the compression hole, the first circuit creates a pressure provoking the movement of the second circuit. The resulting emptiness is filled with liquid. The spring serves as a limiter and returns pistons to their previous places.
Causes of breakdowns and their signs
One of the main reasons for the failure of the main brake cylinder is an uneven distribution of fluid in the system, leading to the failure of the contour. Negatively affects the wear of the sealing cuffs located in the fields of the rod inlet to the cylinder. Also, the appearance of the pistons on the pistons and the deformation of their return springs with rubber cuffs are not excluded.
In addition, the compression opening is completely clogged. Wrivered the above faults may be poor quality. Any detail failed to urgently dismantle and install a new one in its place, in the case of a malfunction of the cylinder mirror, the entire node is needed. And it is impossible to slow, because proper work GTC is one of the collateral of your safety.
![]()
Much can be understood on the performance of the brake pedal. So, if it has a reduced working stroke, then, most likely, the reason lies in the compression opening. It may be clogged, or its overlap occurred. It can also be in the absence of a gap between the cuffs of the GTC and the piston. When the piston is seized, overlapping the channels and deformation of the cuff, the pedal does not fulfill the complete move. But if it moves excessively easily, the cause of the hydraulic fluid is the reason, and the replacement of rubber sleeves is needed. About the jamming of the piston shows the braking of the wheels at the allowed pedal.
Diagnostics and Repair - Replacement Repair Kit
Where to start and gtz? First of all it is necessary to produce visual controlSince any damage - drums, wet performances on the case, cracks, etc. - are very disturbing signs. External defects are not detected? Then it should be checked the trace pedal move, it should be smooth and soft, jamming and failures are unacceptable. If everything is in order, the next stage is to try the braking system in action. Check the same dismantled main brake cylinder for tightness can only be at the station maintenance Either if you have a special stand. All its elements are processed with alcohol, and only replacement is suitable for rubber gaskets. Pay special attention to the Mirror of the GTC, it is not allowed to have chips, scratches and other damage.
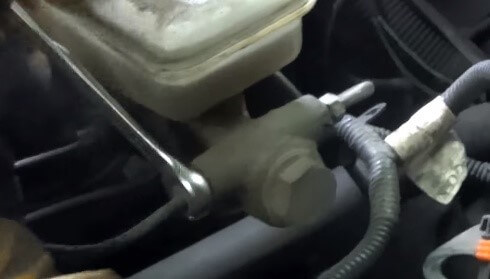
In case of detection of damage incompatible with life, you can replace Repair Kit yourself. Naturally, first of all should be dismantled by the item. It is installed in the case motor compartment. Reaching the unit, merge the brake fluid, for this you need to push the screwdriver the corresponding clamps and pull the nozzles. After that, the studs and GTz are twisted, you can freely remove.
![]()
The next step will be a disassembly to get to the wear elements. From the side of the part there is a bolt, it must be removed, mainly the key on "13". Act extremely carefully, since it also has a spring, and it is possible to flow the brake fluid. Next, we unscrew the bolt connections of the pistons and gently dismantle the boot. After that, you can disassemble the node to the components and produce visual control. It should not be traces of corrosion, nor chips, nor other defects, and any replacement spare parts needed.
Then, naturally, it is necessary to collect everything. The first are installed on their regular springs. At the same time, do not forget about the lock washers. Nuting springs, do not confuse the sides. Next, pistons are inserted into the cylinder and fixed through bolts. They must enter smoothly if any obstacles arise, then do not take "for power", but try to eliminate them. For example, burrs can be served on cuffs. In addition, make sure that the gum is located strictly in the center, otherwise it is soaming that it will provoke new malfunction. In completion, screw plug screws and the glands are installed.
When the replacement is completed and the item is located in its place, do not forget to pump the brake system.
For pumping, they first slowly press the brake pedal, then let it release it and wait until the brake fluid rolls up, and it is necessary to close the hole in the GTC tube. Then there will be such a possibility, since the brake fluid goes. Next, connecting the tubes, pump all the brakes. To ensure that air bubbles come out, it is recommended to use transparent hoses. We start from the rear wheels. By revealing the fitting, slowly press the brake and hold in that position. Then, twisting the fitting back, let go of the pedal. Of course, the pumping will not work independently, so you have to take an assistant.
The design and principle of operation of the main brake cylinder (GTC) on any car with a vacuum brake amplifier (VUT) are the same. It is the GTC that provides the necessary pressure of the brake fluid, so the efficiency of the brakes is directly related to its condition.
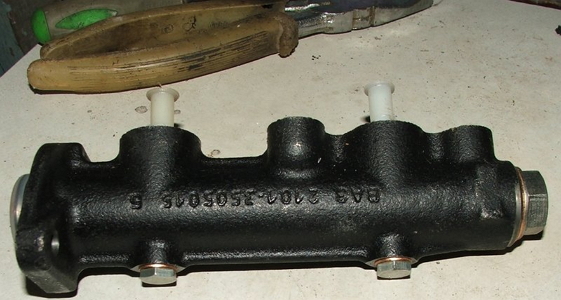
Main brake cylinder
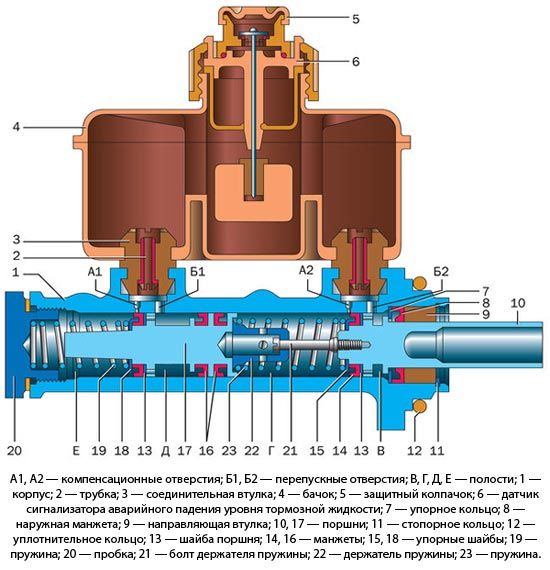
The basis of the GTC is a cast-iron cast pipe with a polished inner surface, in which the pistons move. When the driver presses the brake attached to the pedal, the rod acts into action. Rod Vut presses on rear piston GTC, which overlaps the compensation hole and creates pressure in brake tubes.
As you move forward, the rear piston raises the pressure in the front chamber both through the transition holes and using the spring, which it is connected to the front cylinder piston. The front cylinder piston begins to move, overlaps the compensation hole and raises the pressure in the front chamber and brake tubes.
Faults of GTC
The main malfunctions of the main brake cylinder:
- depreciation of rubber sealing elements;
- the formation of scratches and rust on the inner surface of the GTC;
- air entering into the GTC.
During the braking, the temperature in the working cylinders increases, which leads to a strong heating of the brake fluid. After 1 - 2 years, the properties of the fluid begin to change, this leads to increased wear of rubber seals. After all, particles of metal oxides and hydroxides, as well as microscopic fragments of rubber seals fall into the liquid. As a result, seals, and often the inner surface of the GTC wear out, this leads to the appearance of brake fluid leaks.
If somewhere in the brake system there is even a small leak, the fluid level in the tank will constantly drop. When the critical value is reached, air can enter the air, this will strongly reduce the braking efficiency. Than more air, the worse the system works. In some cases, the brakes are triggered only with 4 - 5 pages on the pedal.
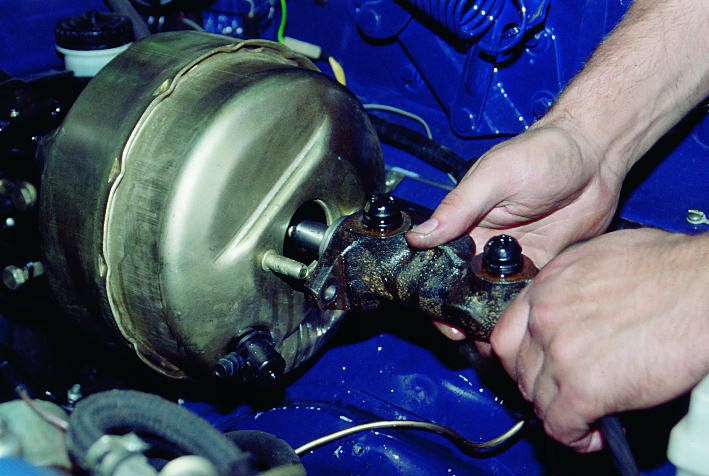
How to remove the main brake cylinder
The technology of dismantling GTC on any car is the same. First, the syringe pumped up the brake fluid from the tank (the tank can be removed on both the machine and after dismantling GTC). Then, with the help of a special key, unscrew the tips of the brake tubes (it is desirable to immediately wear rubber caps on them). After that, unscrew the nuts of the fastening of the GTC to the VUT and remove the cylinder.
Disassembly and repair of GTC
After dismantling the GTC, it is necessary to carefully examine it for leakage of fluid. If the rear gland is wet or wet, most likely, part of the brake fluid got into the Vut and corrosive its membrane. It is necessary for a syringe and a thin tube to pump fluid from the VUT.
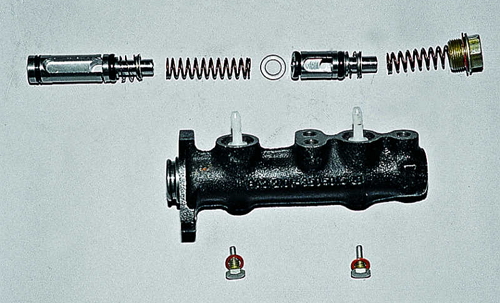
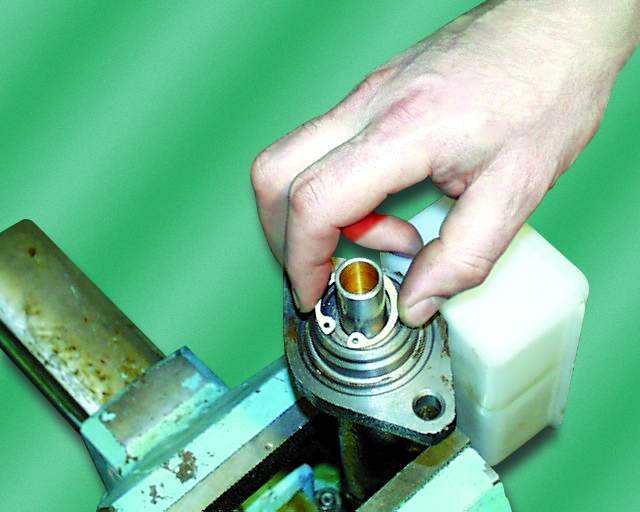
To disassemble the GTC, drain the liquid from it, then carefully clamp in the vice so that the holes for installing the tank are lower. Unscrew the locking screws that do not allow pistons to return unnecessarily. Remove the GTC from the vice and with the help of the puller, remove the lock ring from the VUT. Pull the first piston and spring. Often, the second piston is with difficulty, so it is necessary or pounding the GTC on a wooden bar, or one of the high-cylinder holes with a suitable bolt and connect to the second hole compressor with a pressure of at least 6 atmospheres. Throwing out the pistons, be sure to remember how rubber seals are installed and the pistons are located, it will help it very much when assembling.

Carefully inspect the inner surface of the GTC. Any scratches lead to a decrease in braking efficiency, so unacceptable. If scratches, housing or GTC are detected on the inner surface, must be replaced. Making sure that the inner surface of the GTC has no damage, buy the appropriate repair kit. When choosing a Repair Kit, give preference to products that are manufactured by partner enterprises of large automakers. Often, original repair kits from one brand or model are suitable for another.
Remove all old rubber seals with pistons. Rinse the pistons with water and dry compressed air. Install new seals from Remkomplekt. Before installing, be sure to smear their brake fluid, it will facilitate their landing in place and prevent damage. Do not confuse the direction of installation of the cuff. Before assembling GTC, rinse it with water with water with washing agents, dry with compressed air and grease the brake fluid. Do not use gasoline or other petroleum products for washing, if you are melting them down poorly, they will dig rubber seals. Install the pistons in place, tighten the locking bolts, insert the rear gland and the locking ring.
Installation and pumping GTC
Installation also do as dismantling, only in the reverse order. After the tips of the tubes have been dragged, pour the brake fluid. Now it is necessary to pump the main brake cylinder. Ask the assistant 4 times smoothly and until it stops the brake pedal, then press again and not to let go. Loosen the rear right tip brake tubeSo that the brake fluid flows from under it. After the liquid and the air stop out, tighten the tip and allow the assistant to release the brake pedal. Repeat this procedure 3 - 4 times for each tube.
In half cases, this approach avoids complete brake pumping. After pumping the brake pedal should be very tight. Get the engine, and press the brake pedal several times. If it is easily pushing more than 1/6 part of the stroke, complete flow of brakes is needed. Go to any direct plot where you can disperse and brake without interference. Spoke up to 5 - 10 kilometers per hour and click on the brake to make sure that the brakes work. If everything is fine, turn up up to 30 kilometers per hour, then sharply and strongly click on the brake pedal. If the machine will slow down quickly and without any injury, you did everything right. If the car led to the side, complete flow of brakes is necessary.
The efficiency of the car brakes depends on the state of all its elements, and with any signs of faults in the brake system, you need to repair.
Replacing the brake cylinder - the work is simple, but extremely important, it is categorically prohibited with faulty brakes. Diagnostics and repair of the brake system (TC) must be carried out in a timely manner, the safety of motion depends on the serviceability of the brakes.
VAZ brake system
The brake system of car Togliatti production is simple enough, the TC consists of the following main parts:
- pedals by pressing braking is achieved;
- the main brake cylinder (GTC), it transmits the force of pressing the pedal through the hydraulics to work cylindriks, respectively, and wheels. GTC VAZ - double-circuit, contours are separated for transmission of fluid pressure on the front and rear wheels;
- vacuum amplifier facilitating the effort of pressing pedals;
- tubes that combine elements of TCs;
- working brake cylinders (RTC);
- pads (drums) and discs;
- dispenser (pressure regulator) brakes.
When you press the brake pedal, the piston in the GTC compresses the brake fluid and transfers its pressure to the RTC. Pistons of work cylinders under the influence of hydraulics are sampled, making pads to disks or drums. The movement of the wheels slows down, and thus the car braking occurs.
Malfunctions occurring in brakes
Periodically, various malfunctions arise in the CU, also often fails chief cylinder. The following breakdowns occur in the RTC:
- enrolls the piscants in one of the provisions;
- the inner surface is wearing;
- the sealing cuffs failion (rut or swell).
The main feature of a faulty state is the appearance of leaks (leaks) of the brake fluid (TZH) from the RTC. If the pads are worn to bare metal, the pistons in the RTC are extended too far, as a result, the "brakesuha" can be found, and the brakes will disappear.
The GTC can also encryp the piston, wear or rust the inner cavity of the mechanism, pass the cuffs. Signs of malfunction GTC are as follows:
- when braking "fails" the brake pedal (PT), the press efficiency disappears, usually this happens with a small leakage of GTC;
- braking occurs at the very end of the pedal stroke, and the PT has to press several times to produce braking;
- no brakes on the front or rear wheels, this happens if one of the CTC circuits does not work.
It is impossible to ride with faulty working and main brake cylinders, the details should be changed immediately.
The replacement of GTC on VAZ-Classic cars (2101-07) is easy to make this work independently. To perform such an operation, you will need a tool:
- key on 10 (or special permissions);
- cruciform screwdriver;
- the combined key to 13 (you can also additionally use the head with a gate and with a ratchet).
A pit or lift for performing work is not necessary, the replacement can be made on the street in dry weather or in the garage. Work should be performed in the following sequence:
After the operation performed, a liquid should be addressed to the tank, then it is necessarily good to pump the brakes.
Work on replacing GTC on VAZ 2108-15 models is also produced approximately, there are only some constructive differences.
We make a replacement as follows (on the example of VAZ-2114):
If in the GTC 2114 the inner surface of the cylinder itself is not yet worn, it is possible to replace the insides of the mechanism by installing a new repair kit. Remkomplekt consists of four cuffs:
- three cuffs are the same, they are the same as on models 2101-07;
- one sealing ring 2108.
Remkomplekt changes very simple:
The repair of the GTC on the VAZ models is not always appropriate - if the mirror surface inside the mechanism is worn, the replacement of the brake cylinder repair kit will not solve the problem, the GTC will also flow. Most often on VAZ machines, the main brake cylinder changes entirely - it is worth new detail As a collection in the area of \u200b\u200bone thousand rubles, and the repair is urgent.
Replacing the rear brake cylinder
The rear brakes on the models of the VAZ-Classic and front-wheel drive 2108-15 - drum type, therefore the replacement principle of the rear cylinder is the same. In order to perform the work on the replacement of the RTC, it is necessary to remove the drums, respectively, and first should be removed the rear wheels.
If the replacement operation on the VAZ classic is not made on the auto lift, it is more convenient to do the work sequentially - first on one, then on the other side of the rear wheel. To perform work vehicle It is necessary to put on a flat platform, then we do as follows:
After the work performed, it is necessary to add to the TJ system and pump the brakes into the tank.
The RTC on the rear axle of the wheels 2109 changes along the same principle as on the VAZ-classic, the wheel and the drum is also removed, unscrewed with a ten tube and two cylinder mounts. It often happens that the Tube and the RTC bolts on the support disk boil to take them off, it is necessary to sprinkle the WD-40 connections, and before unscrew, wait 15-20 minutes. The brake tube nut will be easier to unscrew if the metal around it carefully cansoise with a hammer. When tapping, it is important not to break the pumping fitting. 
Replacing the brake cylinder 2109 - the case is simple, and many drivers can do this work independently.
The brake system of the VAZ 2110 car is almost the same as on the "eight" or "nine", on the "dozen" drums, pads, rear cylinders have a marking of 2108. Therefore, the rear cylinder rear cylinders is made in the same way as on auto models 2108 -09-099. 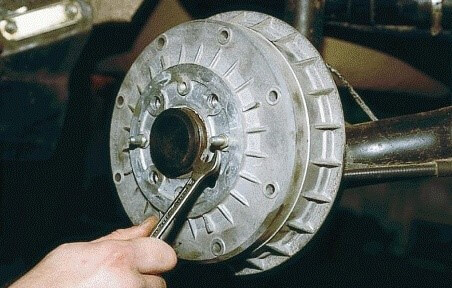
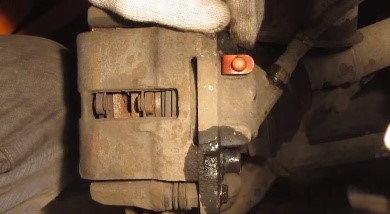
On the front wheels of car VAZ calipers are installed:
- in the car VAZ-classic on the caliper brackets, two front brake cylinders are attached (PTC);
- on VAZ 2108-15 models, on each side, one PTC is installed on the front axle.
Replacing the front cylinder 2109 is easy, it is also easy to do:
- install another new spare partWe produce assembly.
The VAZ-Classic Automars Machines changes a little differently than on the front-wheel drive cars VAZ. The front caliper on the "classic" can be changed entirely in the collection, but it is also possible to replace only cylinders. The work is performed as follows:
If you wish on VAZ cars, you can not change the rear work cylinders entirely, but make only replacing the cuff. To do this, disassemble the RTC - remove the pistons and the spring, with the pistons to remove the old cuffs and install new ones. RTC repair is advisable to do only if the cylinders last long, but they flowed. The thing is that the RTC's VAZ cars are very cheap, it is advisable to change rear cylinders Whole assembly - the replacement of the cuff is often unreasonable. 
After replacing any cylinder in the CU, it is necessary to pump the brakes. Pumping on any car is always starting from the farthest wheel from the GTC. On all the VAZ car, first of all, pump brakes start from the rear right wheel, then go to the rear left, the right front, and the front left wheel is pumped last. If the brake pedal takes at the very end or rigid, the pumping should be repeated, the work should be performed according to the same diagram. 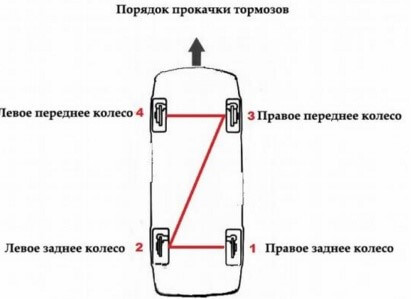
- If problems with brakes began, first of all, it is necessary to make an external inspection of the TC: check the level of fluid in the tank, make sure that the front / rear cylinders are not suitable. In the hydraulics of the brakes there should be no supains of the DJ.
- "TORRAMUUHU" must be poured the same brand, completely replacing the TJ is recommended no less than once every two years.
- If malfunctions are identified in the GTC, and it has already served at least a year, it is advisable to replace it completely than to repair. The same can be said about the rear work cylinders.
- Before changing the GTC, it follows from it to remove the brake fluid, usually make such an operation using a syringe.
- Usually, the main cylinder is not visible to leak, but if there are any suspicions that this item is faulty, it is necessary to remove the GTC - the tracks of the sublists will be at the back, and this indicates its faulty state.
- If, with external inspection, cracks were detected on the brake hoses, it is better not to risk and immediately replace defective parts.
If the expression is "the main thing in time in time" in everyday communication concerns the moral principles, then in the context of motor transport, this expression may affect the material aspect of the life and health of the motorist. There are no secondary aggregates in the car device, but brake system Must become a priority in the maintenance and repair of the machine. In the scheme of operation of hydraulic brakes, both both the working brake cylinder are both. Let's look at the principle of operation, device, diagnostics, repair and replacement of this node on the example of a common VAZ brand car.
Contributed from the main, under pressure, the brake fluid affects both pistons in the working cylinder, those, in turn, are squeezed or squeeze the brake pads, which leads to braking. Front contour brake discs, rear in many cars - drum type. 
- Front calipers.
- Pipeline, submissive hydraulic fluid to the front wheels.
- Rear pipe.
- Rollers rear wheels.
- Tank.
- The main roller.
- One of the pistons.
- Stock.
- Pedal.
Device
Device front Caliper and the rear brake cylinder of the VAZ car differ in appearance Cases and main parts. Device disc brake Consists of such basic details: 1 - piston. 2 - boot. 3 - sealing cuff. 4 - Caliper case. 6 - air fitting. 7 - springs, pressing pads. 12 - pads. In the drum brake device, such details are used: 2 - pumping fitting. 3, 11 - boot. 4, 10 - piston. 6, 9 - piston sealing casing. 7 - Case.
Diagnostics
The fact that the repair of the working brake cylinder is approaching, such signs will tell the motorist:- Uneven triggered wheels when braking, consequence, a car drift can be. This is a sign of a piston jealous, which can cause the use of poor-quality liquid or entering the air system.
- The triggering of the indicator light at a critical decrease in the liquid in the tank, or detecting this during visual inspection, which indicates a possible leakage of the hydraulic fluid from the wear cuff or the protected pipes.
- Pressing the pedal is given with great effort, it can occur in all the above reasons.
The stirring piston and the tight pedal is not yet an indicator for repair and replace working cylinders. Attention should be paid to the thickness of the pads, if their wear reached the maximum, it can provoke a piston enrolling, as they practically do not work.
 Initially can help fix these problems full replacement Hydraulic fluid or pumping brake system. If these actions have not led to a positive result, it is necessary to repair the working brake cylinder, the benefit on sale has a remakactility of the working brake cylinder, in the set of which, depending on the car brand, includes: cuffs, piston, boot and other components.
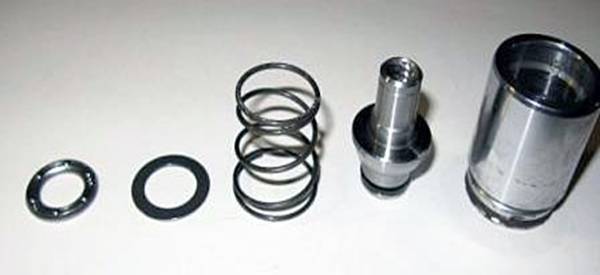
Repair work
Disassembly, repair and replacement of the car brake cylinder VAZ does not represent a special complexity. By purchasing the necessary repair kit of the working brake cylinder, unscrew the wheel and, disconnecting the nozzles, remove the faulty cylinder (the dismantling scheme is described in more detail below). For convenience, holding the body in the vice and removing the boot, we get access to the locking ring that locks the piston, after the removal of which, take out all the working items.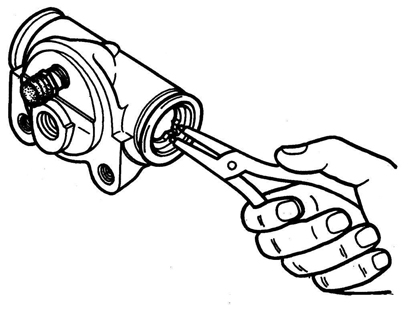 By making disassembly of the body, you need to wash all the brake fluid and inspect the case mirror for mechanical damage.
 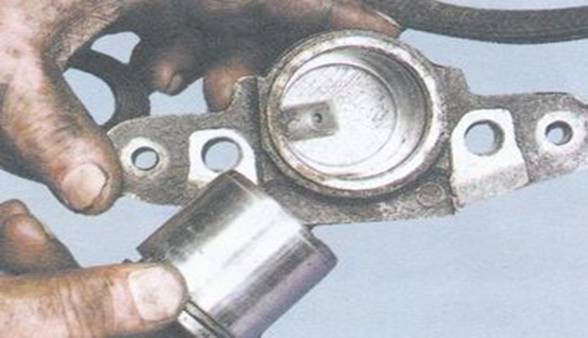 If damage is not detected, then opening the repair kit of the working brake cylinder, make a replacement of faulty parts.
The prerequisite, regardless of their state, is the replacement of all rubber parts of the working brake cylinder included in the repair kit. This list includes: boot, cuff and so on.
Replacing a defective brake cylinder
The replacement scheme in the VAZ family is almost the same for the cylinders of both contours with small differences. Initially need to cook required keys and suitable in the size of the plug nozzles. After removing the wheel and unscrewing the nozzles, to prevent the leakage of the liquid we wear plugs on them. By revealing the appropriate nuts, dismantle the old cylinder and put a new one in its place, producing an assembly in reverse order. If after replacement, the wheel assembly interferes too diluted pads, you can cut the ending pads, just do not overdo it, it can affect the work of the manual brake. After any manipulations with the brake system requires its pumping according to the scheme. For pumping, prepare: liquid, the key of the suitable diameter to the aircraft, the hose, tightly dressed onto the fitting and any container. The scone diagram depends on how contours are located in a specific VAZ model. The brake device of some implies pumping from the "long pipeline", meant from the farthest wheel relative to the main cylinder.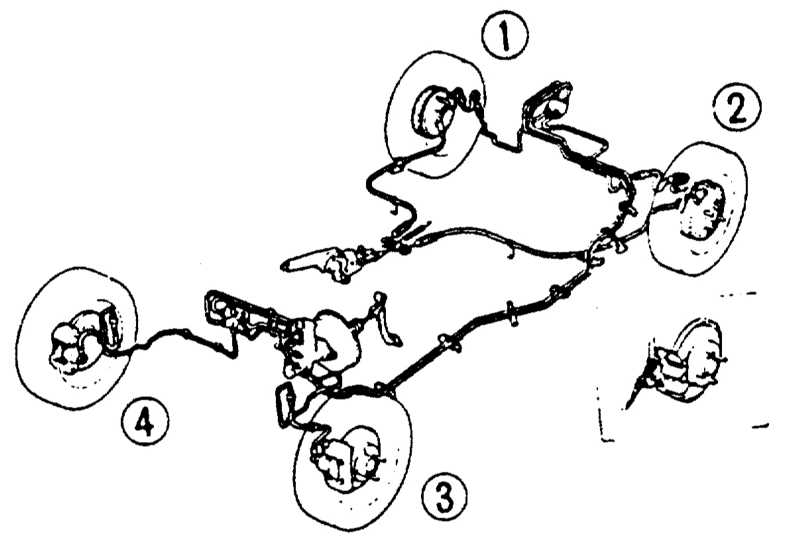 If more specifically it looks like this: in the car, the main cylinder is located looking at the rear bumper, which means the first rear right cylinder, then the rear left. The following is the front left, and ends the procedure for pumping the wheel, which is from the right side of the main cylinder. In later models, the scheme implies pumping the cross-cross-time looking at the car from the back:
 - right rear wheel;
- left front wheel;
- left rear wheel;
- right front wheel.
 In any case, finishing pumping follows the front right wheel. In the course of this action, do not forget to monitor the level of the hydraulic fluid in the tank so that the air does not get into the system again. We also recommend video viewing