A headlamp washer is considered a surplus in the design of a car, but this is far from the case, especially if you have xenon. Any contamination of lighting fixtures not only reduces the light transmission of the lens, but also changes the refractive indices, which can cause oncoming drivers to be dazzled.
What can be a headlight washer?
There are two types of this device, they differ in the principle of cleaning the diffuser. A jet headlight washer does this using a high-quality jet of water under high pressure, which knocks down all possible dirt. No other intervention in the cleaning process is required. Today it is the most popular type of washer, and everything depends on modern headlights, now they are plastic everywhere. Plastic does not tolerate any friction, so traditional brushes are not suitable for it.
As already became clear, the second type of washer is a brush. Everything is very clear here, the process is similar to washing glass: water is supplied to the lens in a lazy stream, and the brushes, which are controlled by the headlight washer motor, diligently rub the surface. But in modern car such a rarity is no longer found, because only glass can withstand such a cleaning scheme, and they try not to make of this material in the mass automobile industry. Therefore, you will hardly find such a kit on sale for self-installation.


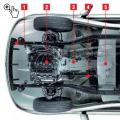
Cover and headlight washer nozzle, as well as other elements of the device
The washer consists of the following parts: control system, water tank, system of hoses and nozzles, pump. It all starts with a tank, where there should always be a sufficient amount of washer fluid, usually water, but in winter it is mixed with alcohol, or a special "anti-freeze" is poured into the tank. Often, one tank is used to clean the glass, depending on the fluid consumption, it can be 2 liters, or maybe all 4. Usually, an increased volume is used if for cleaning each element there is not one nozzle, but several.
The pump maintains the correct pressure in the system so that the liquid is sprayed in the right mode on contaminated surfaces. He obeys electrical diagram all cars and responds to commands from the control system. The hoses provide fluid delivery to the spray elements and can be of different lengths, of course, this is dictated by the location of the reservoir in your machine. The headlight washer nozzle is responsible for efficiently spraying water onto the lens and efficiently using it.
The nozzle can be of two types. The simplest in design is a stationary spray, it is constantly in sight, because it is attached to the bumper, so when installing, expect some design change in your car. But the telescopic version is hidden until it is used. The headlight washer nozzle cover carefully hides this useful attribute, it opens only at the command of the control system. But in winter, an incident can happen, this plug will freeze at some point and will not open "according to your desire."
You can control cleanliness yourself using a button, or you can set intelligent control that will different ways determine the need for the lens cleaning, and according to its calculations, the headlight washer cover will open, activating the system.


DIY headlight washer installation
First you have to buy a washer kit. They can differ in the list of parts, depending not only on the principle of operation of the device, but also on the decorative preferences of the car owner and the shape of the bumper of his car. For example, some kits may include a headlight washer nozzle cover, this will save your bumper from drilling, since all communications, be it lone nozzles or even brushes, will be installed on it. Also, you will always find in the kit instructions, hoses, pumps and a tank (if you do not cut into the main tank to clean the windows), the necessary relays.
Now everything is assembled, it's time to start. Installing a headlight washer kit for any kit starts with some decisions. We open the hood and examine the tank, whether it is possible to drill into it with an additional hose, usually this can be done in domestic cars, but foreign cars are more capricious. Therefore, we are looking for additional space for a new tank, it is better to place it away from heating parts. You have made the decision on how to connect to the water source, now find a place for the nozzles. Ideally, they are placed opposite the optical center of the headlight, you can calculate it from the pattern on the lens, the center is indicated by a circle.
We drill a bumper opposite the center, make a small hole, then expand it under your nozzle, so it is more rational than reanimate the extra millimeters later. Drill with outside bumper, so less paint will rise.Fix the nozzles, and if they do not match the color of the bumper, take care of this nuance in advance. Now we install the tank (if it is decided to install an independent one) and the pump. Each kit is individual, so the instructions attached to the purchase will help you. It's time to pass all the necessary hoses, take the shortest route, but beware of heating surfaces.
Now the time has come for the electrician, the pump needs to be connected to the general wiring diagram and its control is brought to a separate button or to a common glass washer. It's hard to say what is better to take, the opinions of motorists differ. The button will require a lot of hassle to connect, implant, etc. But "sucking" to the standard washer means increased consumption cleaning liquid, because the headlights will be washed every time you want to arrange a wet cleaning of the glass. After making a decision and connecting the electrics, the installation can be considered complete.
The appearance of dirt on the headlights during the daytime does not create problems when driving, but things will be much worse if it is already late evening or night on the street. After all, even a small contamination of headlights will impair the flow of light from the headlights, and visibility in general. Do not despair in such a situation, there is a way out - this is a headlight washer. Although it does not provide a full guarantee of impeccable cleanliness, it will noticeably improve comfort.
The famous song says that the weather does not have bad weather. But far from everything is smooth on the road. Rain or snow will make it difficult to see when driving. In addition, precipitation increases the likelihood of headlights contamination, since the headlights are located a short distance from the ground, and there will be dirt and slush all around. In addition, the headlight tilt angle itself is less than that of windshield, which means that their pollution will occur faster.
Is there a need for a headlight washer?
If during the day you do not experience problems with dirty headlights, then at night it can affect. This is explained by the fact that the luminous flux will decrease, and the rays of light will begin to scatter to the sides, including they will hit the oncoming lane, thereby blinding other motorists. In general, this situation leads to violations of road safety rules.
How to avoid such problems? You can, of course, get a wet rag and wipe the headlights from time to time. But this method requires stops and is inconvenient. And besides, imagine if it will be pouring rain at this time. And besides, the rag will begin to collect dirt and there will be little sense from your wipes, because the machine cannot boast of its own plumbing.
Another radical solution to the problem is to limit travel at night, but not everyone will agree to such a step. Installing a headlight washer will be an adequate method of solving the problem. Although this will not give a full guarantee of the cleanliness of the headlights, it will significantly improve comfort and general position cases.
Washer types
There are two types of headlight washers. In the first, low pressure is used, in the second jet, that is, high pressure.
The washer of the first type is usually provided for by the design of the car, since it is very problematic to install it yourself, even in the service it will require significant alteration. The difficulty will be how to fix the wiper motors, as well as adapt them to a specific headlight. In addition, if the headlight is not flat, then the mission may become completely impossible. Therefore, the most preferred option is the second type. It is more aesthetically pleasing and easier to install and maintain.

Choosing a headlamp washer kit
To begin with, carefully inspect your car, especially observe the design of the glass (but glass is a conditional concept, since there may be plastic, let's call it customarily a lens) headlights, as well as the upper surface of the bumper - this is especially important, since you need to understand with what design of the washer will have to be dealt with. In terms of design, washers differ in nozzles.
Injectors can be made:

Fortunately, in our time there is a huge number of online stores, everything can be bought from your home. It is best to take a digital camera and take a few photos of the car. On the first, the headlight should be in front of the entire frame, and on the second - in profile, so that the bumper is visible.


Such photographs can help the consultant to choose a washer model. In addition to the nozzles, attention should be paid to the washer tank. The fact is that the kit, which includes the headlight washer, has a pump, but the reservoir itself is not there.

Headlight washer reservoir
It becomes interesting - does the standard windshield washer reservoir contain additional space for the pump. If this is not the case, then you will have to install an additional tank or forget about the washer. Domestic cars they can still allow drilling a special hole for the tank, but for foreign cars it will already be a stupid idea.

If you nevertheless decide to put such a tank, think about its location. It should be easy to access and free from overheating. Well, its location is very important in the immediate vicinity of the headlights, and not in the trunk.
Go to installation
I hope you have an idea of \u200b\u200bhow to remove the front bumper?

Although you will only need this when installing the washer yourself. If you are not going to carry out the installation yourself, then we will deliver a kit with a washer to the service station. But it is even better to call a trusted service station in advance and find out about the possibility of such a procedure. The fact is that for many, installing a washer means something exotic. So, what if you are denied a service station and you cannot install it yourself? It remains to find the familiar "Kulibins".
Consider what awaits us when installing the washer.
We carry out the removal of the bumper. The procedure basically boils down to implanting the pump into a standard regular tank, or another additional tank is installed, and then the nozzles are placed on the bumper. Here's another important point - are you ready to drill the bumper? After all, by doing so, you will physically destroy it, and your further refusal from the washer will cause it to be repaired later.
As for the nozzles, they must be placed opposite the optical center of the headlights.

Usually this center on the headlamp is indicated by a circle on the lens. It is necessary to make such markings so that the nozzles look symmetrical. We drill a small diameter hole, then increase it, carry out 3-4 approaches.
You need to drill a hole in the bumper from the front side, so the paint will fall off less.
We fix the nozzle and see how securely it is attached. There is another pitfall here, the injectors are black, and the bumper is different.
We remove the nozzles and go to paint them in the color we need.
After installing the pump and nozzles, it is necessary to connect the system. It will include a system of pipes, tees and a valve. All this can be easily placed using the instructions. Remains a solution to the issue with the electrician. Basically, energy consumption will be required by the pump, it also needs control.
The pump can be connected in two ways:
- To the standard washer pump. Then the headlights will be automatically washed when cleaning the windshield. To carry out our plans, the kit will need a special relay;
- To the button included in the headlight washer kit. So the relay is not required. Activating the headlamp washer will be triggered by pressing a button.
The first method is much more convenient, since people often forget that there is a headlight washer. In addition, it does not require unnecessary work with wires, and in general it is sometimes difficult to put a button and find a place for it in general.
The only drawback will be that the washer fluid will run out faster. But it can hardly be called a minus, because the headlights will be clean.
A little about operation
Only fill the system with clean fluid, do not use tap water.
If you are saving money on distilled water, you can boil plain water. In summer, you can also add a cleaning agent like shampoo to it. In winter, it is worth using only a non-freezing liquid and no need to dilute it.
Pay attention to the nozzles, check them periodically.
Do not forget to keep an eye on the liquid level as it is consumed very quickly.
Even in dry weather, occasionally use a washer to make sure it works.
It's no secret that poor visibility on the road negatively affects the ride quality of even the most professional driver... But the reason for this can be not only weather conditions, but also dirty optics of the car, which reduces the amount of light supplied to the road. Pollution on xenon headlights, for example, lead to strong refraction and scattering of the light flux, which, as a result, blinds oncoming drivers. Ordinary ones completely reduce their working capacity by half, if their degree of purity decreases to eighty percent. It was for the struggle for the transparency of the optics of cars that the washer was invented by engineering minds, subsequently becoming one of the most useful additional devices for anyone vehicle.
- glass;
- plastic.
The first type of diffusers is gradually becoming obsolete, yielding the palm to the more practical second. It should be noted that washers for different types headlights are different from each other. And the design and the way of work.
Mechanism difference
Glass headlights are practically not found in mass production at the present time. Therefore, it is rather difficult to find a washer for this type of equipment on sale. But still.
The mechanism of such a device is brush. The brushes that clean the surface of the headlights are controlled by a special motor. And water is supplied to the surface of the optics in a small stream through a device such as a headlight washer nozzle. The brush washer is similar in principle to the operation of a windshield washer. But, as already mentioned, such a design is very rare these days.
Another thing is jet washer. It is designed for headlights made of plastic and is very popular today. The thing is that plastic optics cannot stand friction, so this type of washer is an excellent way out of the situation. And how the headlight washer works in this case, we will consider below.
At a time of operation, the jet mechanism consumes about two hundred grams of liquid, which is supplied under high pressure to the surface of the headlight, cleaning it from contamination by the force of pressure. Thus, no additional cleaning devices are used here. And since the washer and headlights of the car work from the same container, we can conclude that you can “wash” the diffusers both with plain water (actual in summer), and with special means containing alcohol (do not allow liquids to freeze in winter).
Important ingredients
The design of the jet mechanism consists of the following elements:
- Washer fluid reservoir... Its volume is tied to the number of washer nozzles and varies from 2.5 to 4 liters.
- Connecting hoses... Their total length is usually between two and four meters. This indicator, as well as the diameter, directly depends on the liquid injection pressure and its duration. The hoses are fastened together with plastic connectors, one of which has a check valve.
- Pumpproviding a pressure of 0.2–0.5 MPa. It is included in the car electrical system.
- Nozzles... They can be single and double, which depends on the area washed by them. In addition, nozzles are:
- Stationary... This is when the mechanism is installed directly on. Such elements are not hidden from prying eyes and can slightly change appearance cars. And not always in better side... That is why, before installing a stationary mechanism, it should be coordinated with the design of the vehicle model. Then the nozzles will look harmonious.
- Telescopic... In an inactive state, such devices are hidden under a special cover and are completely invisible to others. But they are popular not only for this reason. The fact is that telescopic nozzles differ in the optimal angle of spraying of the cleaning liquid on the headlight and the distance to it. The only negative point in using such devices is that the headlight washer cover can freeze to the bumper, and this, in turn, can make it difficult or even impossible to use the entire mechanism in a timely manner.

- Design control system... There are two types:
- Forced... It means that the washer is manually turned on with a special button on dashboard... By the way, she will help to turn off the headlight washer. The forced method allows you to perfectly control the flow rate of washer fluid, but can distract the driver's attention. Especially a beginner.
- Automatic... Such a system is triggered when the driver holds the wiper lever for more than a certain period of time, or after a certain number of washer starts windscreen. Automatic switching on most often found in regular jet washers.
Inkjet mechanisms for cleaning car optics are often installed at the production stage. But even in the absence of such a design in the factory configuration, it can be installed independently, so to speak, using personal abilities. All you need to do is purchase a special kit.
The installation kit includes all the necessary parts (up to brushes and relays) and even some additional elements (for example, an overlay for injectors, which reduces the need to drill a bumper to zero, and so on). That's why self-installation headlight washer is quite within the power of every car owner.
Stages of headlight washer installation
- First, you need to decide whether the structure will be powered from the same container with the glass washer or the headlight cleaning tank will be located separately. In the first case, the container will have to be drilled (the option is more suitable for) and an additional hose connected to it, which will supply water to the headlight. In the second case, an additional tank should be installed and it should be done, preferably away from the heating parts of the machine.
- The location for the nozzle on the bumper should also be determined before finally installing the headlight washer. Ideally, it is opposite the center of the diffuser. Here, the bumper should be drilled out for the required hole or a special overlay should be installed on it, along which all communications of the mechanism will be carried out.
Council. It is best to drill the hole from the outside of the bumper to minimize paint swelling.
- After that, the tank (if it is separate) and the pump are installed, the necessary hoses are held.
- The final stage is the installation of the washer electrics.

This completes the installation. But before you turn on the headlight washer, you should carefully check all the connections and fastenings of the elements. Otherwise, the construction in best case may just not work. Detailed description installation of the entire mechanism must be attached to any set. And this will help both the experienced driver and the work.
The fact that a headlight washer is a really useful addition to a car can be seen from our own experience. To do this, it is enough to get caught in the rain on the track once. Then all doubts about the expediency of the device will disappear from a reasonable driver by themselves.
Headlight cleaning with fan nozzles. What is needed for this:
Pump
Fan nozzles
Washer pipes
Tee
Valve
4-pin relay
Wire / Lugs
The first step is to install an additional pump. Next, we make holes in the bumper, having previously marked out the place, well, we lay the pipes accordingly. There are a couple of nuances to consider here.
1) in order for the pressure of the jet to be the same on both sides, it is necessary to cut tubes of the same length, thereby leveling the resistance. Up to the right headlight, the stock turned out to be too large, turned into a ring and hid it under the bumper.
2) since the nozzles are below the level of the barrel and the water did not escape by gravity, you need to lay the tube in a loop, creating a barrier.

Above the spray, it is necessary to cut a little with a knife in order to set maximum angle attacks.

Nozzle clipped and raised
The most difficult thing was to tighten the injector nuts, since the bumper is installed on the car. Next is the electrical part. You cannot do without a multimeter. A relay with a fuse is placed under the steering wheel.

From the relay to the pump, you need to stretch only one positive wire, minus, respectively, from the ground under the pump itself.

The signal to the relay coil is supplied from the steering column switch in the position from itself, that is, the washing mode rear window, since I have neither a brush, nor a brush motor, nor even a rear-view mirror, this particular mode was chosen by me. Having disassembled, ringing and examining the switch device,

we conclude: at the moment of pressing from ourselves + 12B appears on the WH contact.

Marked with a red line
For you friends, who did not understand my writing, a diagram for clarity. I draw diagrams by hand out of habit from the university))).

All wires are neatly tied and placed under the panel.

In the process
The injectors hit quite powerfully, that's quite enough. We watch the video of the washer and the work of the running lights.

In general, what I want to add, there is an option provided by me, and you yourself already think to whom and how best.
Having traveled around the streets of the city in rainy weather and wiped the headlights several dozen times, the car enthusiast is thinking about installing a headlight washer. The device allows you to easily and comfortably clean the glass lighting equipment from dirt without leaving the car. There are many devices on the market for every taste, but first you need to understand the design features own car.
Design
Depending on the design of the headlights, you can choose the best option cleaning systems. There are two main types of headlight washers: brush and jet. The brush washer is difficult to install, since it is a mechanism of small wipers on the surface of the headlight glass.
The nozzles deliver a small amount of liquid and the brush removes accumulated dirt. You should not use this type on headlights with plastic optics, as over time the surface will be covered with many scratches. The jet washer cleans any type of headlamp using high pressure fluid. Installation of such a mechanism is much easier, since it excludes the brush from the design.
Essential elements
The headlight washer jet system includes:
- Rotary headlight washer pump high pressure to supply fluid to the nozzles. The device creates a pressure in the system within 0.2 MPa.
- Connecting hoses to ensure that liquid from the tank enters the nozzles. Depending on the selected kit, they differ in material quality and length.
- System control unit.
- Fuse box and wiring to connect the pump to the vehicle electronics and monitor its operation.
- Fluid tank. Not available in some kits, since the pump is supposed to be located in the wiper tank.
- Injectors and bumper mounting kit.Depending on the selected type of placement, they can be stationary or telescopic. The main difference between these types lies in the possibility of a hidden location of telescopic nozzles.

There are special washer kits for some models. They take into account the optics model and the upper bumper surface. In some cases, it is possible to connect the kit to the wiper reservoir, but often you need to choose a place for installing a separate reservoir. There are also no particular problems with the installation of a universal headlight washer.
Manufacturers
The main equipment manufacturers on the market are Sho-me and Hella. Headlight washers Sho-me will delight you with their price and ease of assembly. The company itself is a typical mass production from China, so it makes sense to opt for the installation of such a mechanism with a modest budget.
Hella, on the other hand, is typical european manufacturer with its own strict standards and certificates, which affects the price. Therefore, Hella headlight washers are better in quality and have a longer life cycle, but the cost is much higher.
Still installation telescopic washer Hella headlights will truly delight any car enthusiast with their long service life. When choosing such simple mechanism it is worth assessing the need to buy better equipment and, if possible, save money.

Detailed installation instructions
Installing a headlight washer does not require any special skills and is within the power of any motorist. If the manufacturer does not provide special holes, then you will have to drill them to fix the nozzles. To do this, you need to remove the bumper and carefully punch holes from the back.
The nozzles are located opposite the central part of the headlights, so you need to carefully measure the distance in accordance with the installation instructions. The exception is bi-xenon headlights, which cannot be used without a washer. In this case, the nozzles are located away from the center of the headlights.
The washers themselves can be repainted to match the color of the car, but for this you need to determine the paint number. We fix the nozzles in the hole made and check the quality of the fastening. Pay attention to the location of the headlight washer nozzle cover.

To install the pump, we drill a hole in the tank and fix it with a sealing rubber, if necessary fix the device with electrical tape. After that, we mount the tank in the selected place and place a special tee valve for distributing the liquid in the system.
Important! Under no circumstances should the reservoir and hoses be located near units with high temperatures.
After installing the bumper in its usual place, we mount the hoses, the necessary valves and tees. According to the instructions, we connect the headlight washer pump to the car electronics. If the pump is located inside the wiper reservoir, then without a special headlight washer relay, it will work together with the wipers. If the pump is located in a separate tank, then it will be started by pressing a special button in the cabin. In any case, you can customize its work to your taste.

Connection and testing
The best place to install the control unit is the alarm column and the ignition unit. For this, the white wire is connected to the positive contact of the size lantern. Then the red wire is connected through a fuse to the power source. The black and red wires coming from the tie with the white are connected to the negative and positive contacts of the washer itself. The blue wire is connected to the positive terminal of the car cigarette lighter illumination or to the disconnect terminal of the dimensions.

It is worth conducting a test of the assembled system after installation before permanent operation, for this it is necessary to pour into the tank special liquid, but distilled or boiled water.
Important! During operation in winter period water can render the pump unusable.
Maintenance and repair
Operating conditions will differ depending on the installation option and equipment chosen. If a car enthusiast connects the washer to the wipers button, then the fluid consumption will increase significantly. To create a high-pressure jet, much more glass cleaning fluid is required, so connecting to the standard wiper mechanism will entail constant refilling of the tank.

To reduce fluid consumption after installation, it helps to turn on the washer only by pressing a special button in the cabin. The headlight washer button will also allow you not to turn off the entire system in the winter, when the use of equipment is impractical and fraught with breakdowns.
In winter, the nozzles become clogged with ice and dirt, making it difficult to use them without thorough cleaning.Telescopic washers freeze to the bumper, which leads to damage to the headlight washer motor. Some drivers sometimes pull out the fuse responsible for the operation of the device during the cold season.
You must periodically use the mechanism you installed to avoid contaminating the nozzles. No more than once a week, run the system for a little test... In particular, this kind of prophylaxis is required when using telescopic mechanisms, since the nozzle can get stuck in the grooves.

Depending on the degree of breakdown and wear and tear of the equipment, minor repairs can be made on their own... Over time, fluid from the system begins to flow from the washer housing joint. You can fix this by disassembling the case and fixing the malfunction. To do this, remove the bumper, disconnect the hose from the system and drain the fluid. Then disconnect the headlamp washer from the bumper.
Then we separate the back and front parts, with the help of pliers we make several breaks around the circumference of the plastic ring. After that, the halves of the body can be pushed apart with a little effort. The device of the washer itself is rather simple: the headlight washer motor pumps pressure into the piston, after which it extends and opens the spray valve, from where the liquid is supplied to the headlight, after which the spring returns the piston to its place. Due to constant vibration, the rubber ring that seals the gap between the cylinder and the body slides into the wider part of the body and the tightness of the cylinder is broken.
To correct the situation, you need to carry out reverse installation rings and secure it. This can be done with a thread lubricated with a sealant or with a rubber pad made by hand. After that, we assemble the body back and tighten it with a clamp.
Outcome
By purchasing a car, every motorist strives to improve comfort and convenience in his constant movements around the city. Unfortunately, manually cleaning your headlights gets in the way of a pleasant driving experience. Moreover, when it is possible to automate this process without serious expenditures of finance and effort thanks to the installation additional equipment... Good road!