A speedometer is a device designed to measure the speed of a vehicle. IN modern carmobile engineering predominantly an electronic version of the device is used.
Patriotic automotive industry began to use an electronic speedometer since the release of the VAZ-2110, the power system of which was based on an injector.
Therefore, if the speedometer does not work even on relatively old cars, the reason should be sought in the wiring elements.
The speed measurement system in a modern car includes such elements as:
- Speed \u200b\u200bsensor installed in the gearbox;
- Electronic engine control unit;
- Speedometer display on the instrument panel;
- Wiring.
During the operation of the engine and gearbox, the sensor removes information about the frequency of its rotation from the output shaft of the gearbox, and transmits it to the ECU in the form of electrical pulses. The higher the vehicle speed, the shorter the time between sensor signals.
The electronic control unit calculates the machine speed based on the frequency of the pulses it receives. This is how the speedometer works electronic type... In parallel with the correction of engine operating modes, the control unit transmits information about the speed of the car to the speedometer and diagnostic block. 
If there is a trip computer with "K" DC output, speed data can be duplicated on its scoreboard.
Causes of malfunction of the speedometer
If the speedometer stops working, troubleshooting is carried out in several directions. The failure can be caused by the following breakdowns:
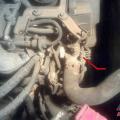
- Failure of the speed sensor;
- Damage to electrical wiring;
- Oxidation of "mass" contacts;
- Malfunction of the speedometer itself;
- ECU malfunction;
- Incorrect installation of the instrument panel after removal.
As a rule, no other causes of the malfunction are found. Sometimes the failure of the device is due to the combustion of the fuse of electrical circuits responsible for the operation dashboard... However, this problem can be attributed to the category of wiring faults.

The diagnostic sign of a blown fuse F19 is:
- Failure of the entire instrument panel;
- Failure of the diagnostic unit;
- Failure of the automatic door locking system;
- Reverse lamp failure.
Diagnostics
Fault diagnostics begin by disconnecting the harness from the speed sensor harness and checking them using a warning light.
To make a control light bulb, you need any car lamp capable of operating at a voltage of 12 V, and two wires about 1 meter long each. One of the wires is fixed to the positive terminal, the other to the negative terminal of the lamp. Also in the received device include a battery "Krona". 
To carry out the test, one wire of the test lamp is fixed to the body weight or the battery, and the second is made short frequent touches to the middle contact of the DS connector. If there are no faults in the section, the connector is a speedometer, the arrow of the latter will slightly shake or rise. If the arrow shakes, the answer to the question why the speedometer does not work can be considered found - the speed sensor needs to be replaced.
In cases where the reaction of the arrow to tapping on the central contact of the pads cannot be detected, it is necessary to "dial" the speedometer power circuit. The procedure is carried out using a multimeter (multitester), or by using the same control lamp.
Previously, the wiring harness is disconnected not only from the speed sensor block, but also from the speedometer itself. One output of the tester or test lamp is connected to the end of the wire under the hood, the other to the salon end of the current supply circuit of the speed meter.
If the tester in the "continuity" mode indicates a violation of the continuity of the circuit, further troubleshooting is carried out in this direction. It is necessary to check the fuses, wire connections, their integrity inside the insulating braid.
The search area can be reduced by gradually “ringing out” individual sections of the chain. On model 2114 and other VAZ products, the reason for the failure of the speedometer is often the oxidation of the "mass" contacts fixed on the car body.
In cases when the speedometer needle does not work, however, there is no data on faults in the electrical supply circuit, a logical conclusion is made about a malfunction of the device itself. Additional verification can be done by temporarily installing a known good dashboard. 
Repairs
Repair of the speed measuring system directly depends on the detected malfunction:
Speed \u200b\u200bsensor
- Clean from contamination;
- Clean the pads' contacts from corrosion and oxides;
- If the above measures do not help, the sensor is replaced.
Wiring
- Check and clear "bulk" contacts;
- To solder or fix with the help of "twists" the places of the broken wires, due to which the speedometer stopped working;
- Cover the damaged areas of the braid with insulating tape;
- Replace defective fuses;
- Clean the pads contacts from oxides and corrosion.
Speedometer
If the speedometer stops working, it is replaced. On domestic carsassembled using an electronic type of speed meter, the speedometer changes along with the instrument panel. You can carry out this operation yourself. To complete it, you only need a Phillips screwdriver and pliers.
It is impossible to restore the operability of the device with your own hands. This can be done by a master electronics engineer. However, given the rather low prices for spare parts for cars russian models, the appeal to the master is economically impractical.
Repairing an old speedometer can be much more expensive than complete replacement old instrument cluster to a new one.
The article describes a simple generator on the 555th timer, with which you can check the performance and correctness of the readings electronic speedometersusing an electronic Hall sensor as a speed sensor.
In many modern cars, such as "GAZelle" (GAZ 2705, 33021), "Volga", KRAZ and others use electronic speedometers with a microammeter and stepper motor... These speedometers work with electronic sensor Hall mounted on the gearbox. When the car is moving, the sensor is driven into rotation from the gear of the output shaft of the gearbox. Six pulses are generated in one revolution of the sensor shaft electric current.
These pulses are fed into the speedometer circuit. The speed indicator in the speedometer is a microammeter. In addition, amplified pulses from the transmitter are fed to a stepper motor that rotates the drums for the distance indicators.
According to the technical documentation, which can be found in, in order to check the serviceability of such a speedometer, it is necessary from the signal generator G5-54 to send rectangular pulses of positive polarity with an amplitude of 6 ... 7 V, a duration of 200 ... 250 μs and a frequency of 100 ... 200 Hz.
If the user or the locksmith of the vehicle fleet does not care about the high accuracy of checking the speedometer readings, and it is only necessary to sometimes check their performance, then the design of a simple rectangular pulse generator proposed by the author can easily cope with this task.
Principled electrical circuit generator shown in fig. 1. It is assembled on a 555 universal timer microcircuit. Typical switching circuit. The ratings of the elements C2, R2-R4 are selected in such a way as to obtain a square wave at the output with a frequency of 100 ... 200 Hz. The required pulse frequency of the assembled generator can be adjusted by the trimmer R3. The circuit is designed for use in vehicles with voltage on-board network 12 V. If the voltage of the vehicle's on-board network is 24 V (for example, in KRAZ), then the circuit must be supplemented with an integrated stabilizer DA2, including it in the power circuit break as shown in the diagram by the dotted line.


Construction and details
All circuit elements are assembled on a printed circuit board made of one-sided foil-clad fiberglass with dimensions of 30 × 20 mm. A drawing of the printed circuit board and the layout of the elements are shown in Fig. 2. For convenience of repetition, the drawing is shown from the side of the foil. The design uses output radio components installed vertically. There are no special requirements for them. Conductors are soldered to the points XT 1-XTZ, at the other end of which a connector is installed, similar to the Hall sensor connector. All circuits necessary for the operation of the generator are brought out to this connector: plus / minus power supply and the speedometer input. The printed circuit board is mounted in a suitable electrically insulated housing. For this purpose, the author used a piece of plastic cable duct with a cross section of 25 × 16 mm.
Assembly, commissioning and use
A properly assembled generator does not need adjustment. Attention should be paid to the correct connection of the connector pins, since if the supply voltage accidentally hits the generator output, it will fail:; 0 operation. There is no need to use radio measuring devices to configure the device. It is enough to have a known good speedometer. The device is connected instead of the Hall sensor and the trimmer resistor R3 achieves the desired speedometer reading, for example, 60 km / h. If the control range is not enough, then to increase the cutoff frequency of the generator, the resistance of the resistor R4 should be slightly reduced, and to decrease it, increased.
85.3802 or its modification 852.3802 installed on the UAZ Hunter is produced in the event of any malfunctions in their operation or when the speedometer readings deviate from the real values \u200b\u200bof speed or distance traveled.
The initial general check the speedometer is carried out in test mode without removing it from the dashboard. Electronic speedometers 85.3802 or 852.3802 are not repairable and, in case of failure, must be replaced as an assembly.
The electronic speedometer is considered faulty and must be replaced if, while the car is moving, its arrow deviates, but the distance traveled is not counted, if the readings cannot be reset daily mileage or individual segments on its liquid crystal display are not highlighted.
General check of the UAZ Hunter speedometer in test mode.
To start the test mode of the speedometer, press the button for resetting the daily mileage and holding it down, turn on the ignition switch. The needle of a serviceable speedometer should move from the 0 km / h mark to the 160 km / h mark and return back, while all segments should be displayed on the liquid crystal display (LCD).
If the arrow of the speedometer during the test mode moves abruptly, with jamming or not in the entire range, does not return to the 0 km / h mark, then the speedometer is faulty and must be replaced as an assembly.
While the car is moving, the speedometer needle does not deviate or deviate, but not in the entire range of indications.
First check the speedometer in test mode. If the arrow during the test moves abruptly or not in the entire range, sticks or does not return to the 0 km / h mark, then the speedometer is faulty and must be replaced.
If the test showed nothing, then it is necessary to disconnect the speed sensor and connect an additional wire to the contact 2 connector of its harness, then turn on the ignition switch and, in a quick stroke, close and open this additional wire to the body or contact 3 harness connector. The arrow must deviate in this case. If it does not deviate, then the speedometer is faulty.
If the arrow deviates, then using a test lamp, check the presence of supply voltage between the contacts 1-3 harness connector. In this case, the control lamp should be lit in the glowing floor. If the lamp does not light up, then the speedometer is faulty. If it is on, remove the speed sensor, reconnect the connector and manually rotate the sensor drive shaft. If the arrow of the speedometer does not deviate, then the speed sensor is faulty.
When the ignition switch is on, there is no information on the LCD.
Disconnect the connector from the speedometer and, using a test lamp, check in the harness connector for the presence of a non-disconnected voltage of +12 Volts between the contacts 3-1 with the ignition switch off and the cut-off voltage +12 Volt between the contacts 2-1 with the ignition switch turned on. If there is voltage, then the indicator is faulty and the speedometer must be replaced.

The backlight of the scale or LCD does not work.
6-1 ... If a control lamp is on, then one or both backlights must be replaced, otherwise there is a malfunction in the speedometer itself.
Additionally for modifications 851.3802 and 853.3802.
LED indicator does not work high beam headlights.
Disconnect the connector from the speedometer and use a test lamp to check the harness connector for the presence of +12 Volt control voltage between the terminals 5-1 ... If the control lamp is on, then the indicator LED is faulty and the speedometer must be replaced.
The speedometer, as the name suggests, shows the speed of the vehicle. Compliance speed mode important not only to avoid fines, but also to make safe turns and other maneuvers. The higher the speed, the larger the turning radius must be. If the radius is less than necessary, there is a high probability of the car skidding and overturning the car. Therefore, the serviceability of the speedometer is just as important as the good performance of the steering or braking system.
How does a speedometer work
There are two main modifications of speedometers:
- mechanical;
- electronic.
The principle of operation of a mechanical speedometer is to transform the speed of rotation of the shaft into energy that moves the needle. The speedometer drive is located in the mechanical or automatic box gearshift and is connected to the indicator by a flexible cable protected by a metal casing. The ends of both sides of the cable are made in the form of a square, due to which they effectively transfer rotation from the drive to the indicator. The mechanical speedometer is always connected to the odometer (vehicle mileage indicator) and forms a single unit with it.
The principle of operation of an electronic speedometer is a sensor that generates pulses of a certain frequency and duration (depending on the speed of the car). The sensor is either connected to a separate electronic speedometer, or to the on-board computer. Both the computer and the speedometer perform the same function - they count the number of pulses per unit of time and convert the value into understandable kilometers or miles per hour.

Speedometer malfunctions
The most common malfunctions are:
- breakage or damage to the cable;
- jumping off the cable tip from the driven gear;
- malfunction of a mechanical or electronic indicator;
- impulse sensor malfunction;
- poor contact or broken wire that connects the sensor and the indicator or computer.
Video - How to fix a speedometer
Diagnostics and repair of mechanical speedometer
- To diagnose you will need:
- 12 volt motor;
- flat and Phillips screwdrivers;
- lantern; jacks and stands;
- instructions for repair or maintenance of your car.
Raise the front passenger side of the vehicle with a jack to check the speedometer. Read about how to do it safely in the article (Replacement and restoration of shock absorbers). Remove the front panel (dashboard) to get to the instrument cluster. On some car models, you can do without this operation, so carefully study the instructions for the repair and operation of your car. Remove the instrument cluster and unscrew the cable fixing nut from the indicator, start the engine and engage 4th gear. Check if the cable is spinning in the protective cover? If so, turn off the engine, insert and tighten the cable end, then start the engine again, engage 4th gear and look at the indicator readings. If the arrow does not change position, the indicator is faulty, it must be replaced.
If the cable does not spin with the engine running and the gear engaged, turn off the engine and remove the cable from the drive located on the driver's side of the gearbox. Pull the cable out of the engine compartment and inspect the tips for damage to the shape (square). Twist the tip on one side of the cable and observe the tip on the other side. If both tips rotate synchronously, effortlessly and the edges of the tips are not lapped, then the problem is in the worn drive gear, so it must be replaced. This operation is described in the vehicle repair and maintenance manual.

Diagnostics and repair of electronic speedometer
For diagnostics and repair you will need:
- flat and Phillips screwdriver;
- tester;
- a set of keys;
- scanner for injection engine (you can use a conventional oscilloscope instead).
Run self-test on-board computer (BC). On most injection vehicles manufactured after 2000, BC supports this function. If the BC generates an error, you need to decipher it using a special table, which is in the instructions for servicing and repairing your car. But, the diagnostic results will show whether the entire speedometer system is working or not. To fix the malfunction, you will have to look for damage yourself. To do this, raise the vehicle as described above. Connect the oscilloscope to the middle contact of the speed sensor (installed in place of the speedometer drive) and the positive contact of the battery. Start the engine and engage 1st gear.
A working sensor will produce a pulse signal with a voltage of at least 9 Volts with a frequency of 4 - 6 Hertz. If the sensor is working properly, you must turn off the transmission and use a tester to check the wire that connects the sensor to the controller electronic unit control (ECU). Or use an oscilloscope to check the sensor signals at the input of the ECU. If there are signals, it is necessary to check the terminals and the wire that connects the ECU and the instrument cluster (speedometer indicator). If there is a special scanner, then it is advisable to check the speedometer indicator, this will allow you to more accurately determine the cause of the malfunction.

Most often, the speedometer stops working due to water and dirt getting into the terminals, as well as due to a break or break in the signal wires. Therefore, in most cases it is sufficient to dry and clean the contacts. If, according to the results of the check, a malfunction of the speed sensor is revealed, it will need to be replaced. This procedure, as well as the replacement of a damaged indicator, is described in detail in the instructions for use and repair of your car.
The technical condition of the speedometer (tachograph) is checked in the following order:
- Inspect the speedometer (tachograph) for external damage to the scale, pointer arrow and protective glass... Check the device backlight for proper operation.
- On the tachograph, check the correctness of the clock, the presence of an indication of the open state of the lid, as well as the presence of a mark on the chart disc about the opening of the lid. In addition, check the ease of rotation of the handles to switch the driver's modes of operation.
- Check the integrity of the speedometer (tachometer) seals. In the case of checking the speedometer, a lead seal with an imprint, covering the body of the device with a sealing wire and the nut of the flexible shaft or the plug connector of the connecting cable, must be brought out to the dashboard. Tachographs are sealed with round red plastic seals with imprints of the inspector authorized organization... Sealing locations for a tachograph with a hinged cover are shown in the figure. Electronic digital tachographs are sealed at the connection point of the diagnostic and control plugs.
- Check the compliance with the period for the periodical examination of the tachograph. Location of the periodical survey plate and appearance are indicated in the figures.
In addition, a plate indicating the set value of the constant K of the device must be attached to the body of the tachograph. Both plates must be sealed by applying a special transparent film on them. The validity period of the tachograph certification is two years.
In the case of using electronic digital tachographs, the plate can be located on the metal elements of the cab in the area of \u200b\u200bthe opening driver's doorand also adhered to the vertical or lower cab panel near the driver's seat anchorage.Figure: Locations of plates and seals of tachographs of various manufacturers: 1 - periodical examination plate; 2 - plastic seals; 3 - a plate with the set value of the constant K of the device; 4 - manufacturer's plate
Figure: Tachograph periodic inspection plate: Datum - date of the last inspection of the device; L is the circumference of the wheel; W - gear ratio; Fz-I-Nr - an identification number (VIN) of the vehicle; App.No - device serial number
Figure: Sealing of the tachograph sensor: a - connection of the wiring harness with the pulse sensor (1 - plug connector; 2 - pulse sensor; 3 - gearbox housing element); b - connection of parts of the wiring harness
- Check cable, flexible shaft, pulse generator, transmission device for external damage.
Check the sealing of the indicated elements. The places of their connection should be sealed with lead seals with impressions, and the sealing wire should tightly cover the mating parts. At the place where the pulse transmitter is installed, three mating parts are sealed: the gearbox housing, the pulse transmitter and the plug nut.